

Updated on January 12, 2021
FreeLoader Child Carrier LEVEL UP
Months ago I started the search for a better way to carry our son on my back. Zeke has cerebral palsy, and can’t walk without some extensive foot/leg hardware and a walker. Even then he’s limited to hard, flat surfaces and his range is measured in yards, not miles. Since he was little, I’ve carried him in a variety of “child” carriers, from the early days in the BabyBjorn (worth the money, people.) up until he reached the weight and size limits of the Kelty Pathfinder Kid Carrier. Sure, most of the time he has a wheelchair, but as a guy who used to actually climb mountains, there are some limitations on wheels. Zeke is also the youngest of four, so there are sometimes some simple things that we can’t do with a wheelchair. Like hiking.
I started the search in earnest about a year after I couldn’t carry him in the Kelty any more. It had been a while since I’d felt really free to take him anywhere. We’d moved back to Colorado to be closer to specialists and doctors, and it was starting to kill me that we couldn’t just go out for a short hike with everyone. There are several “large kid” carrying options, but it took me a while to find one that would let me carry Zeke around like a traditional frame pack. Other (admittedly cheaper) options included the http://piggybackrider.com/ which I think looks like a fantastic idea although it does require your child to support themselves on their own legs.
On a side note, there is some vitriol out there towards parents who won’t make their older kids walk and need to carry them. If you’ve ever taken the time to type this sentiment out and post it to a public forum, don’t worry – you’re a much better parent than the rest of us. No need to feel insecure.
Then I found the guys at FreeLoader. http://www.myfreeloader.com/

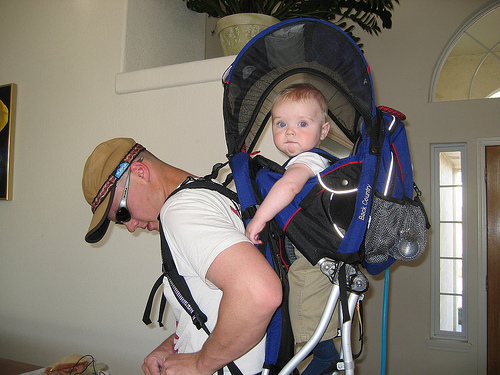
The FreeLoader was exactly what I was looking for; a seat for the child to sit on, waist belt and shoulder strap, the child’s weight distributed like a traditional backcountry pack. I was excited to get it – the guys seem to get the problem and have even stumbled on the special-needs niche, at least to some degree. They were great to work with, even resolving a shipping issue quickly and to my complete satisfaction. Yes, the FreeLoader is a little on the expensive side – but there is literally nothing else like it on the market. FreeLoader got its start on Indigogo back in 2013, and they had an appearance on SharkTank, with an offer that they ultimately turned down.
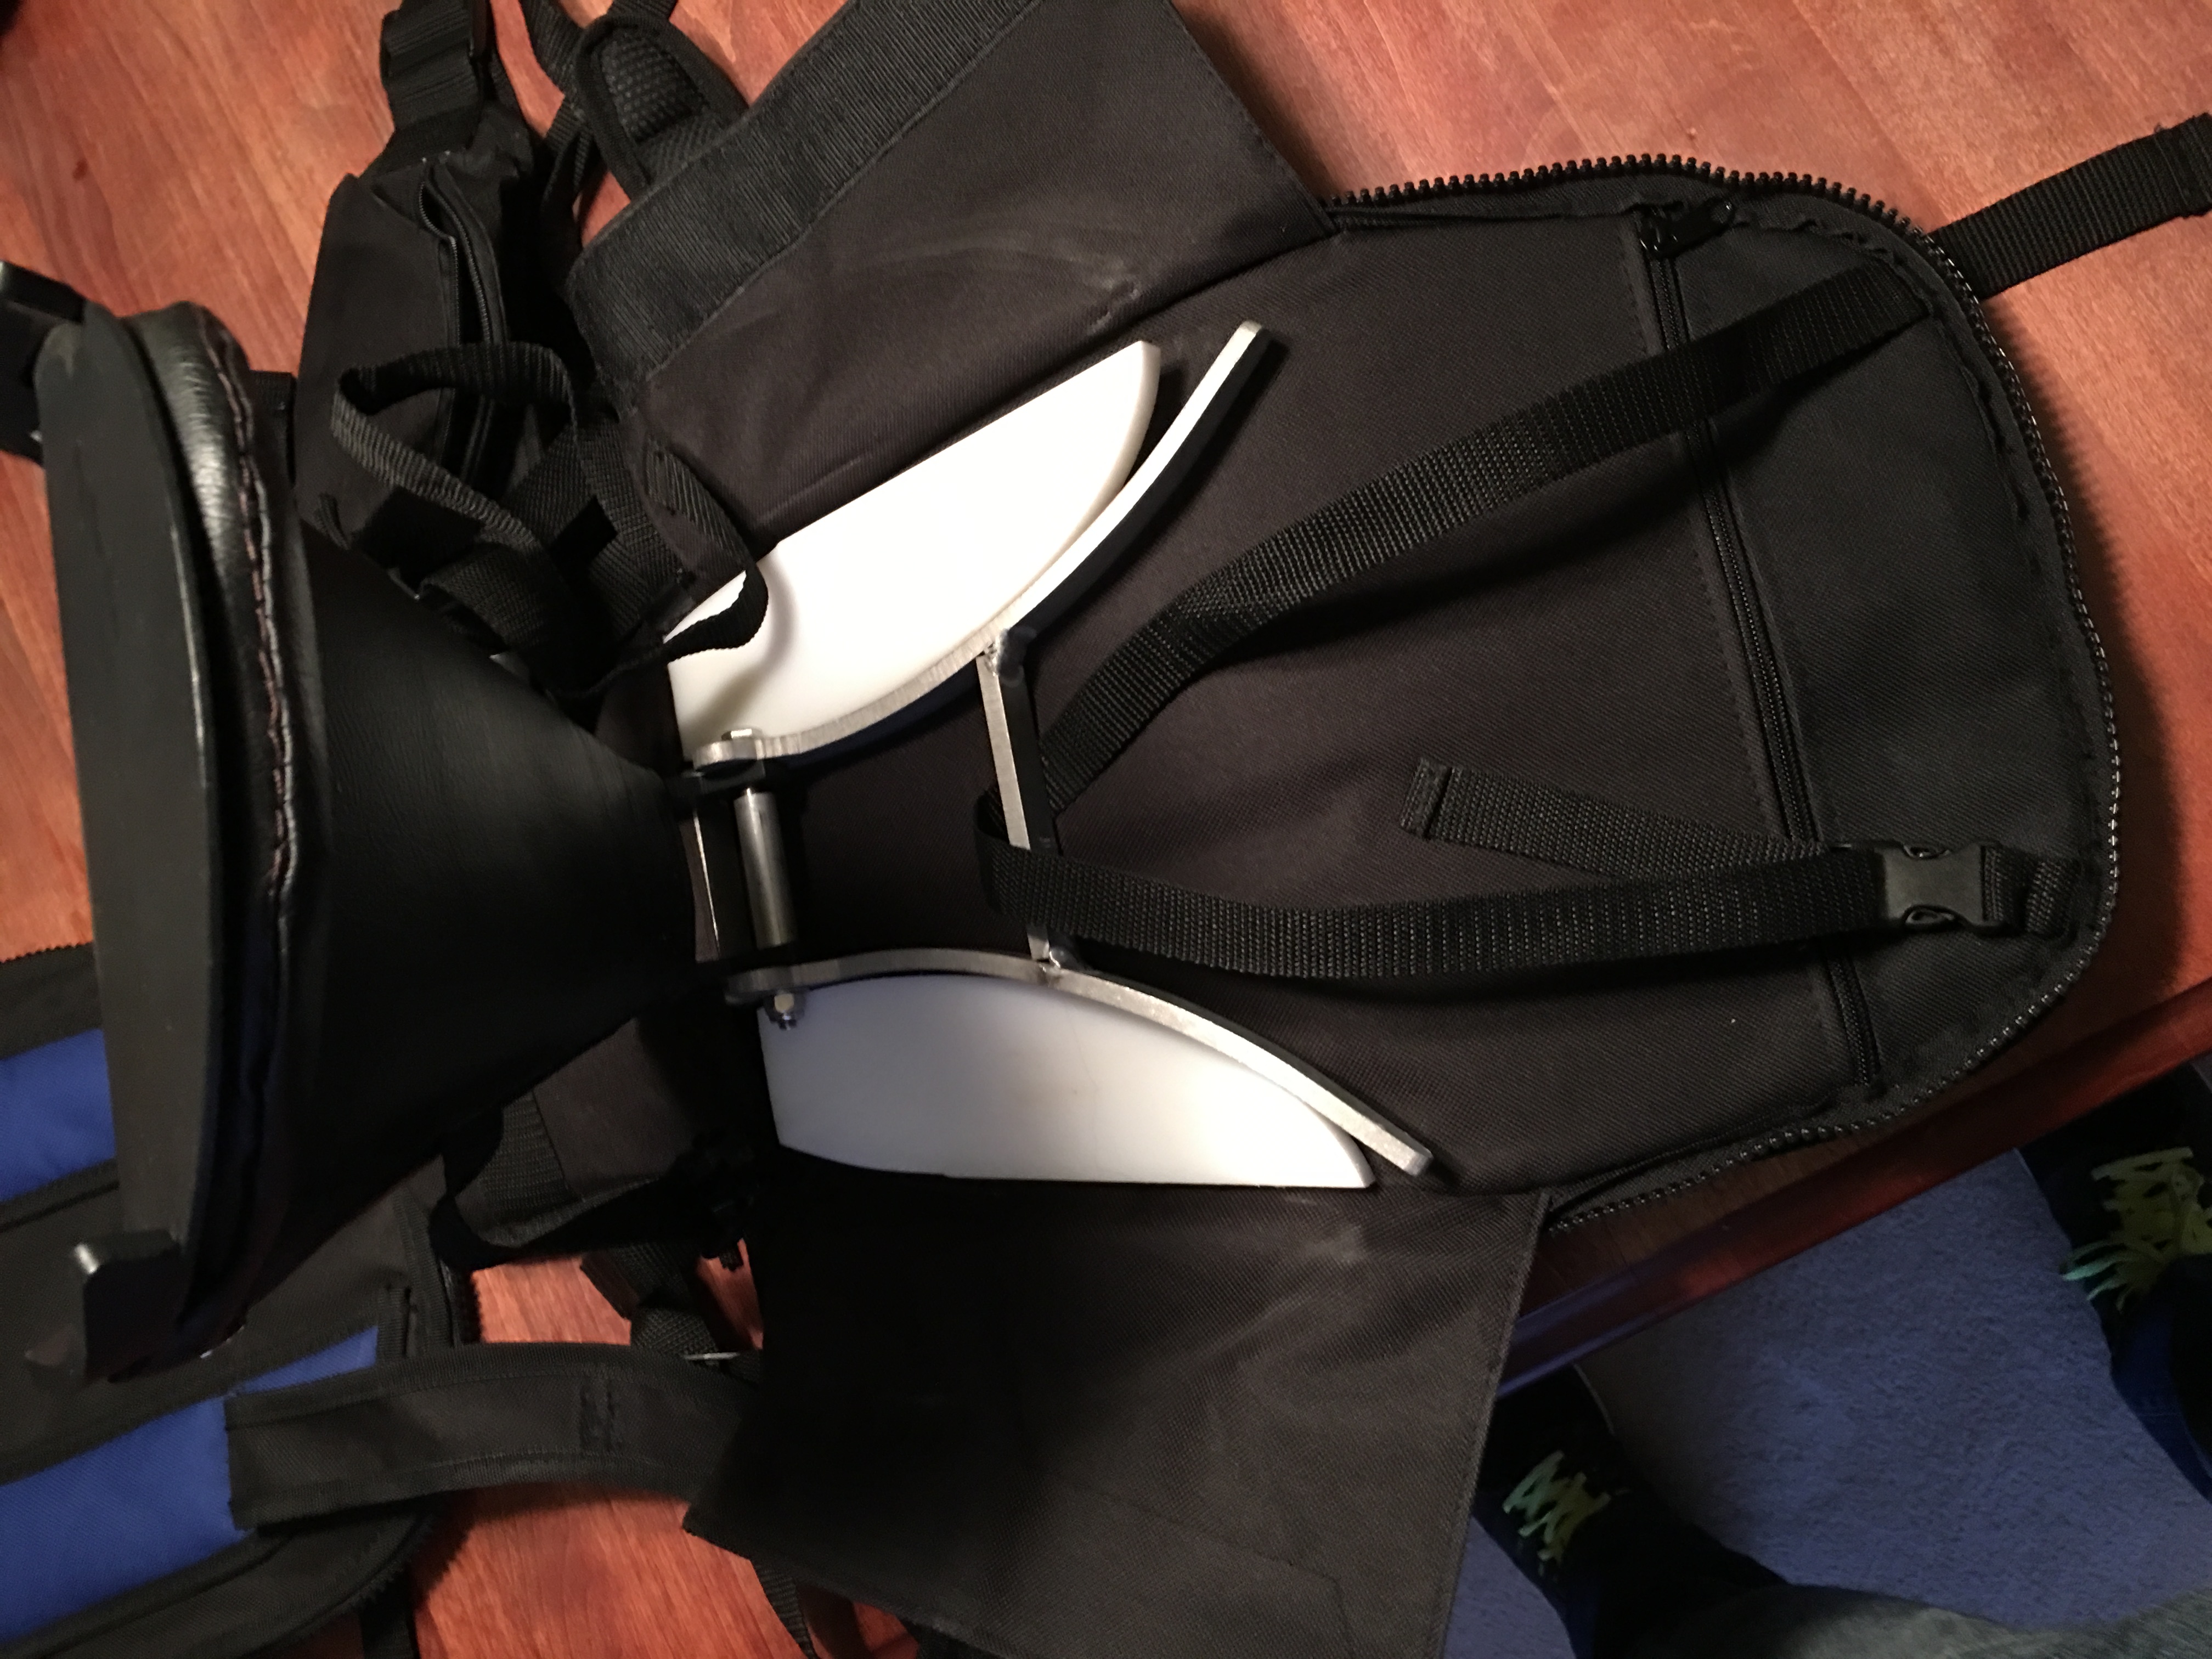
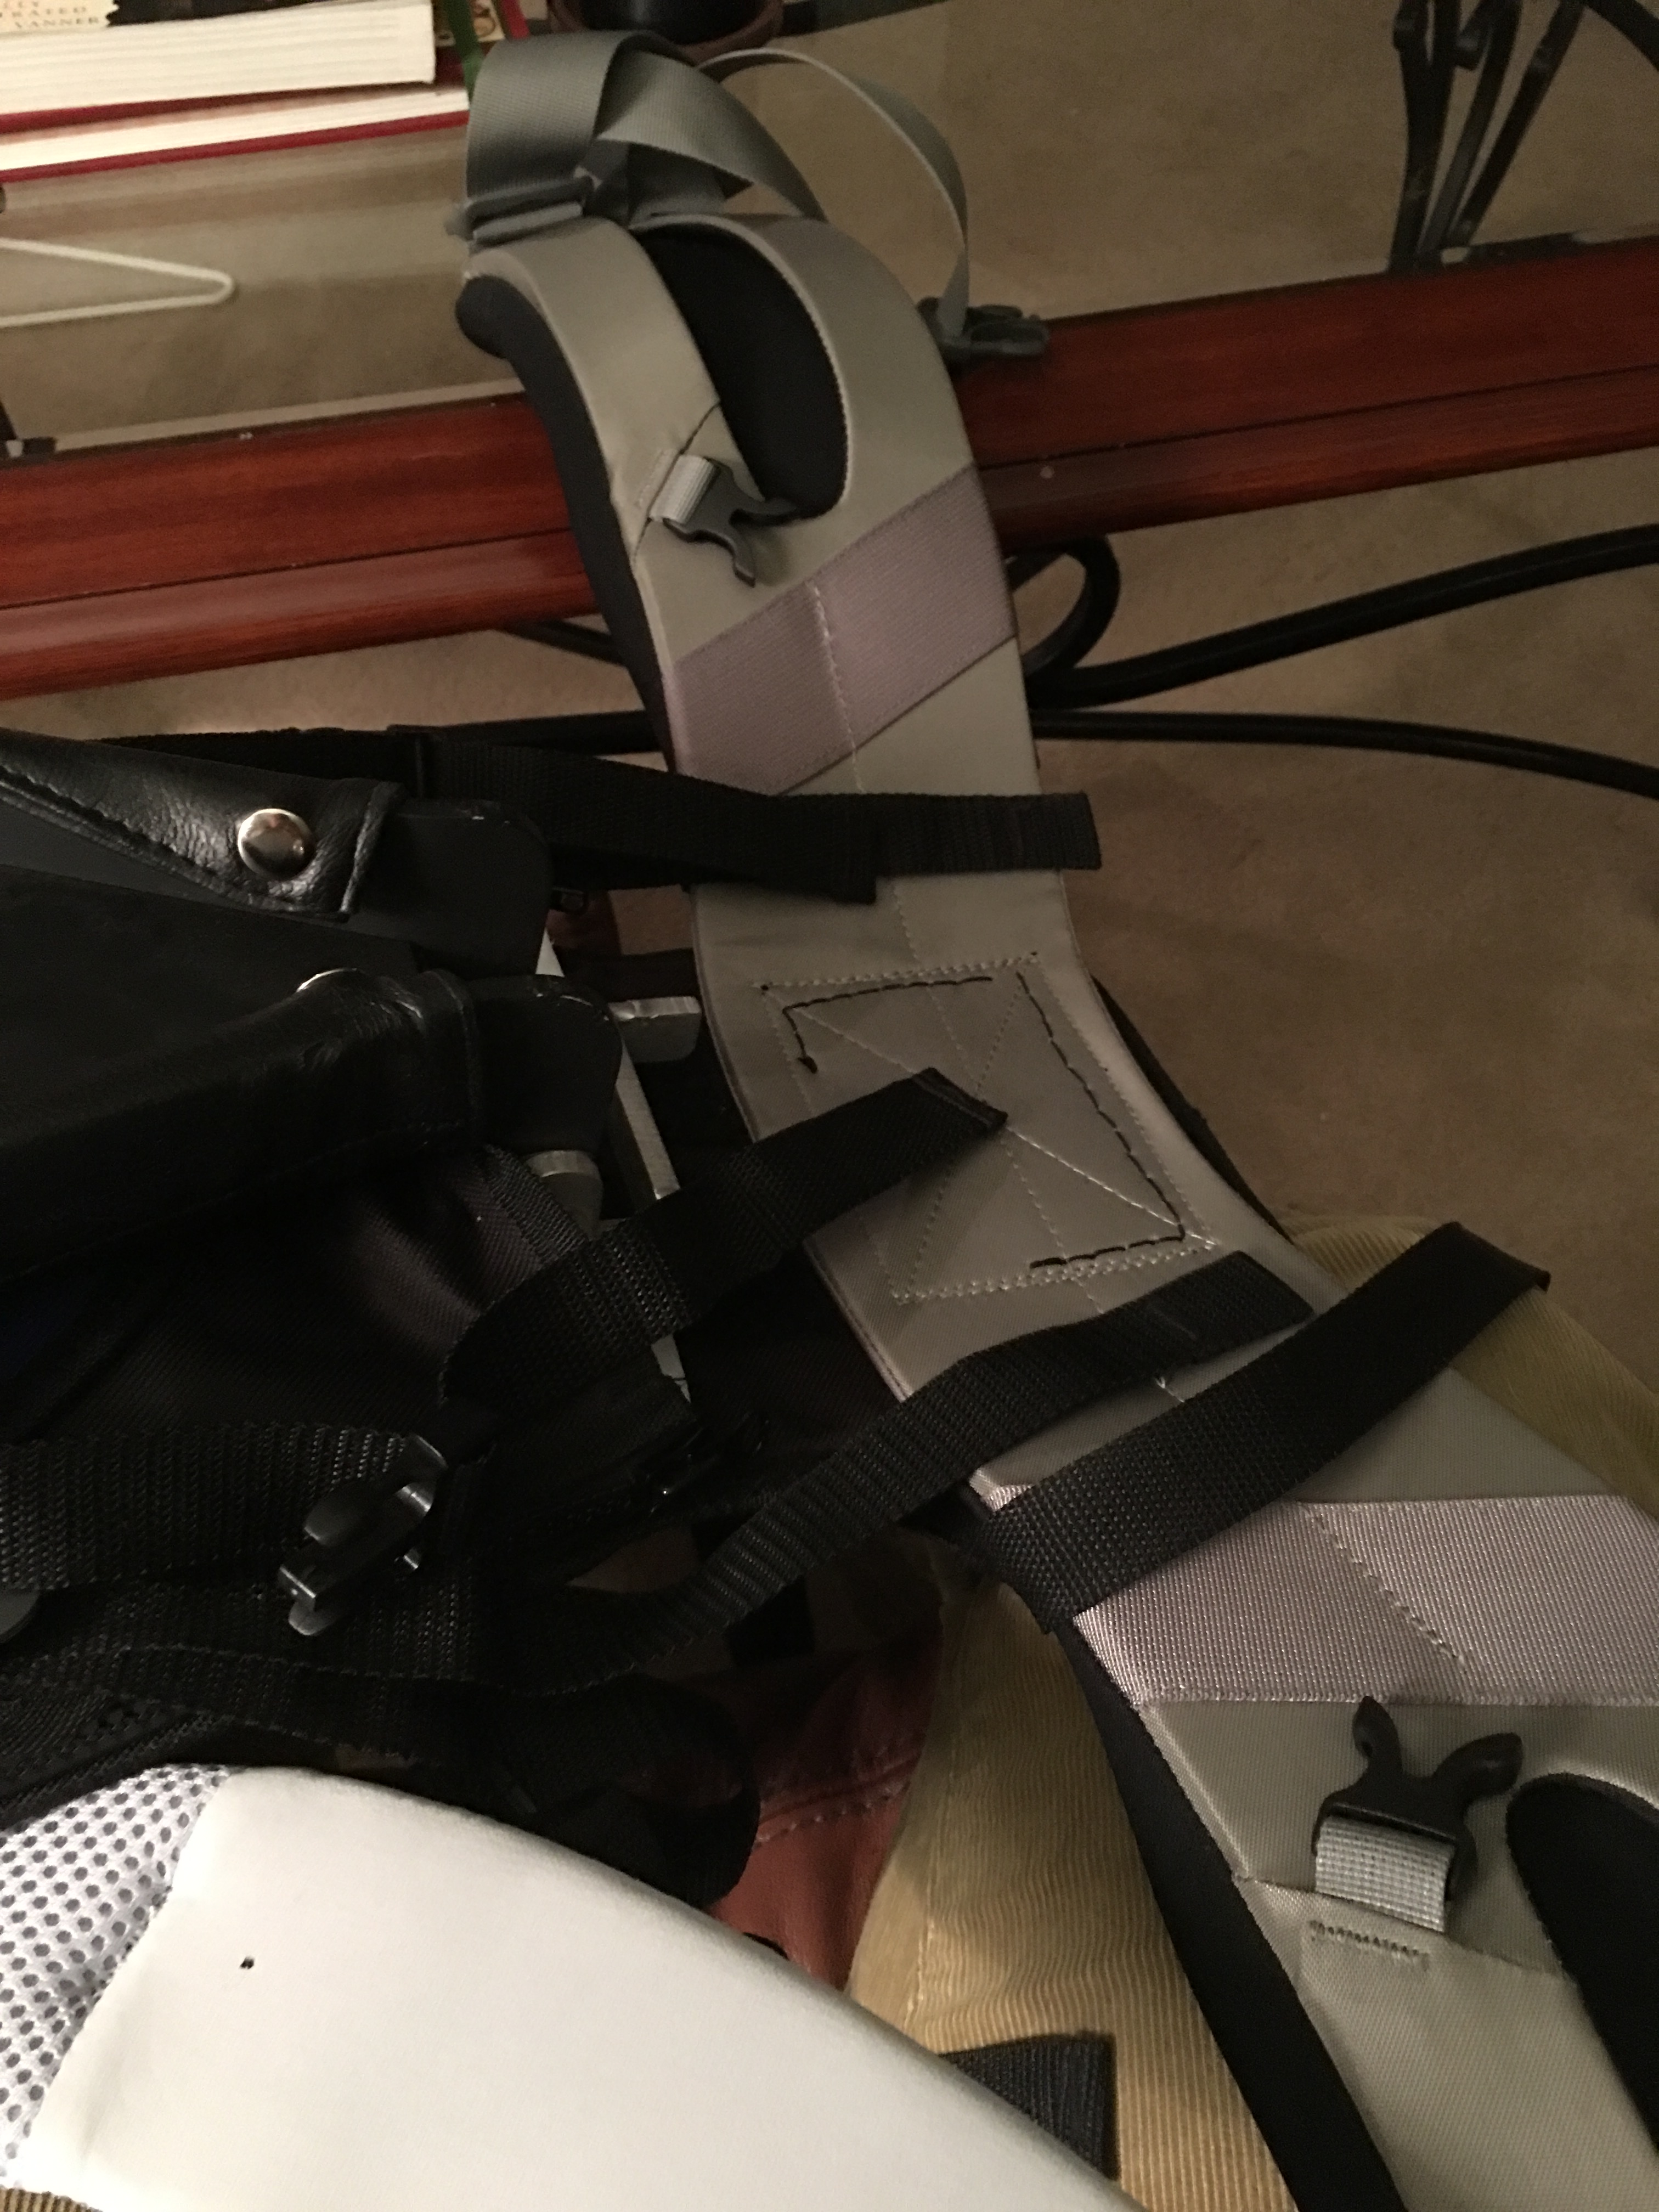
When my (Zeke’s) FreeLoader arrived, I was incredibly pleased. I spent most of my time looking at the very innovative and well designed seat system – it would appear that the majority of the efforts at FreeLoader went towards the seat. Ultimately, I’m glad – this is the part that I have wrestled with in other failed homebrew versions in the past. FreeLoader gets this right – the seat is comfortable, the right balance of strength and weight (supporting up to 80lbs). All told, the parts that interface with Zeke are awesome.
The parts that interfaced with me sucked.
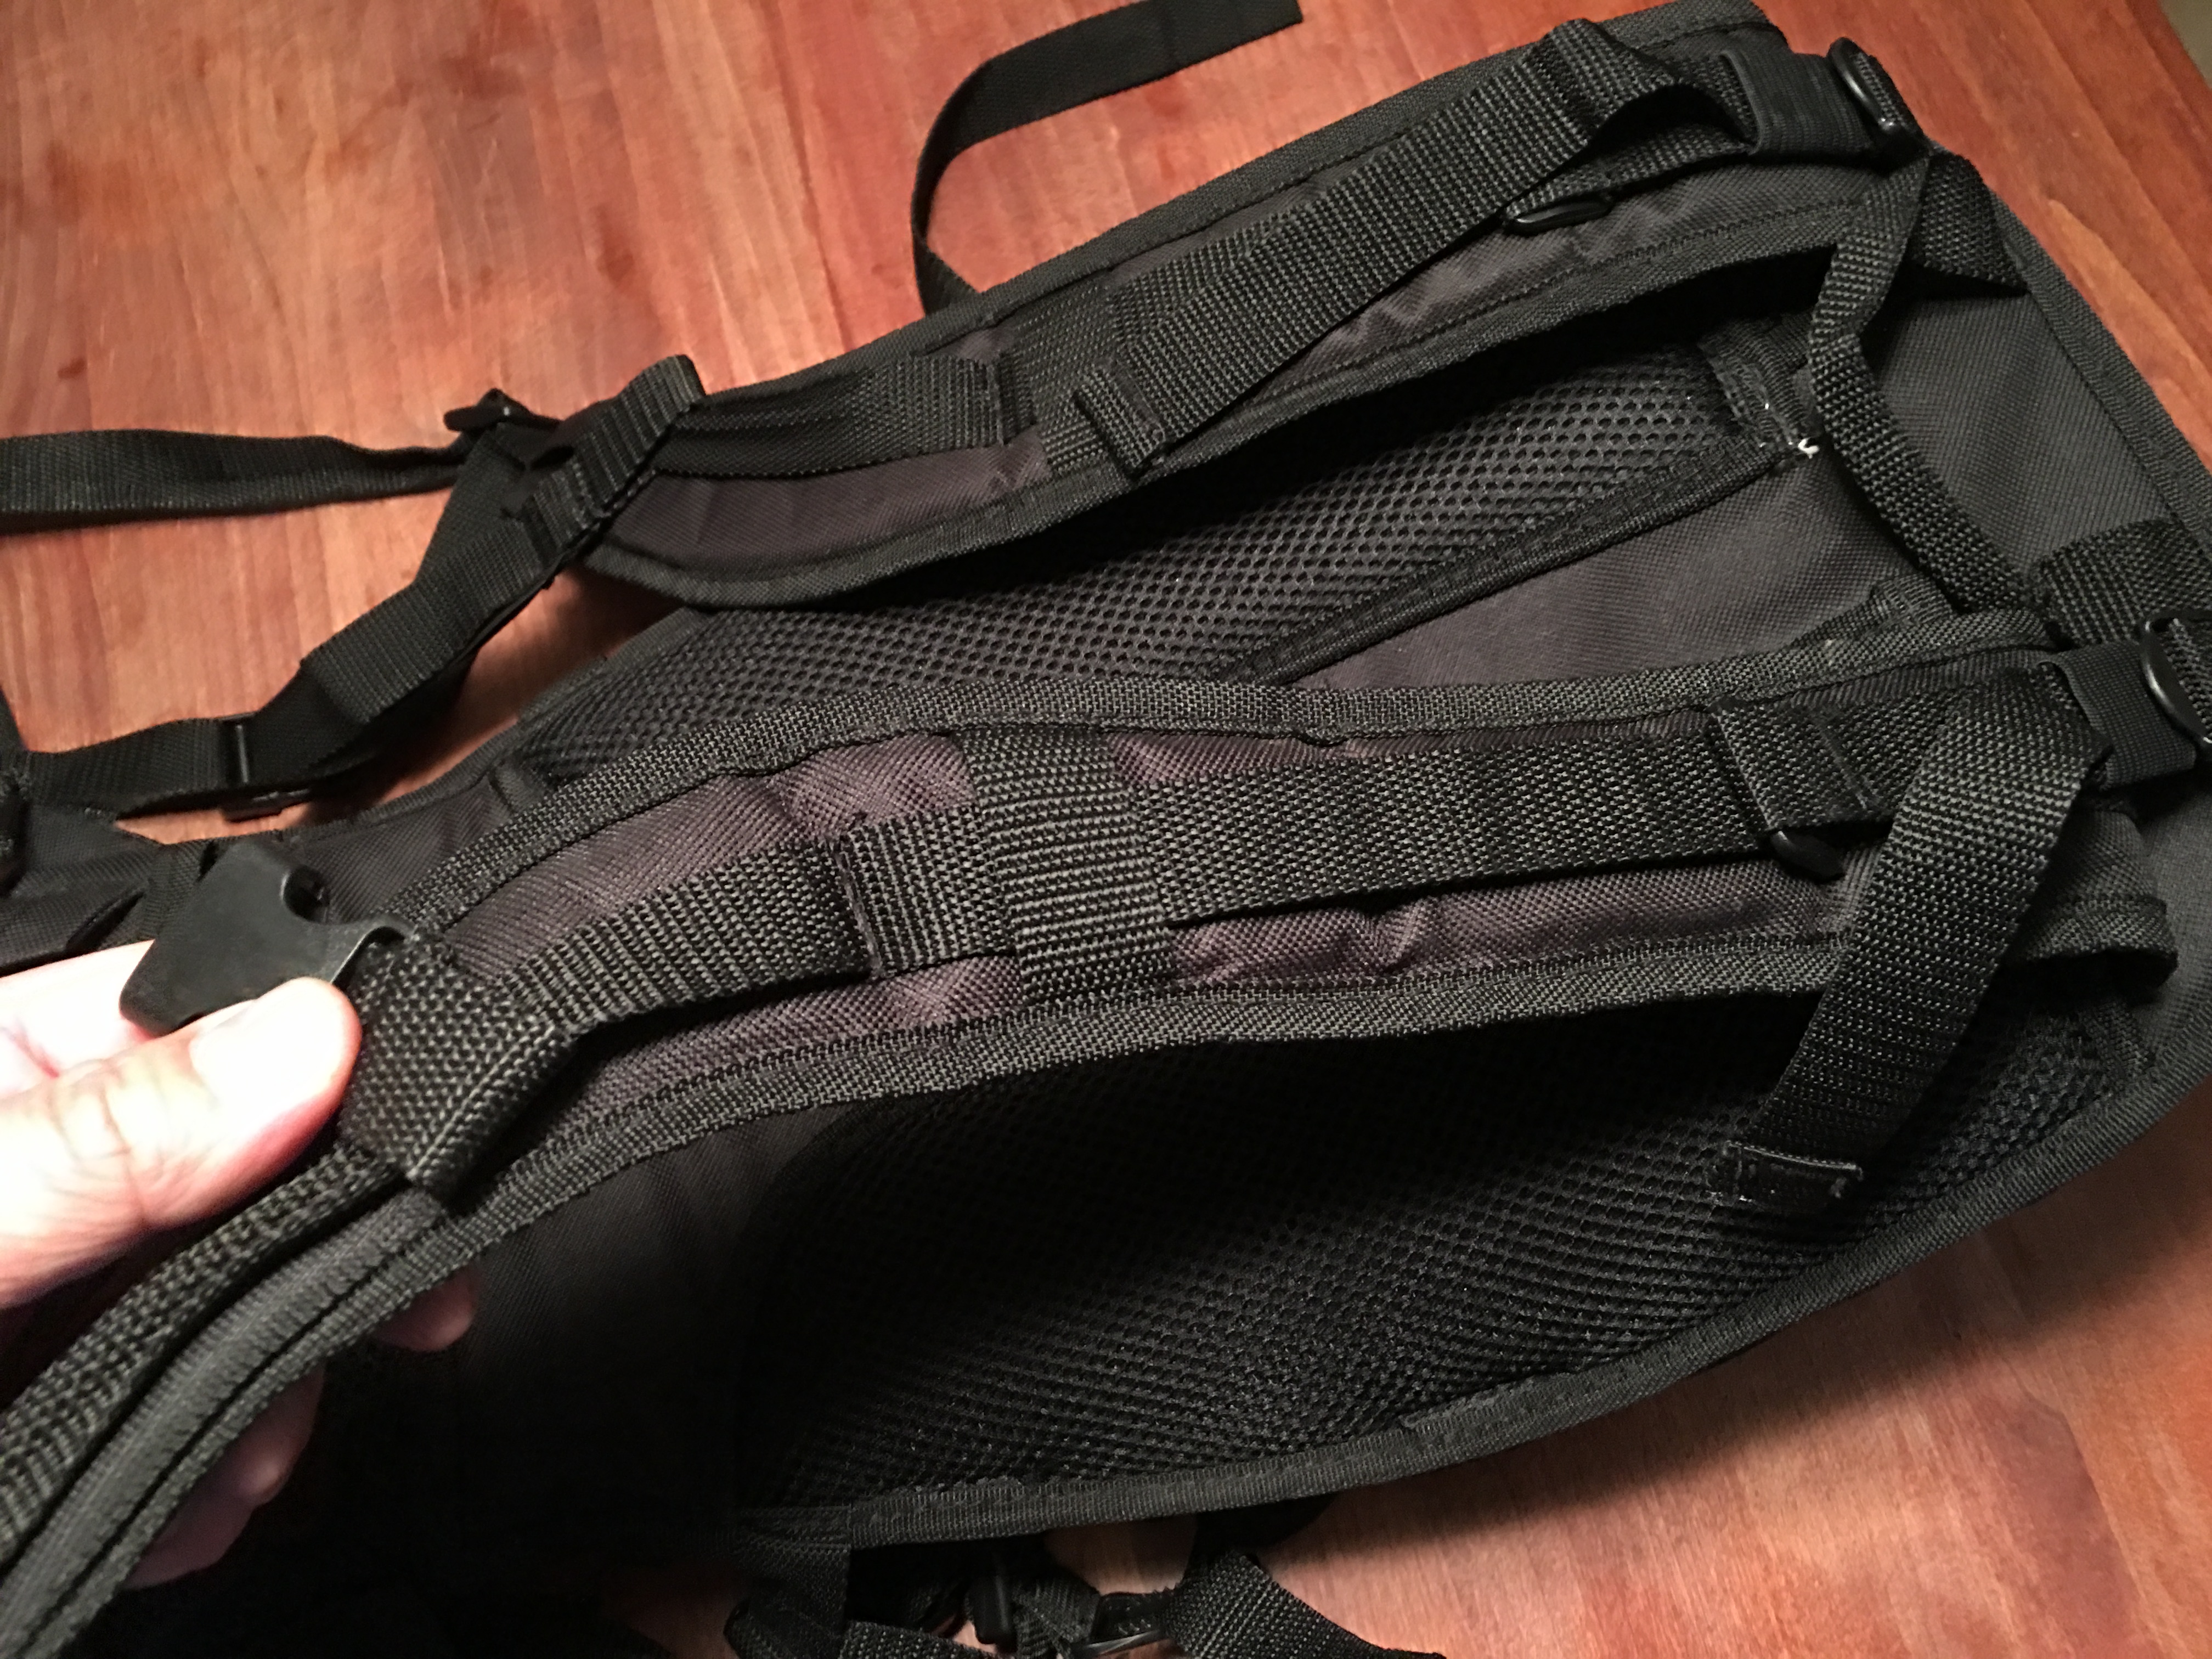
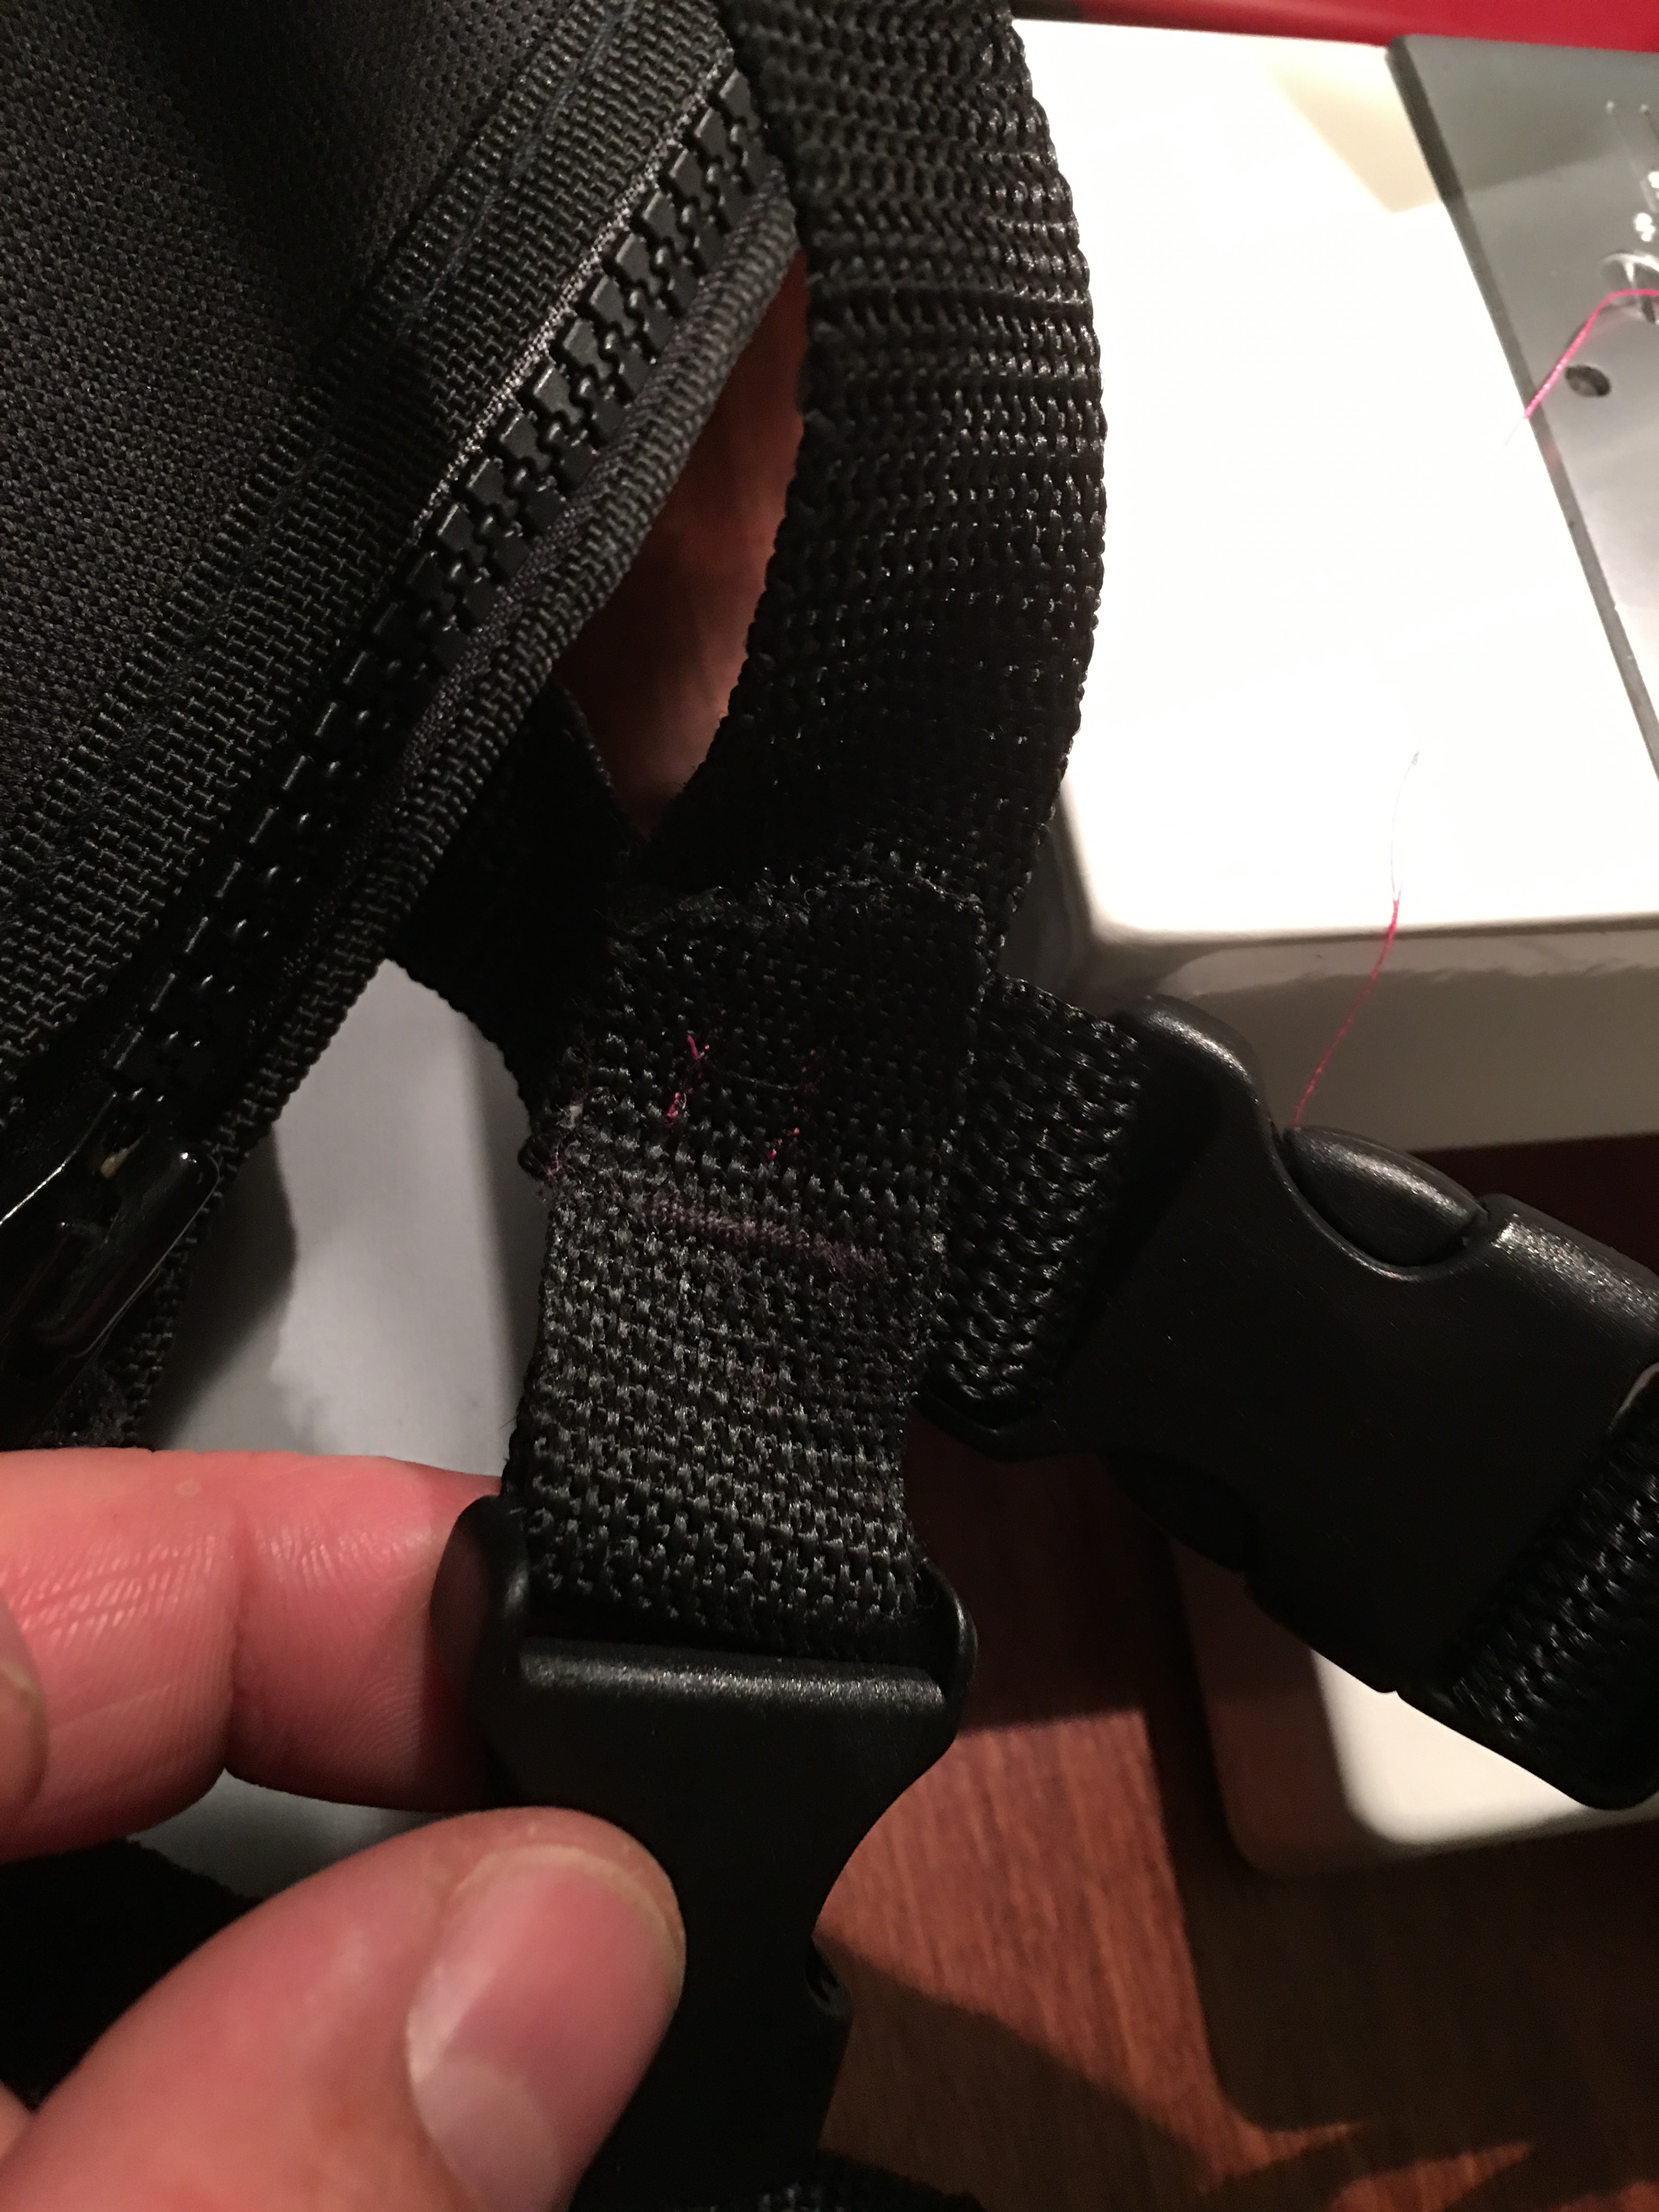
I took Zeke out for a few short walks near the house, and quickly discovered that the pack straps and the waist-belt are bad. Not unusable bad, not by any stretch – Indeed, I’d suspect that in 80% of use cases, they’re completely adequate. It’s possible I’ve been spoiled by week long backpack trips on the Appalachian Trail back when I was a kid, knowing what a high quality fitted backpack should feel like with weight adjustments between the shoulders and hips. On our longer walks, I found that I couldn’t get the waist belt tight enough to move the majority of the weight to my hips – at the same time, I was constantly tightening the shoulder straps as the lower-quality webbing and the lower-quality ladder slider buckles weren’t gripping each other as tightly as they should.
So – balk half of the pack, fantastic. Front half, inadequate for any kind of seriously heavy kid, or seriously long hikes. At the time of this post, Zeke is about 45lbs, for reference – I’m hoping to get a few years out of this thing, but it won’t happen with these straps. At first, I didn’t get it – why so awesome in the really innovative parts of the seat, then fall short on the parts that science has already figured out? But I do get it. Manufacturing and distribution costs are miserable and it was likely the thing that kept this from becoming a $500 product.
Still. I need this thing to be bombproof…. and comfortable. It’s so close, it almost hurts. It just needs…
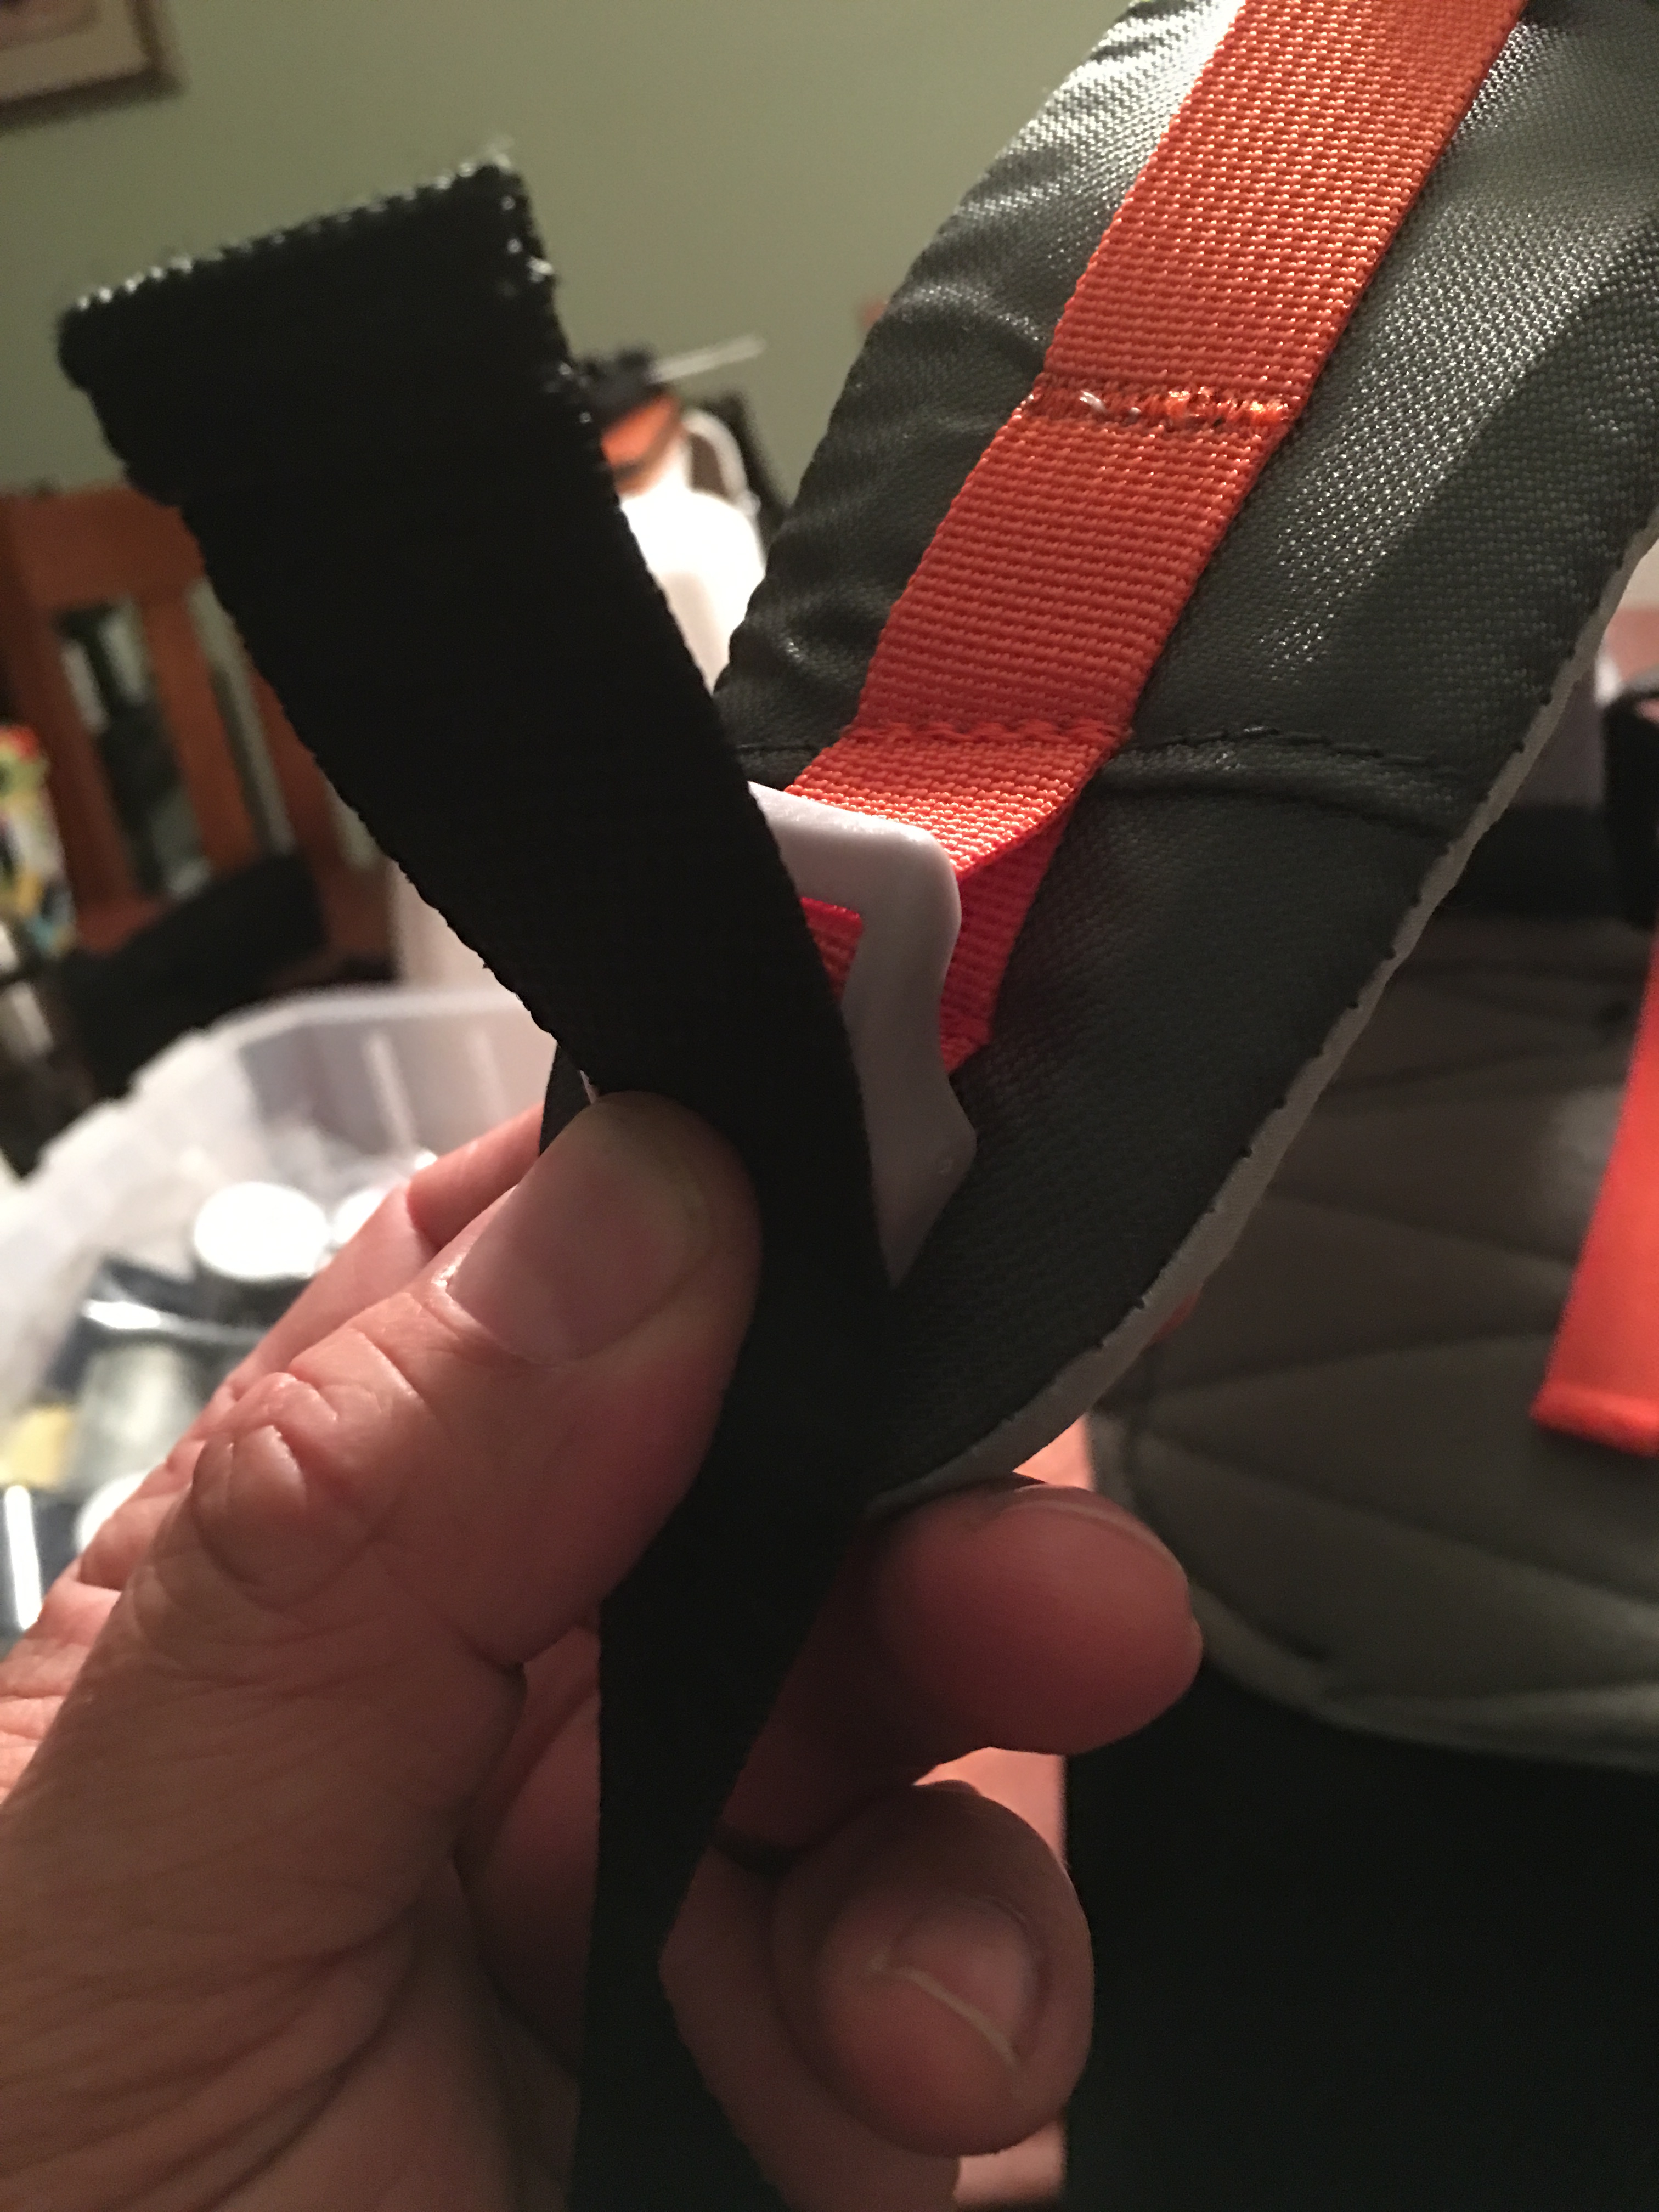
New shoulder straps and a new waist belt. I started looking closely at the construction of the FreeLoader and realized it wouldn’t be that difficult to replace the needed parts. Initially I expected to purchase a full backpack and take it apart and graft it onto the FreeLoader – costly, and it would have broken my heart to gut the seams of a nice pack. Fortunately, I had the sense to search for pack replacement parts, and I hit gold. The waist belt I found on REIoutlet.com on closeout deals – $39 for the belt, and $20 for the straps directly from Mountain Hardware. These are close to the actual ones I used, though you may not find the deals I did. Check around – anything close to these will work fine. At this moment, you can still pick them up from REI and MH:
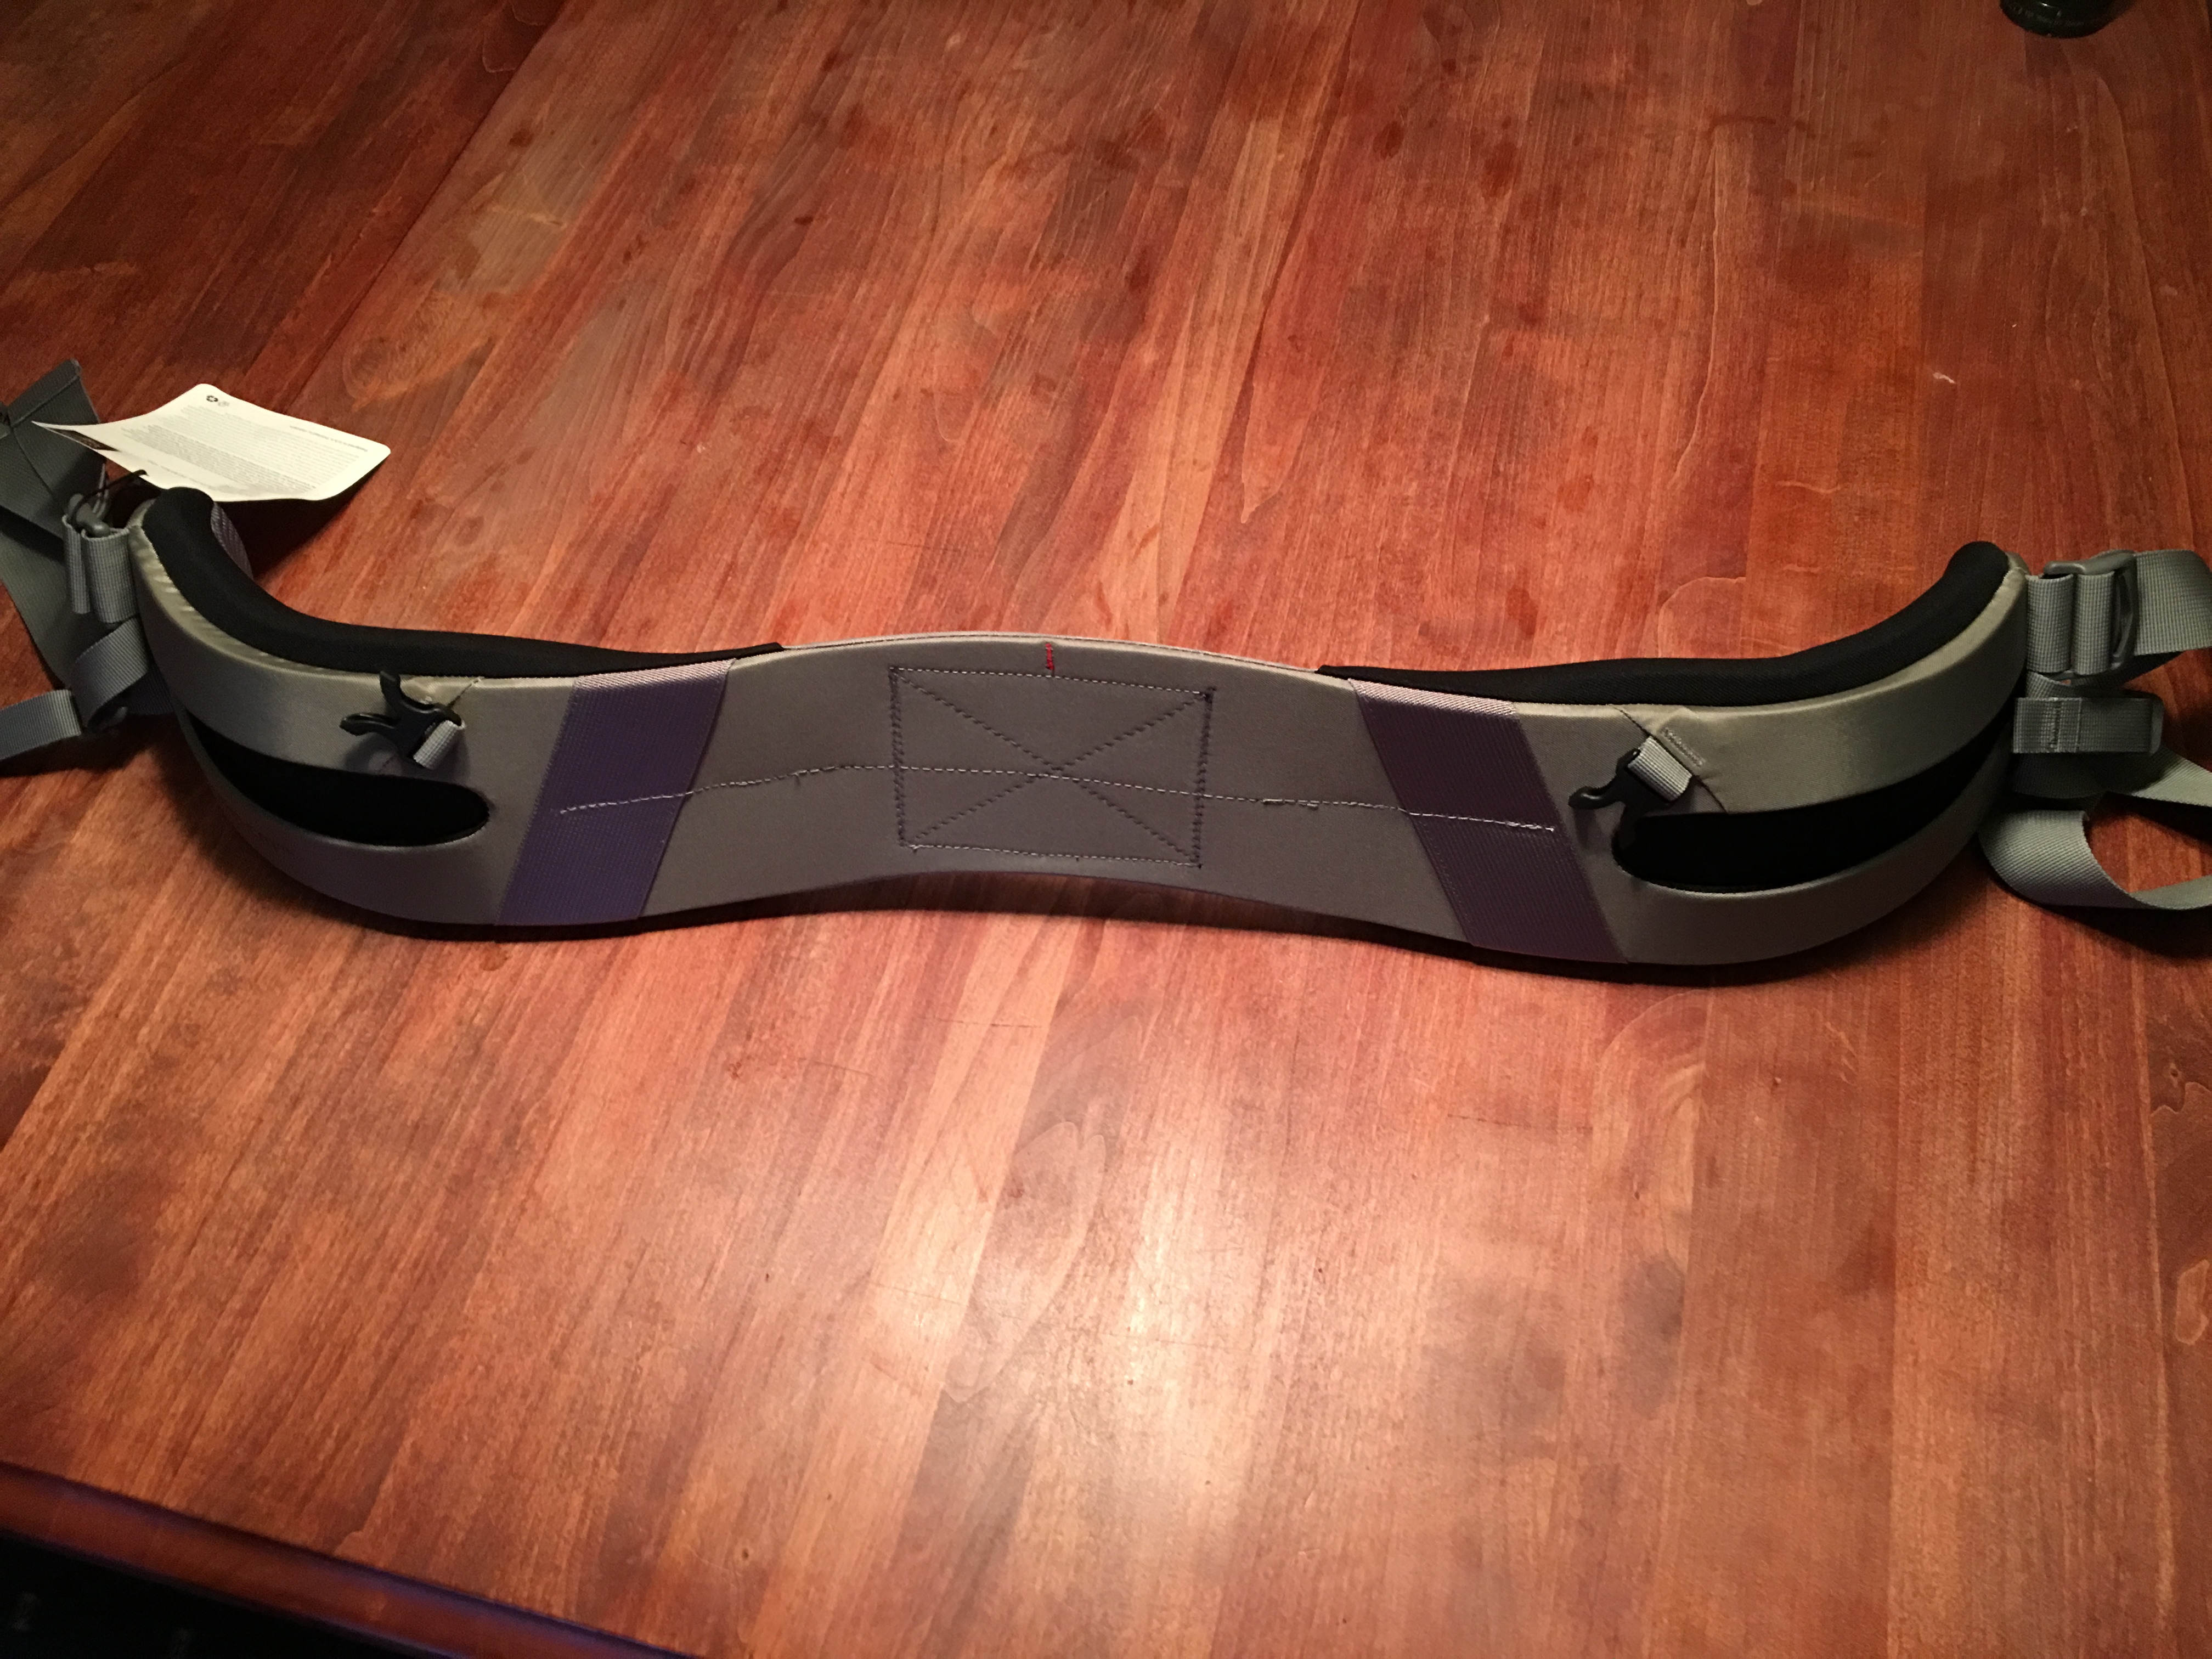
Belt: http://bit.ly/1ItNsoD
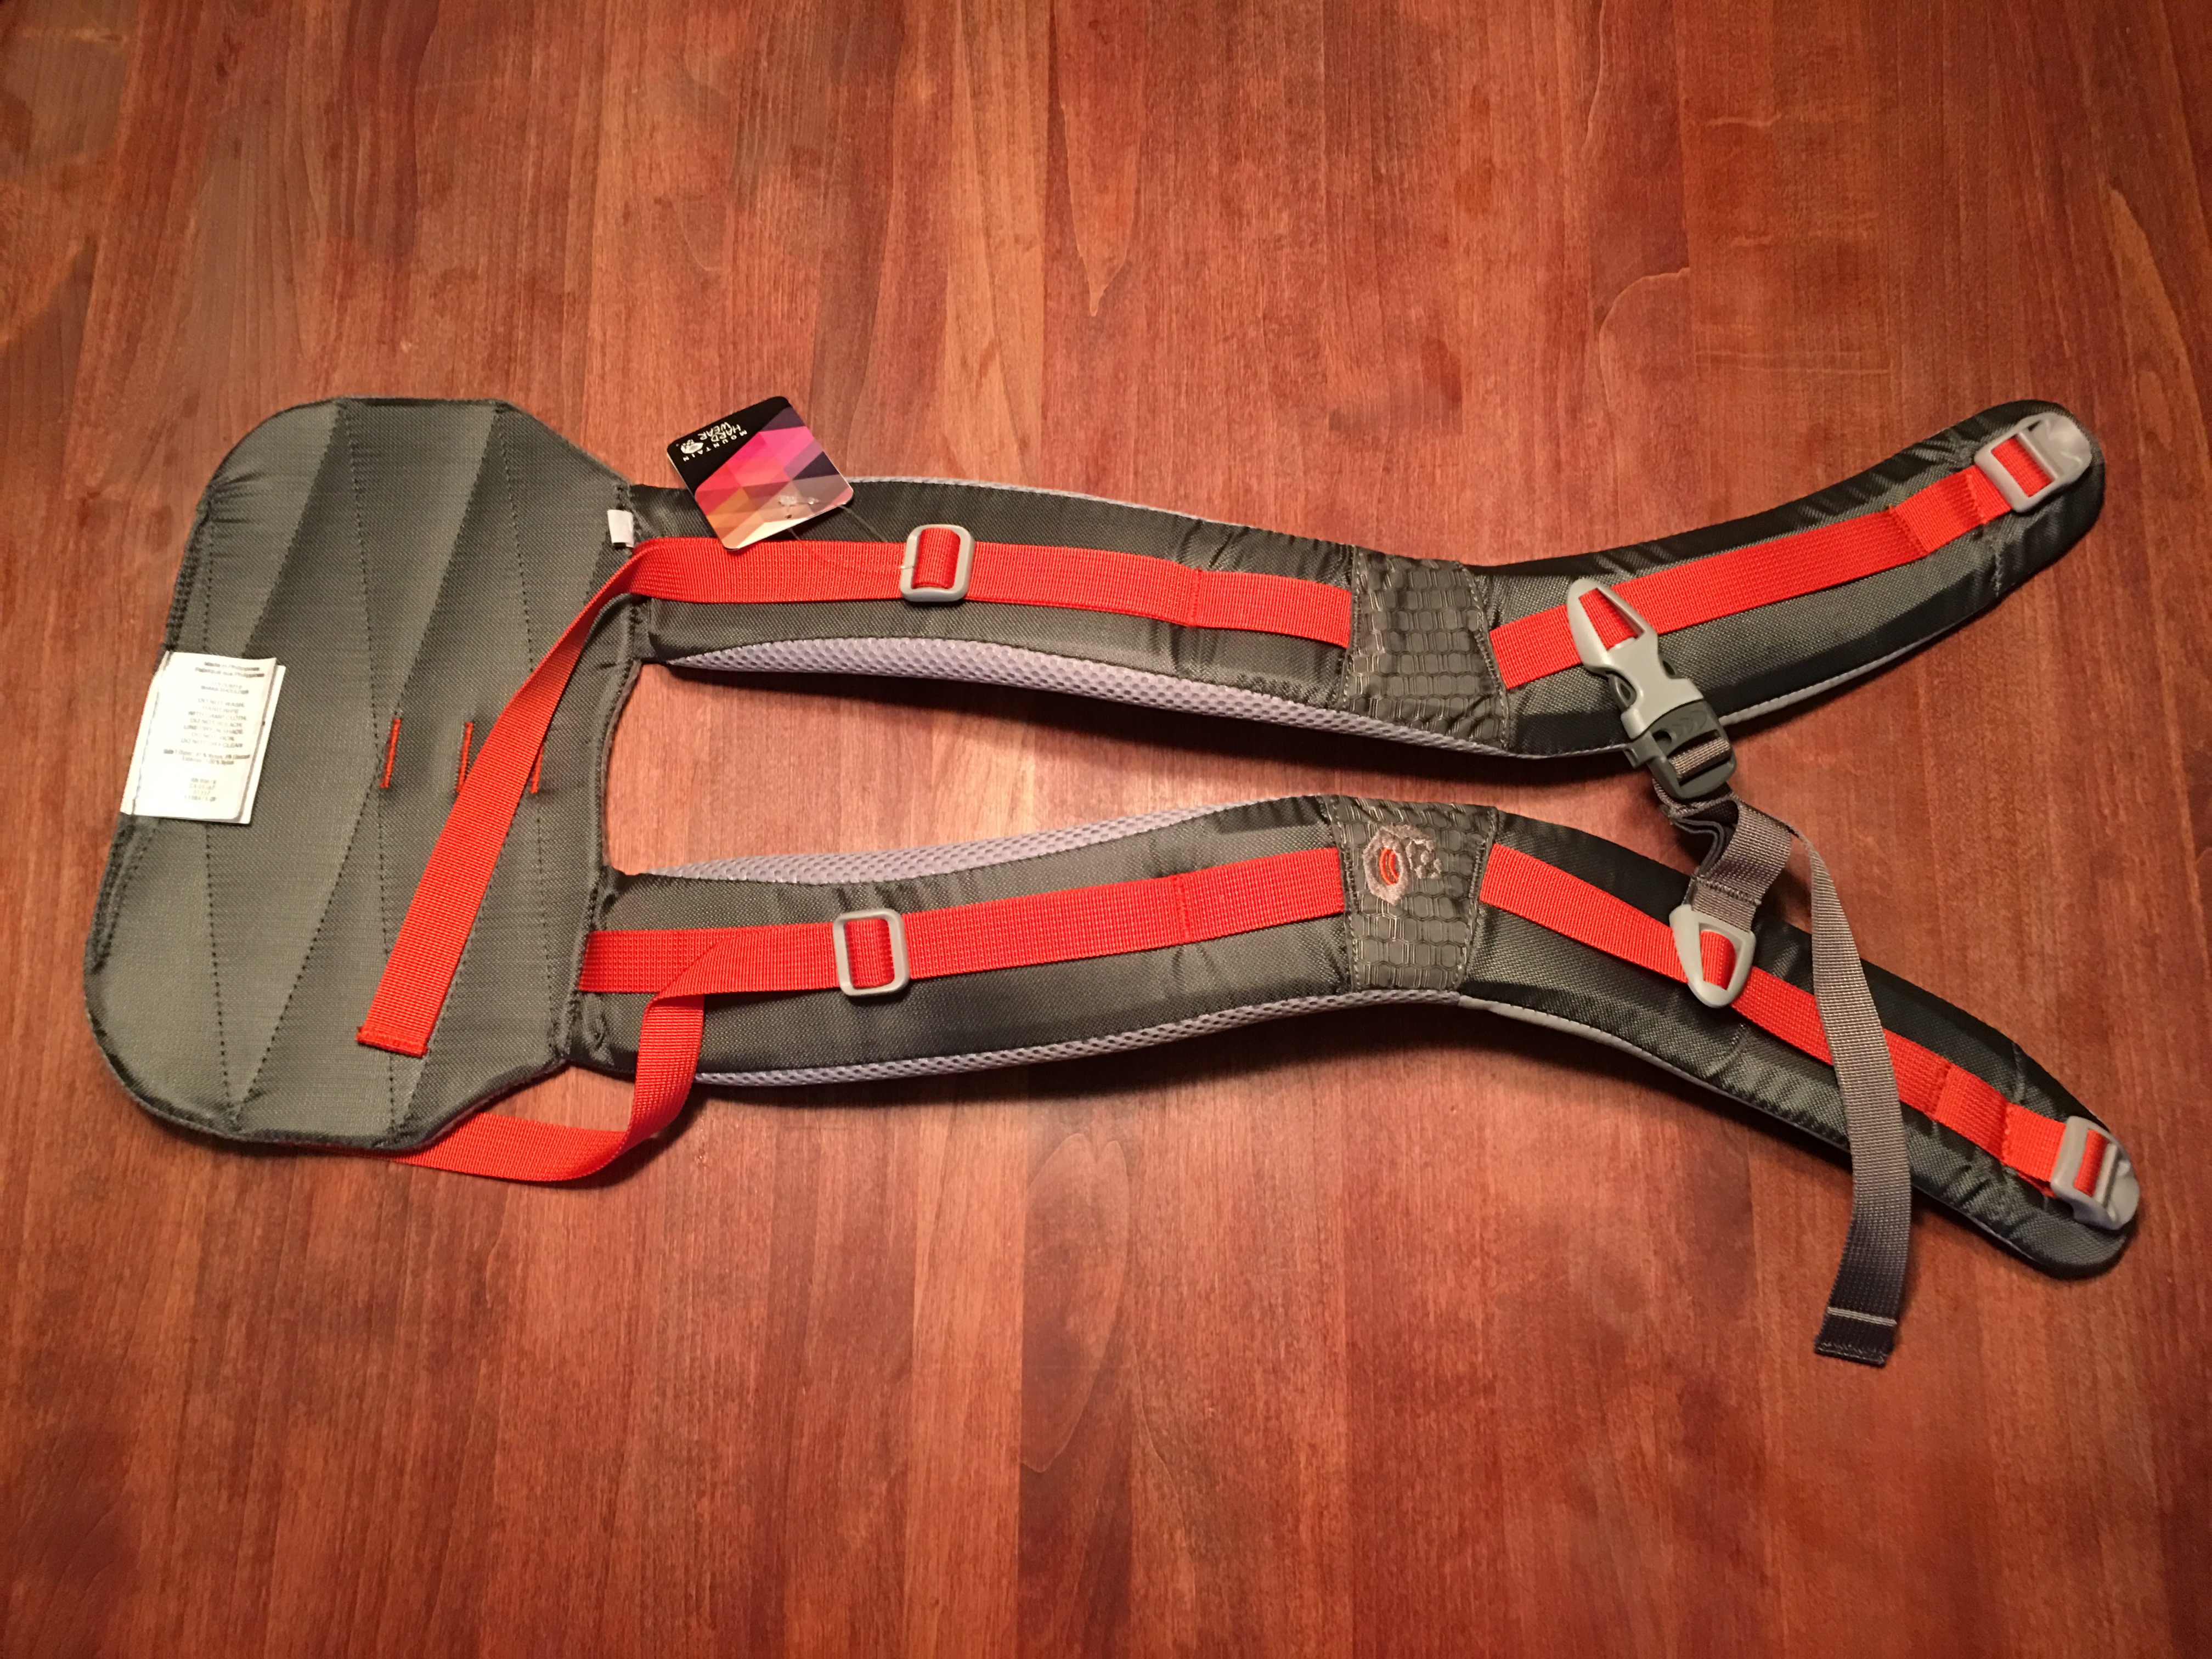
Straps: http://bit.ly/1RfQtjE
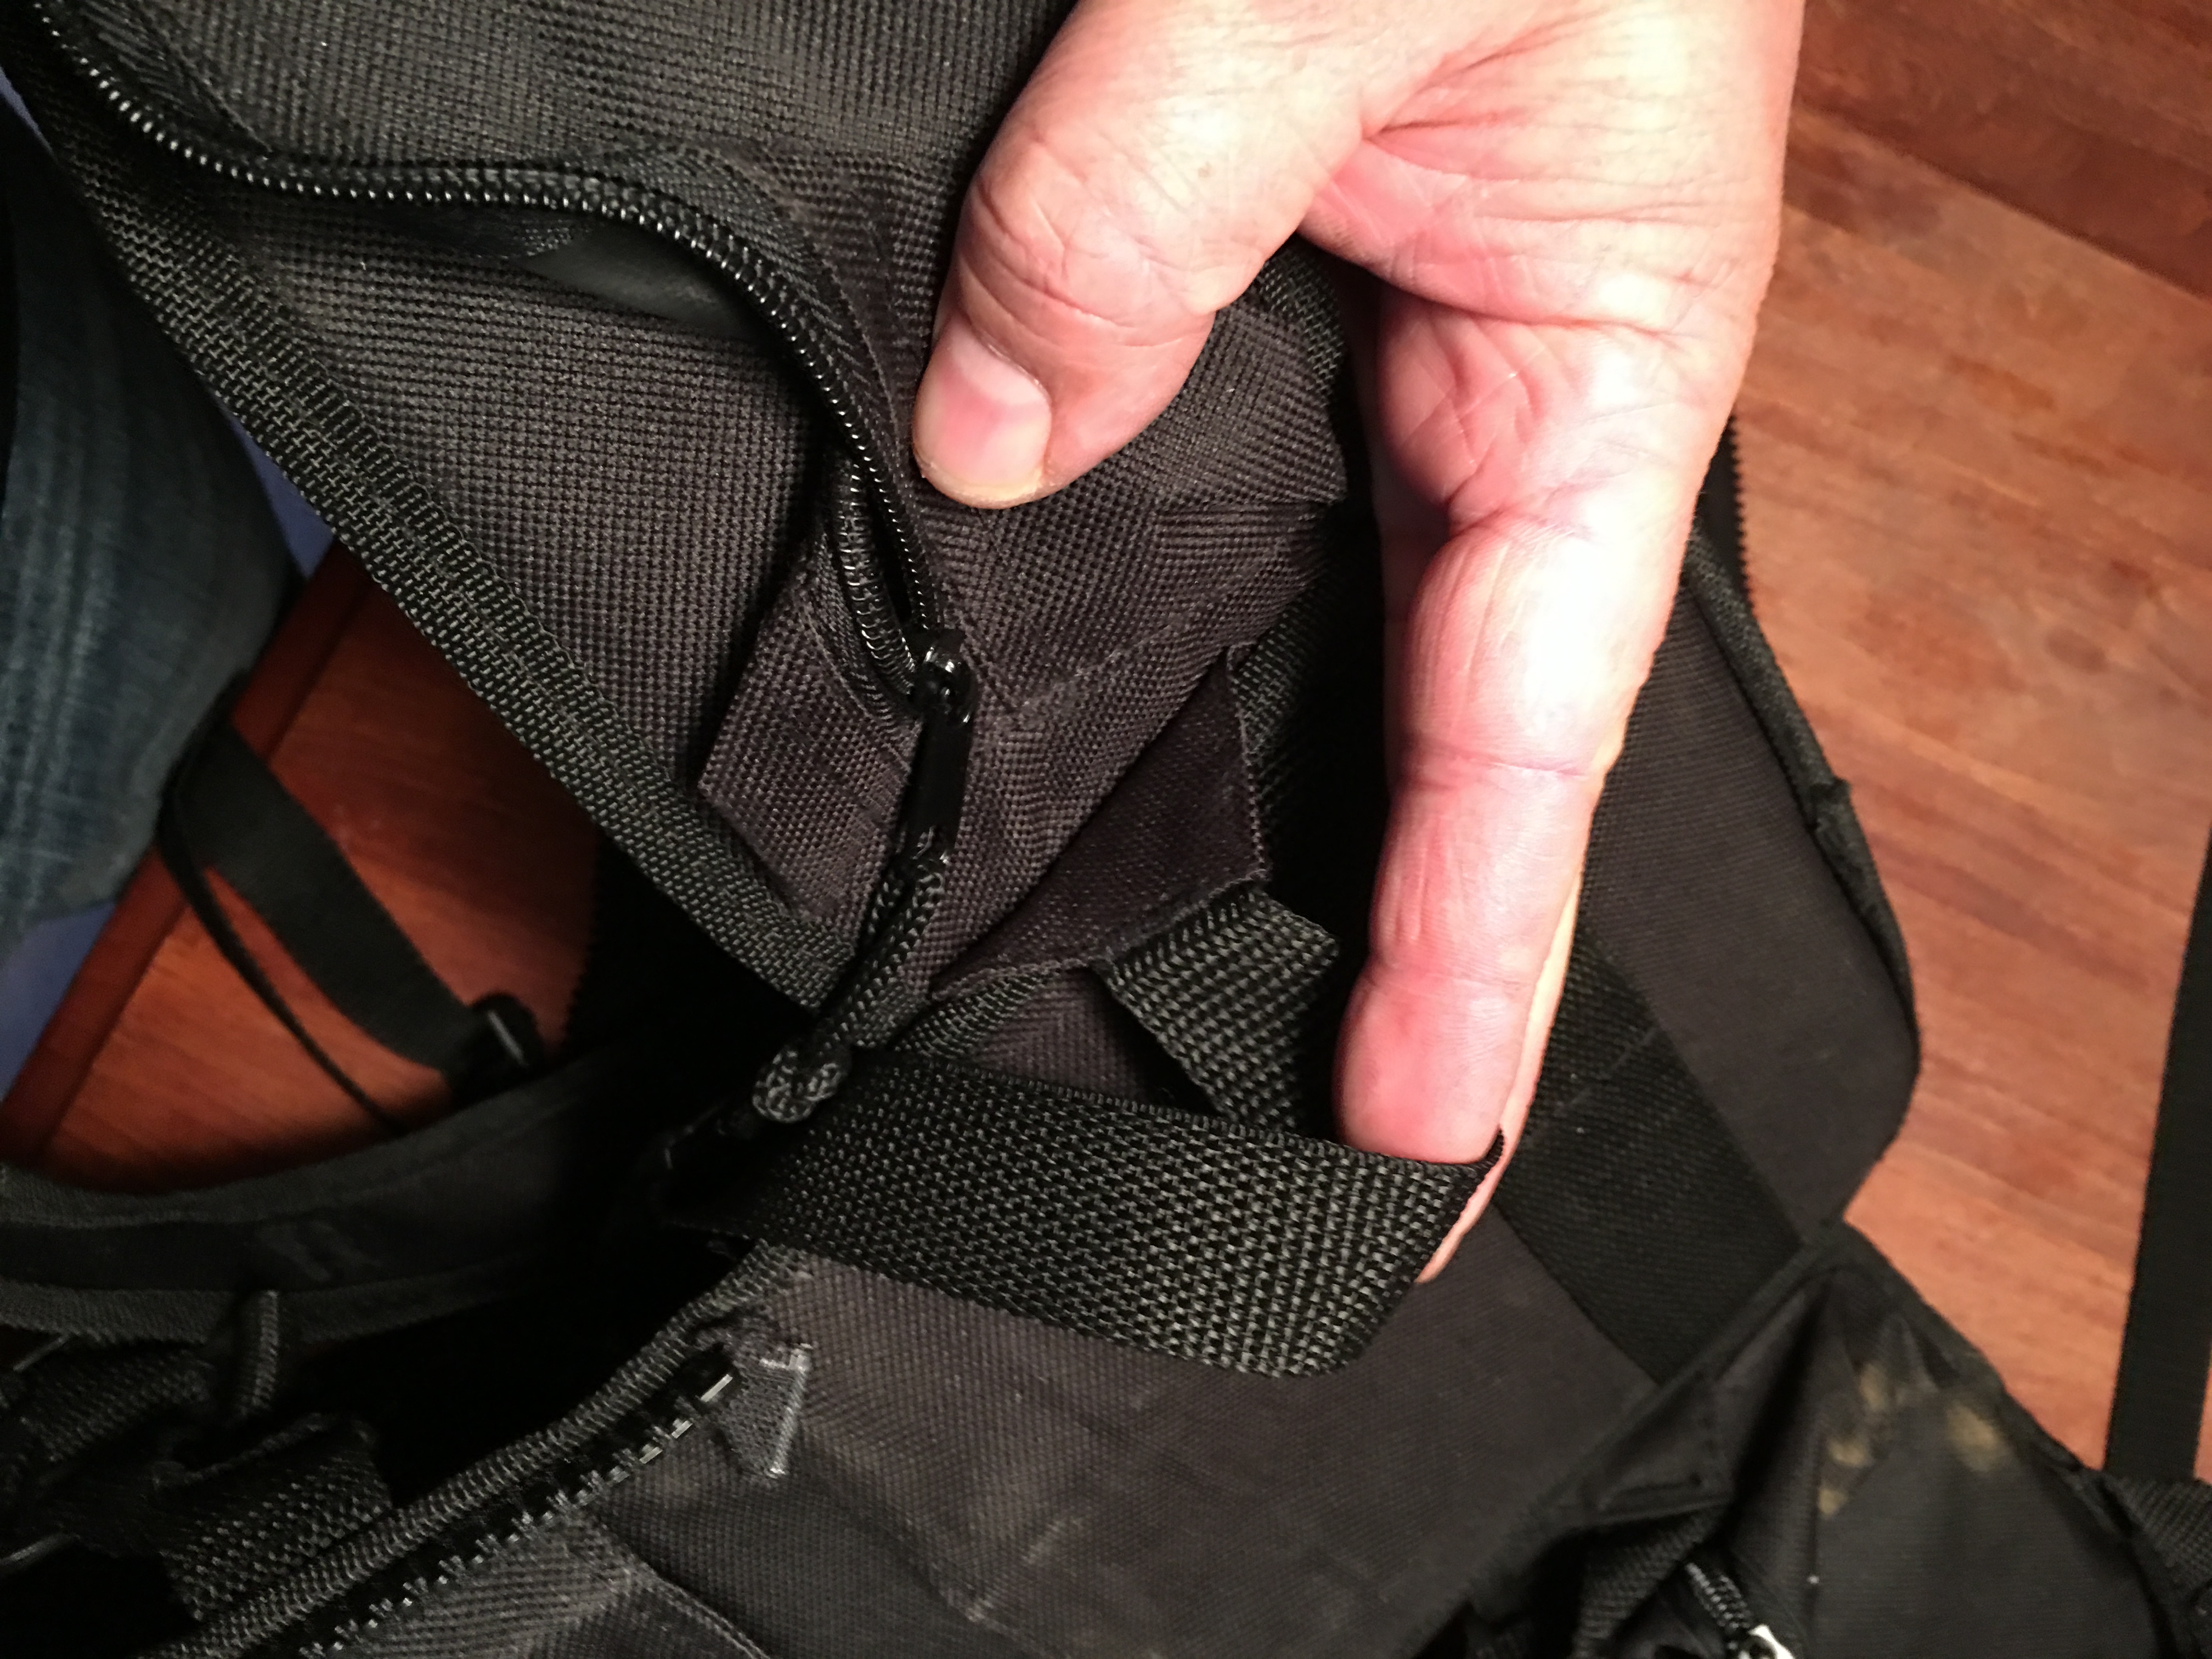
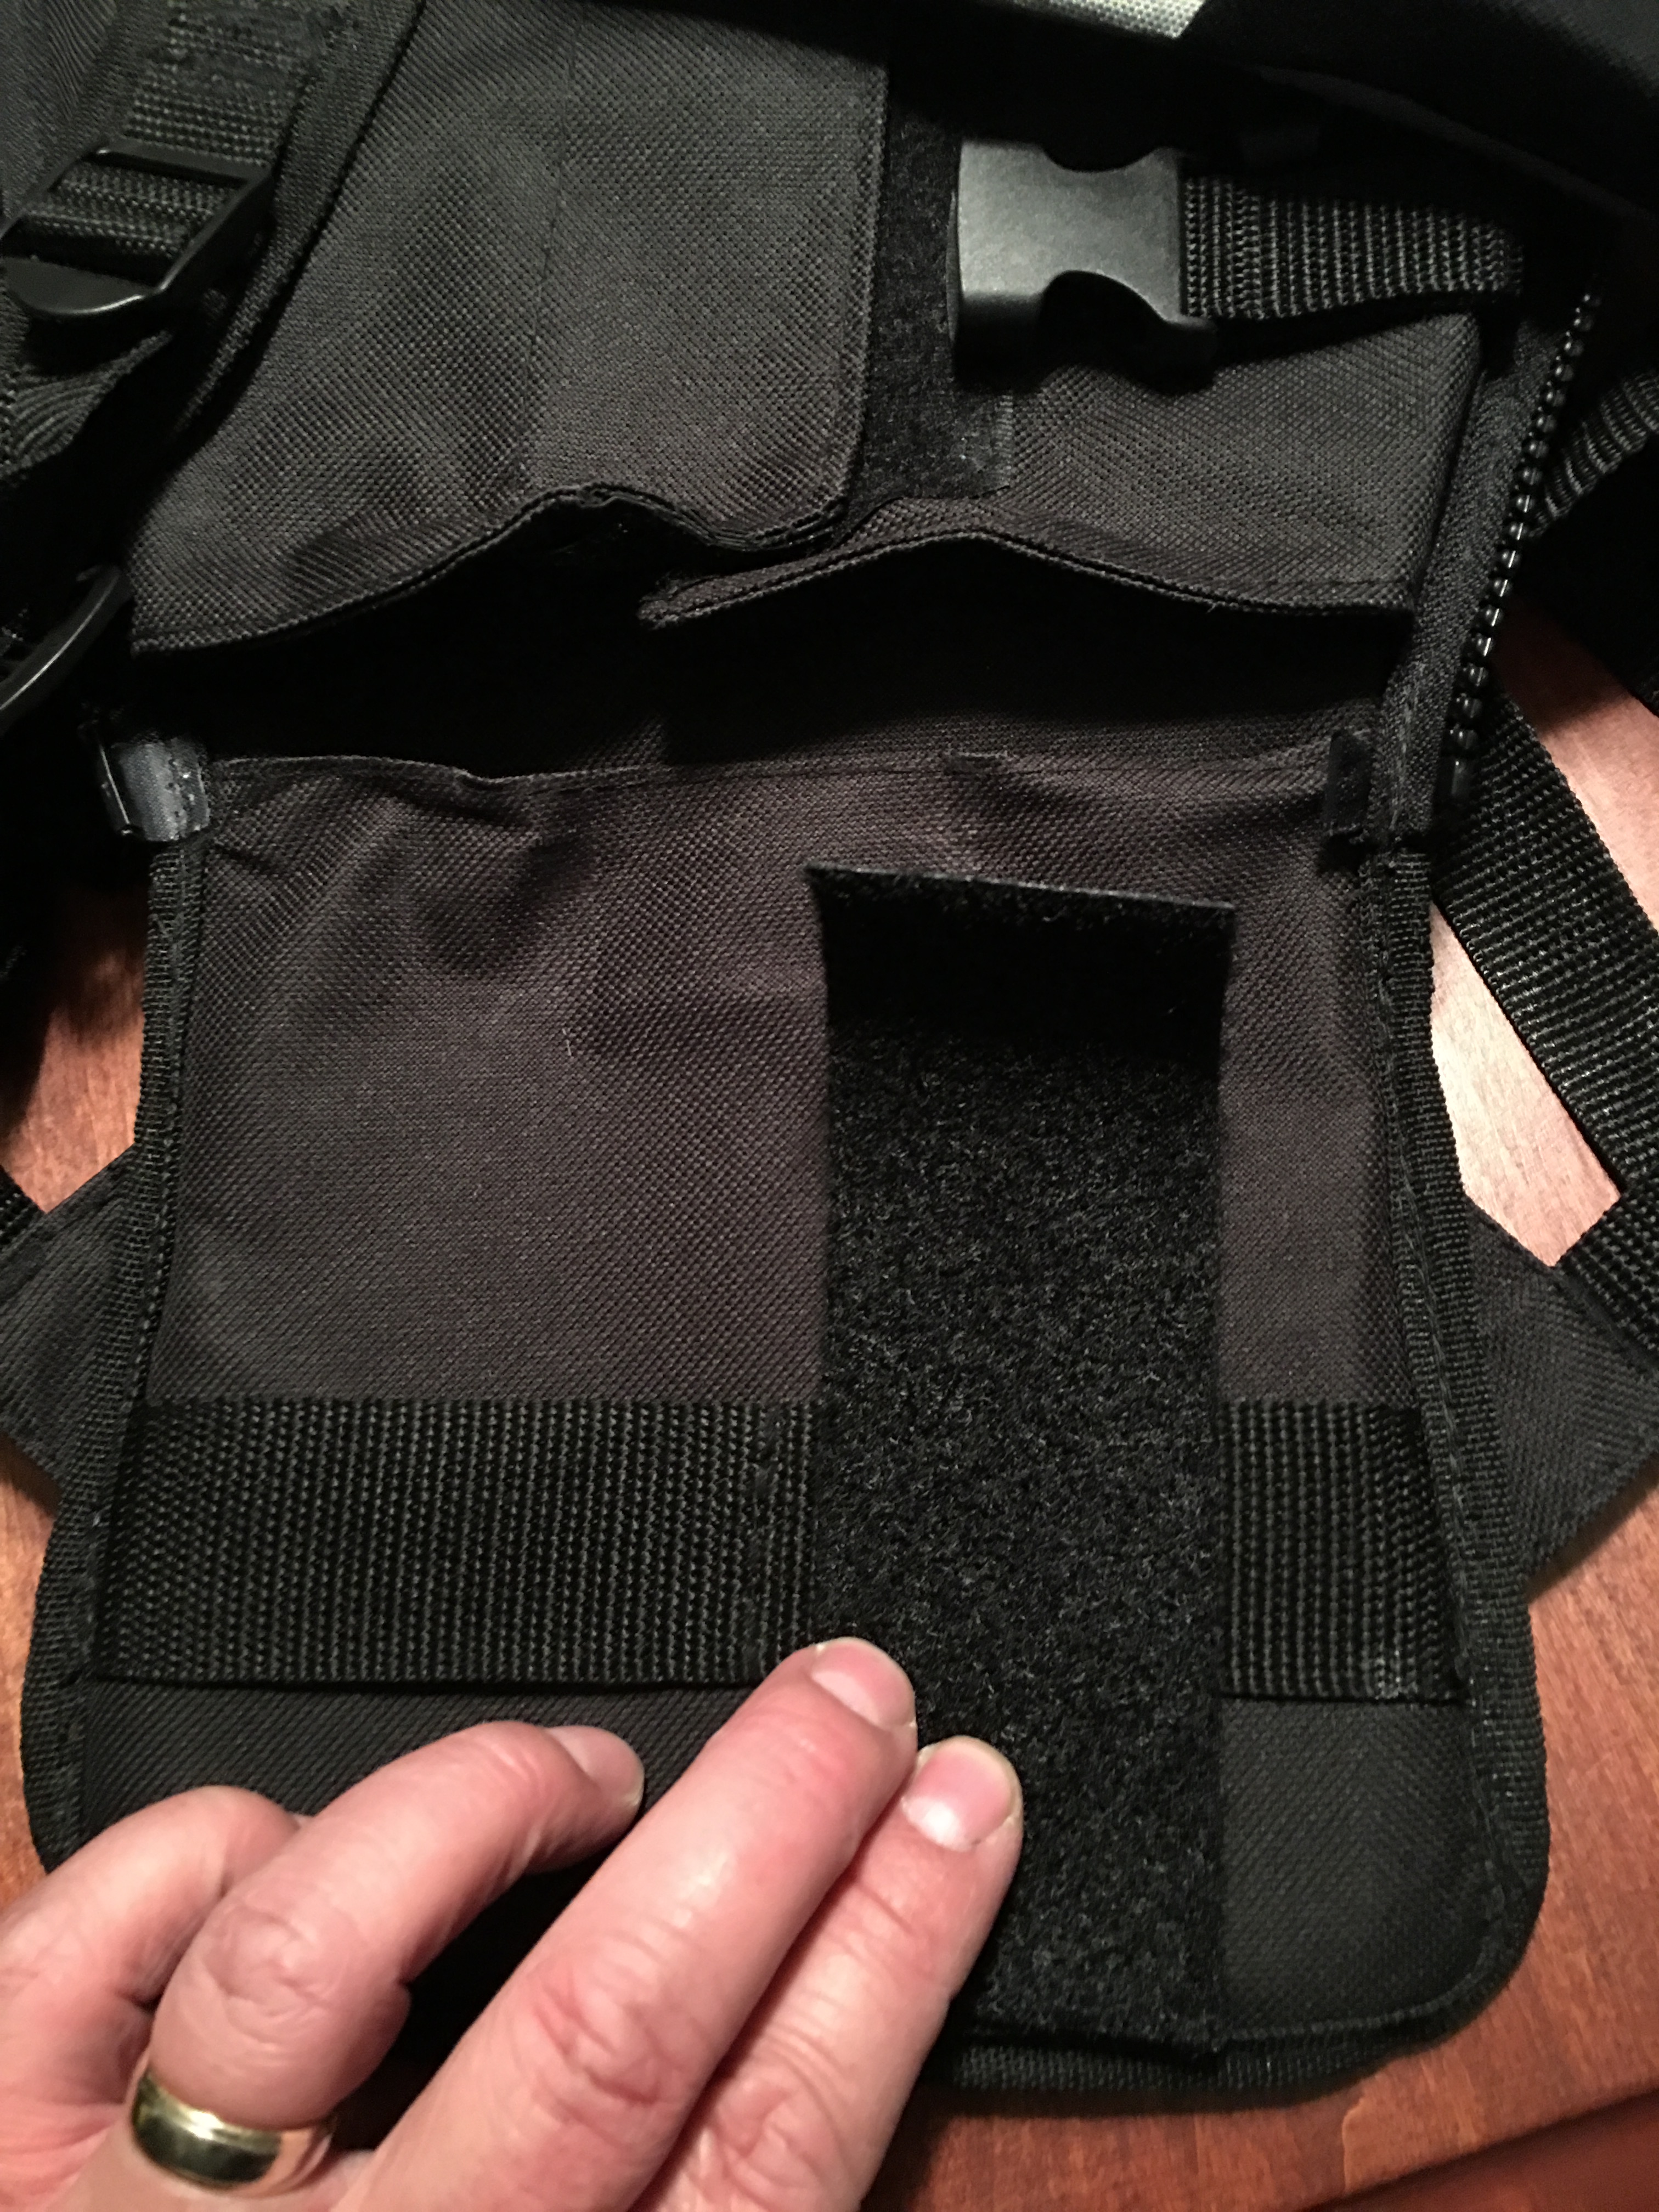
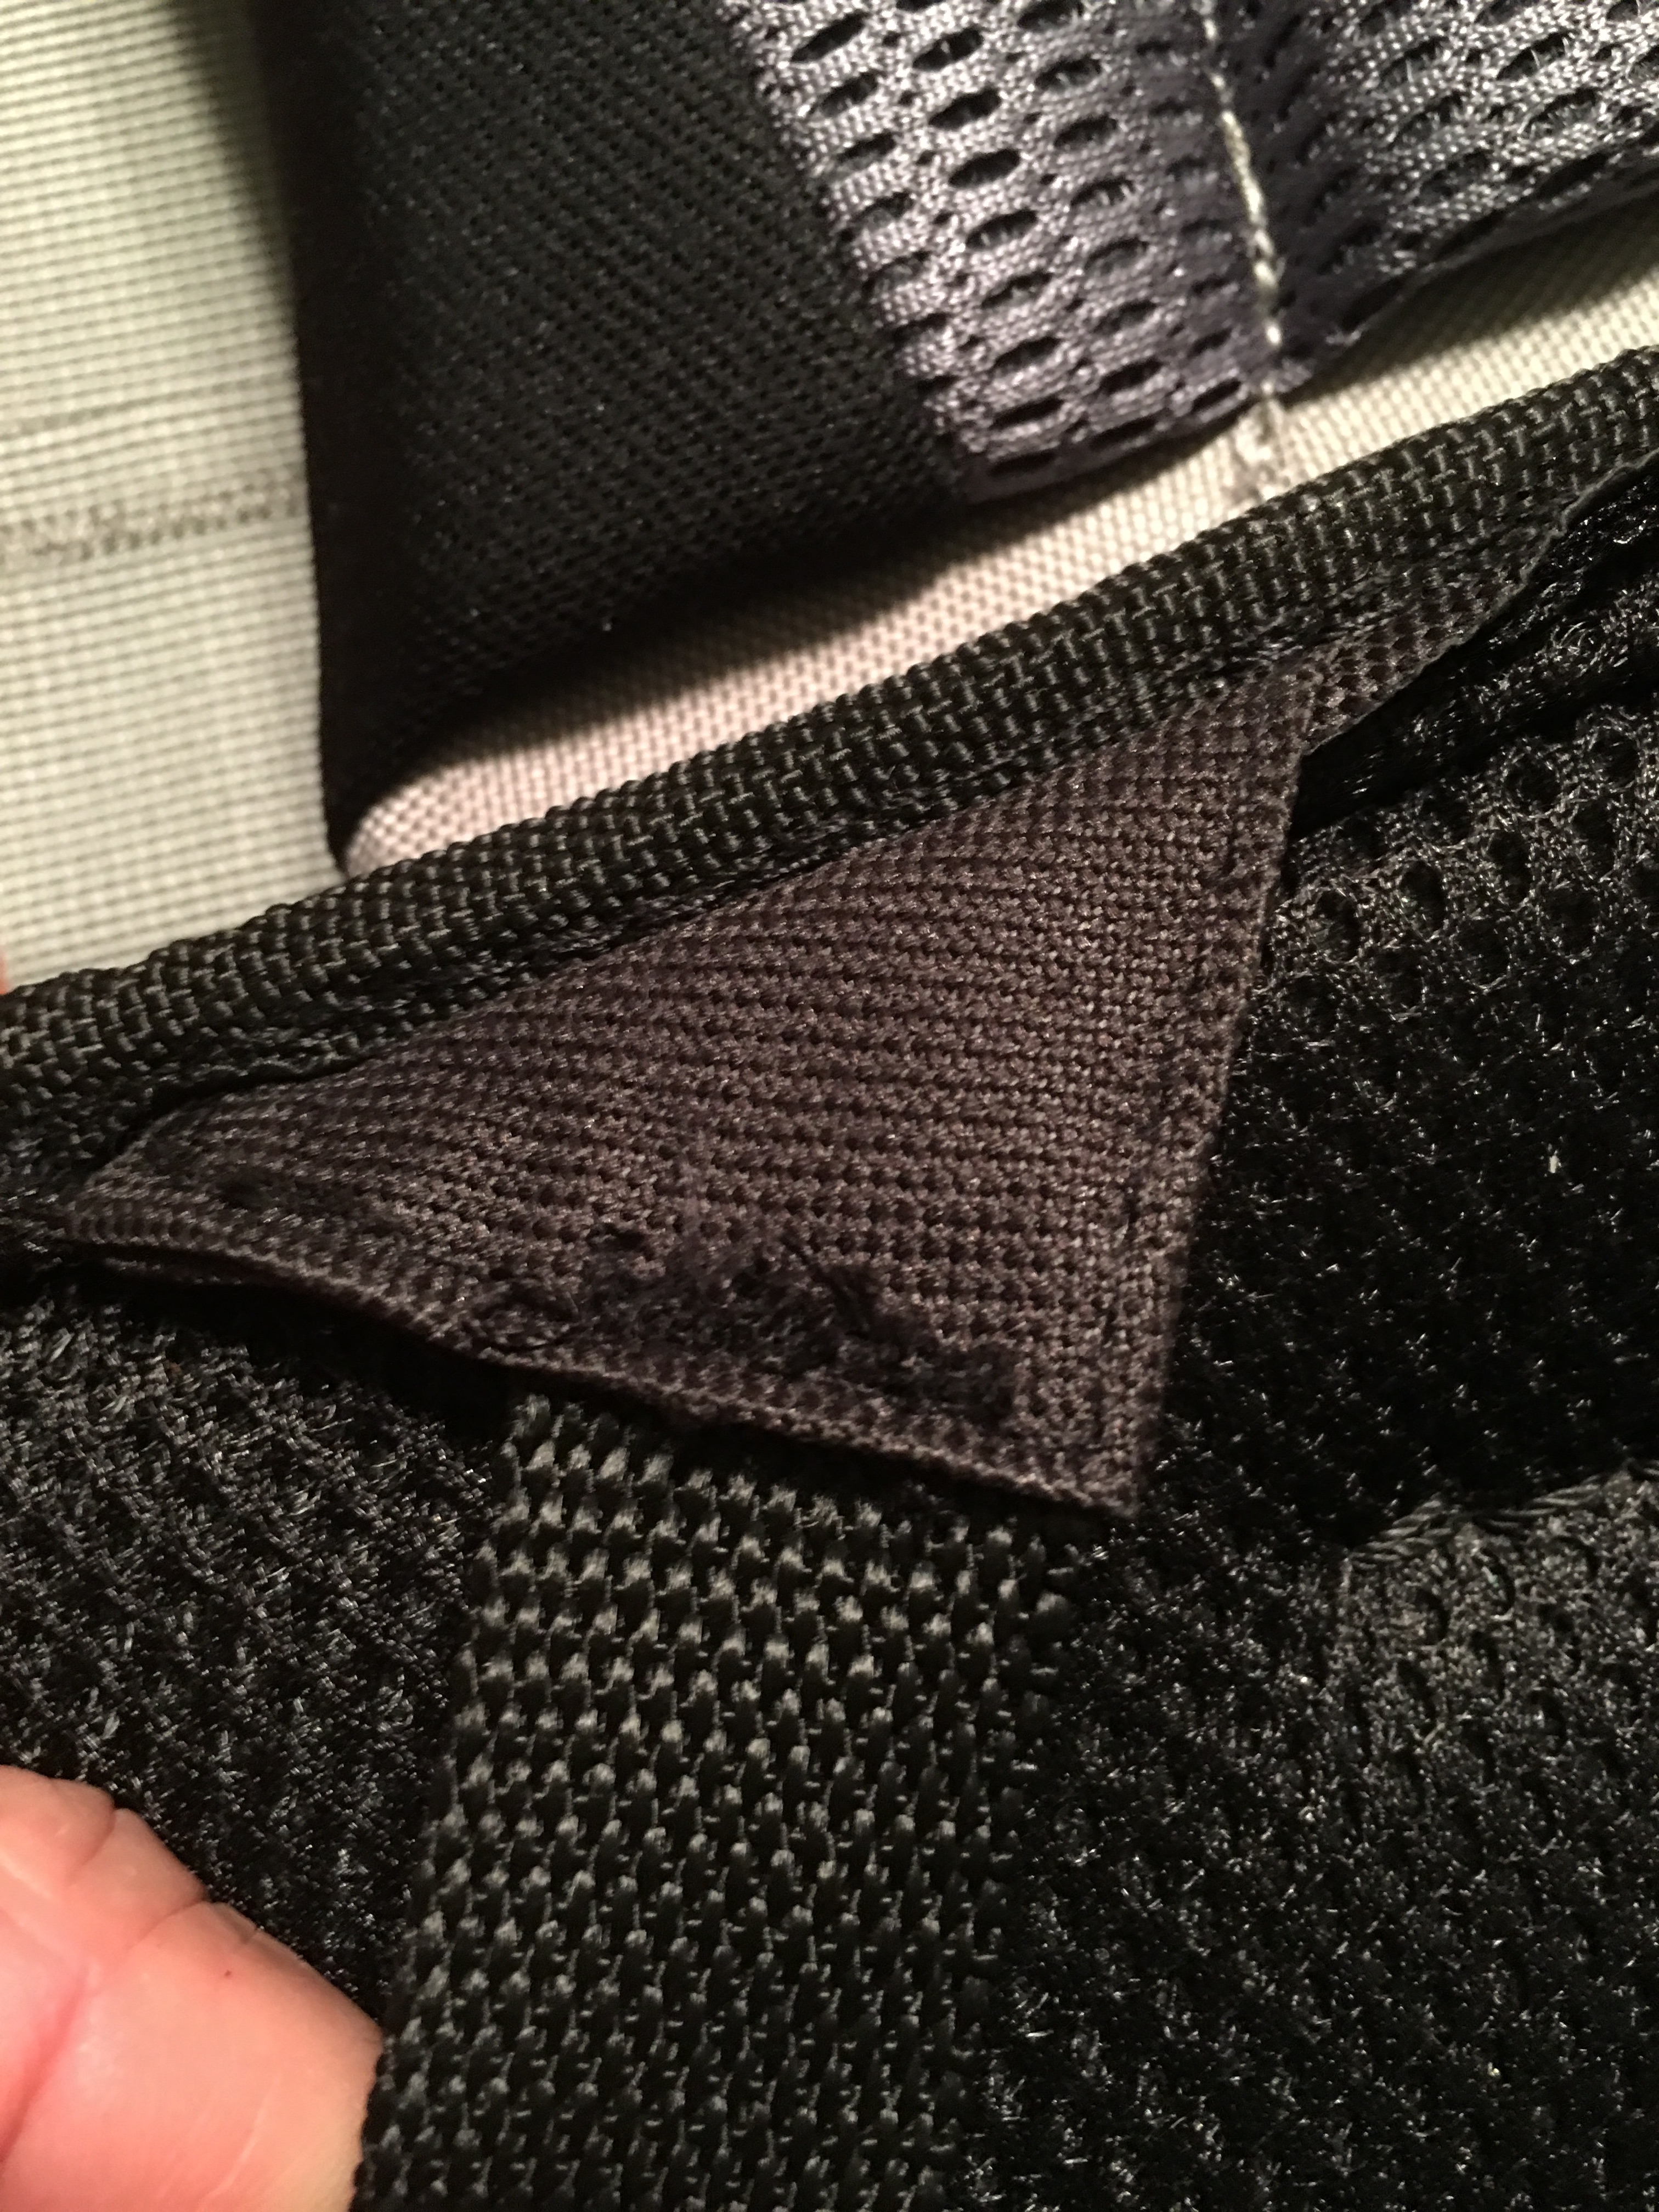
The thing that got me about the Shaka replacement straps was the huge piece that connects the straps; it seemed that it would be easy to stitch that onto the back of the FreeLoader without any crazy modifications. There is a nice wide open patch on the bottom where the new hip-belt should attach. My first thought was that I could actually attach it from the outside with some industrial Velcro – the friction from the Velcro and the tension from the best would hold everything together. I started cutting.
Before you start cutting, here is the disclaimer: You’re on your own. I’m in no way qualified in structural stitching or safety or anything of the kind. You or your progeny could die.
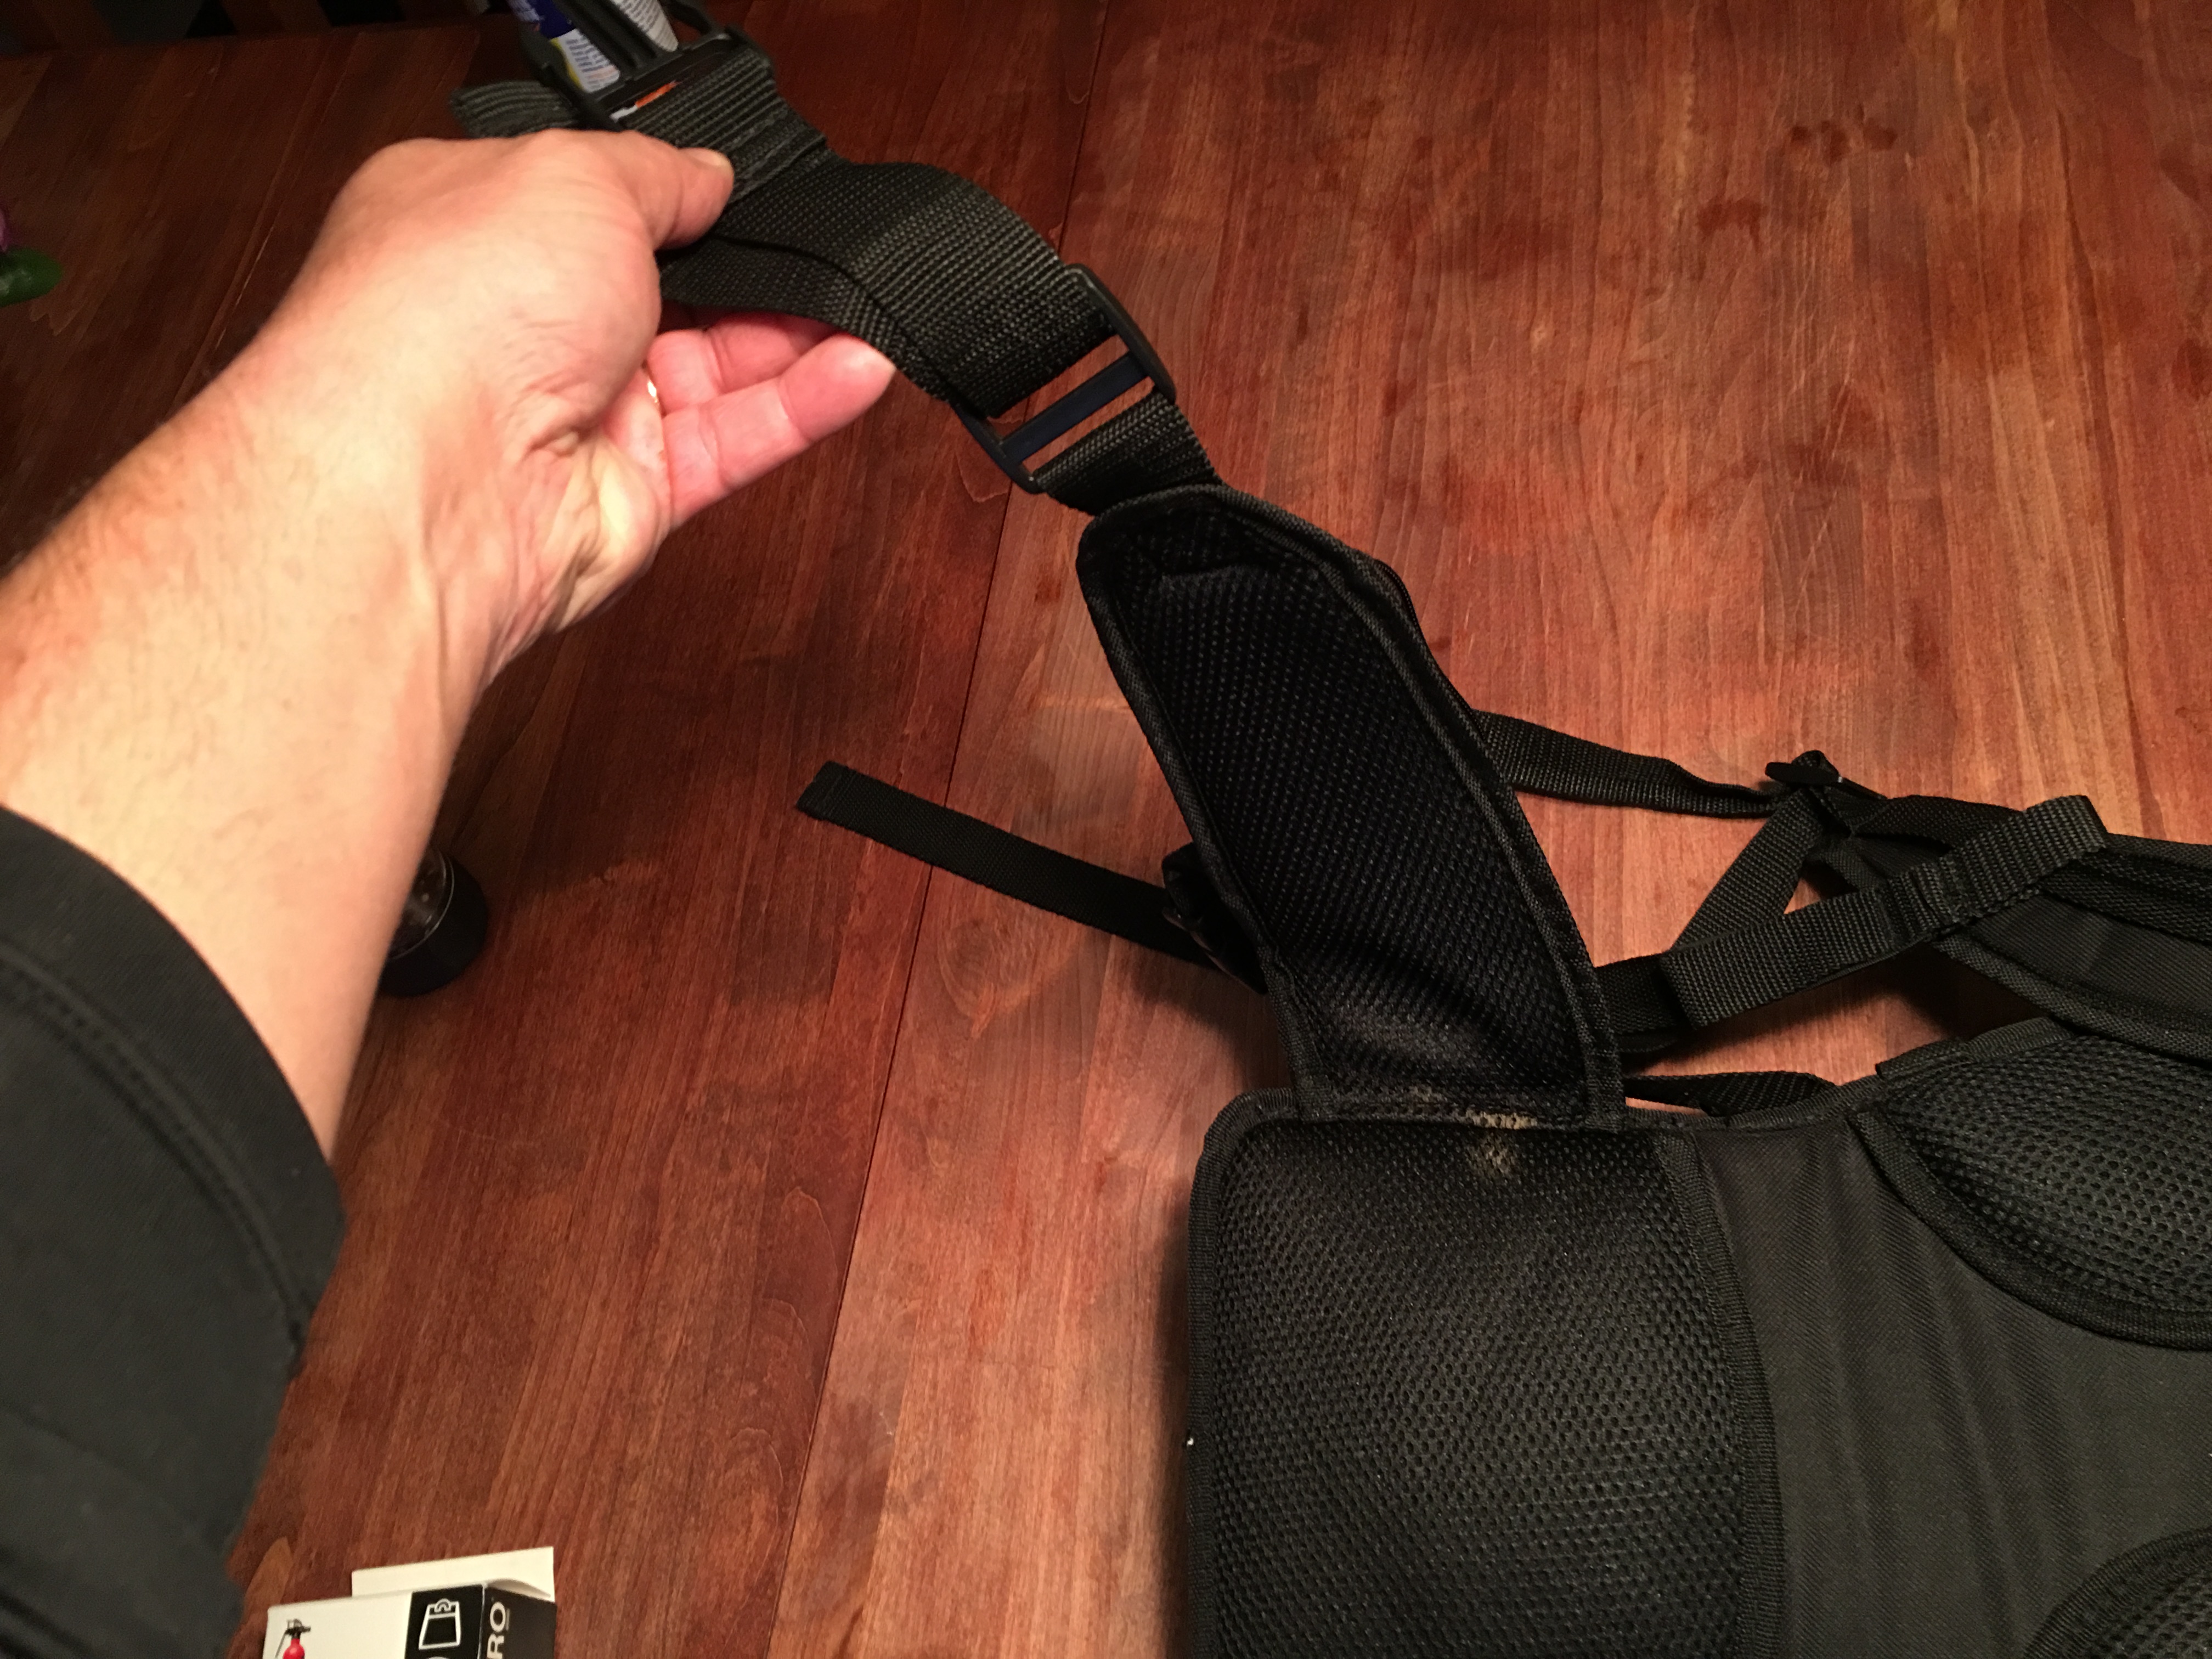

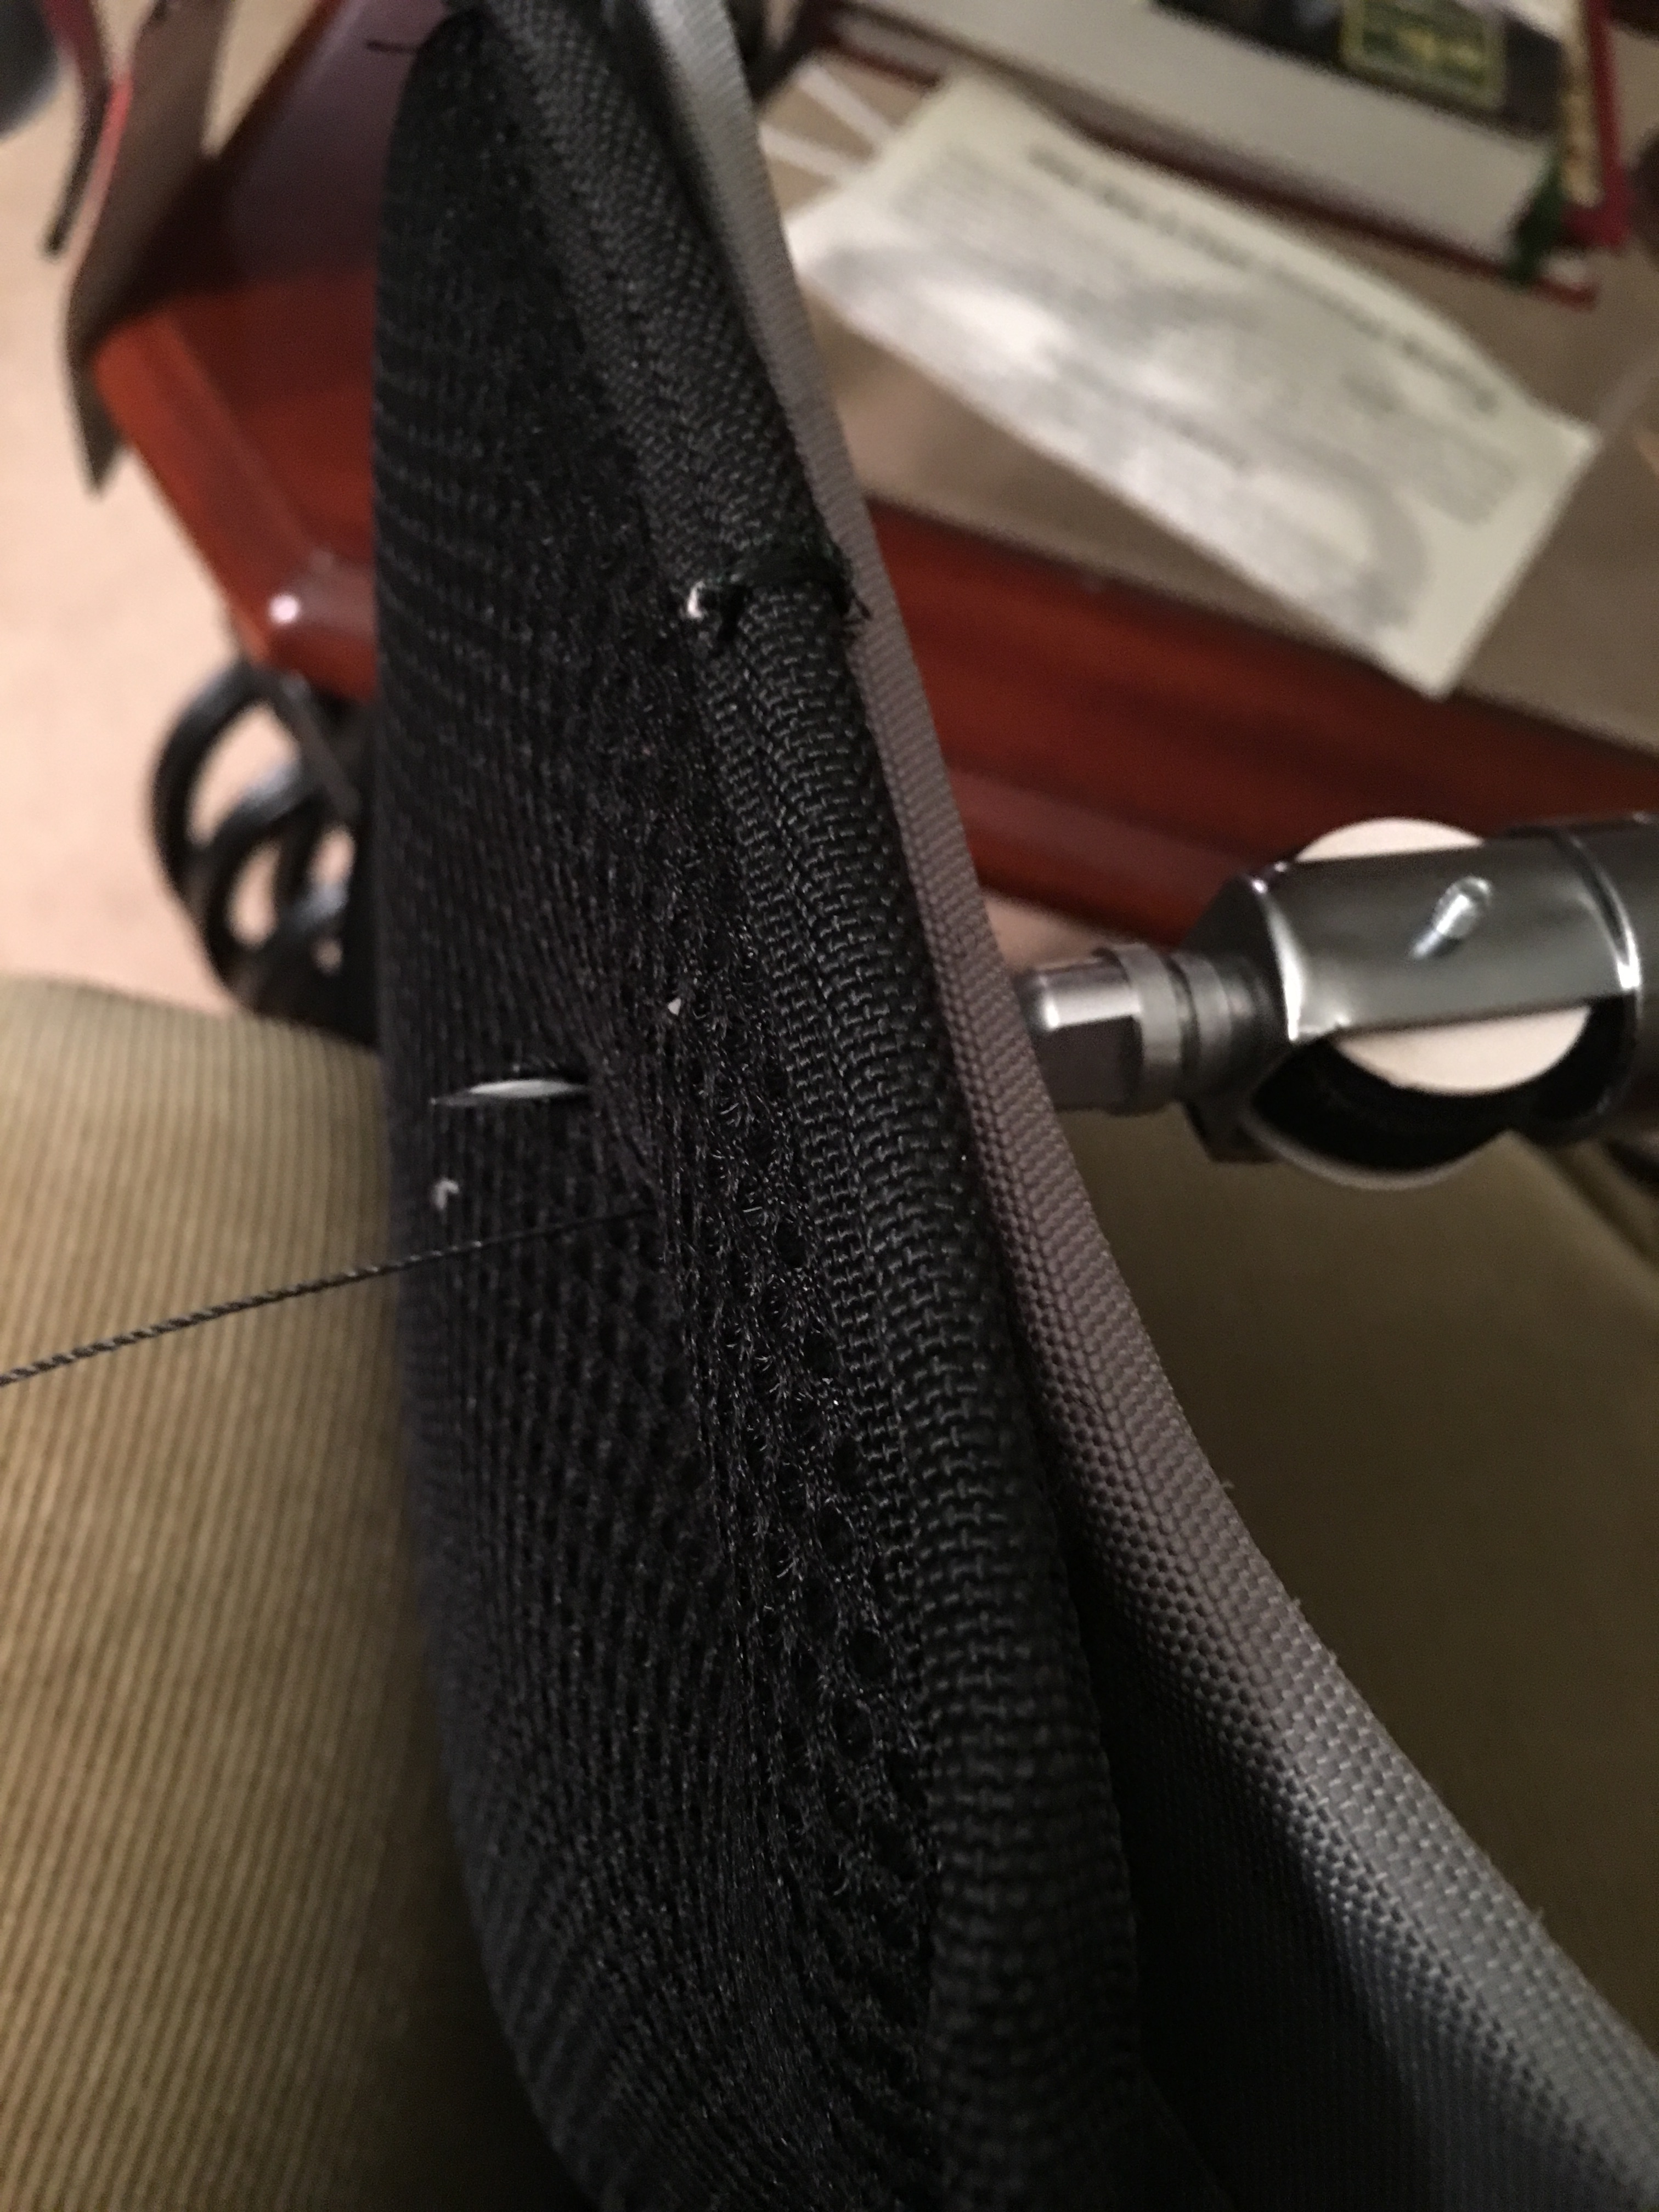
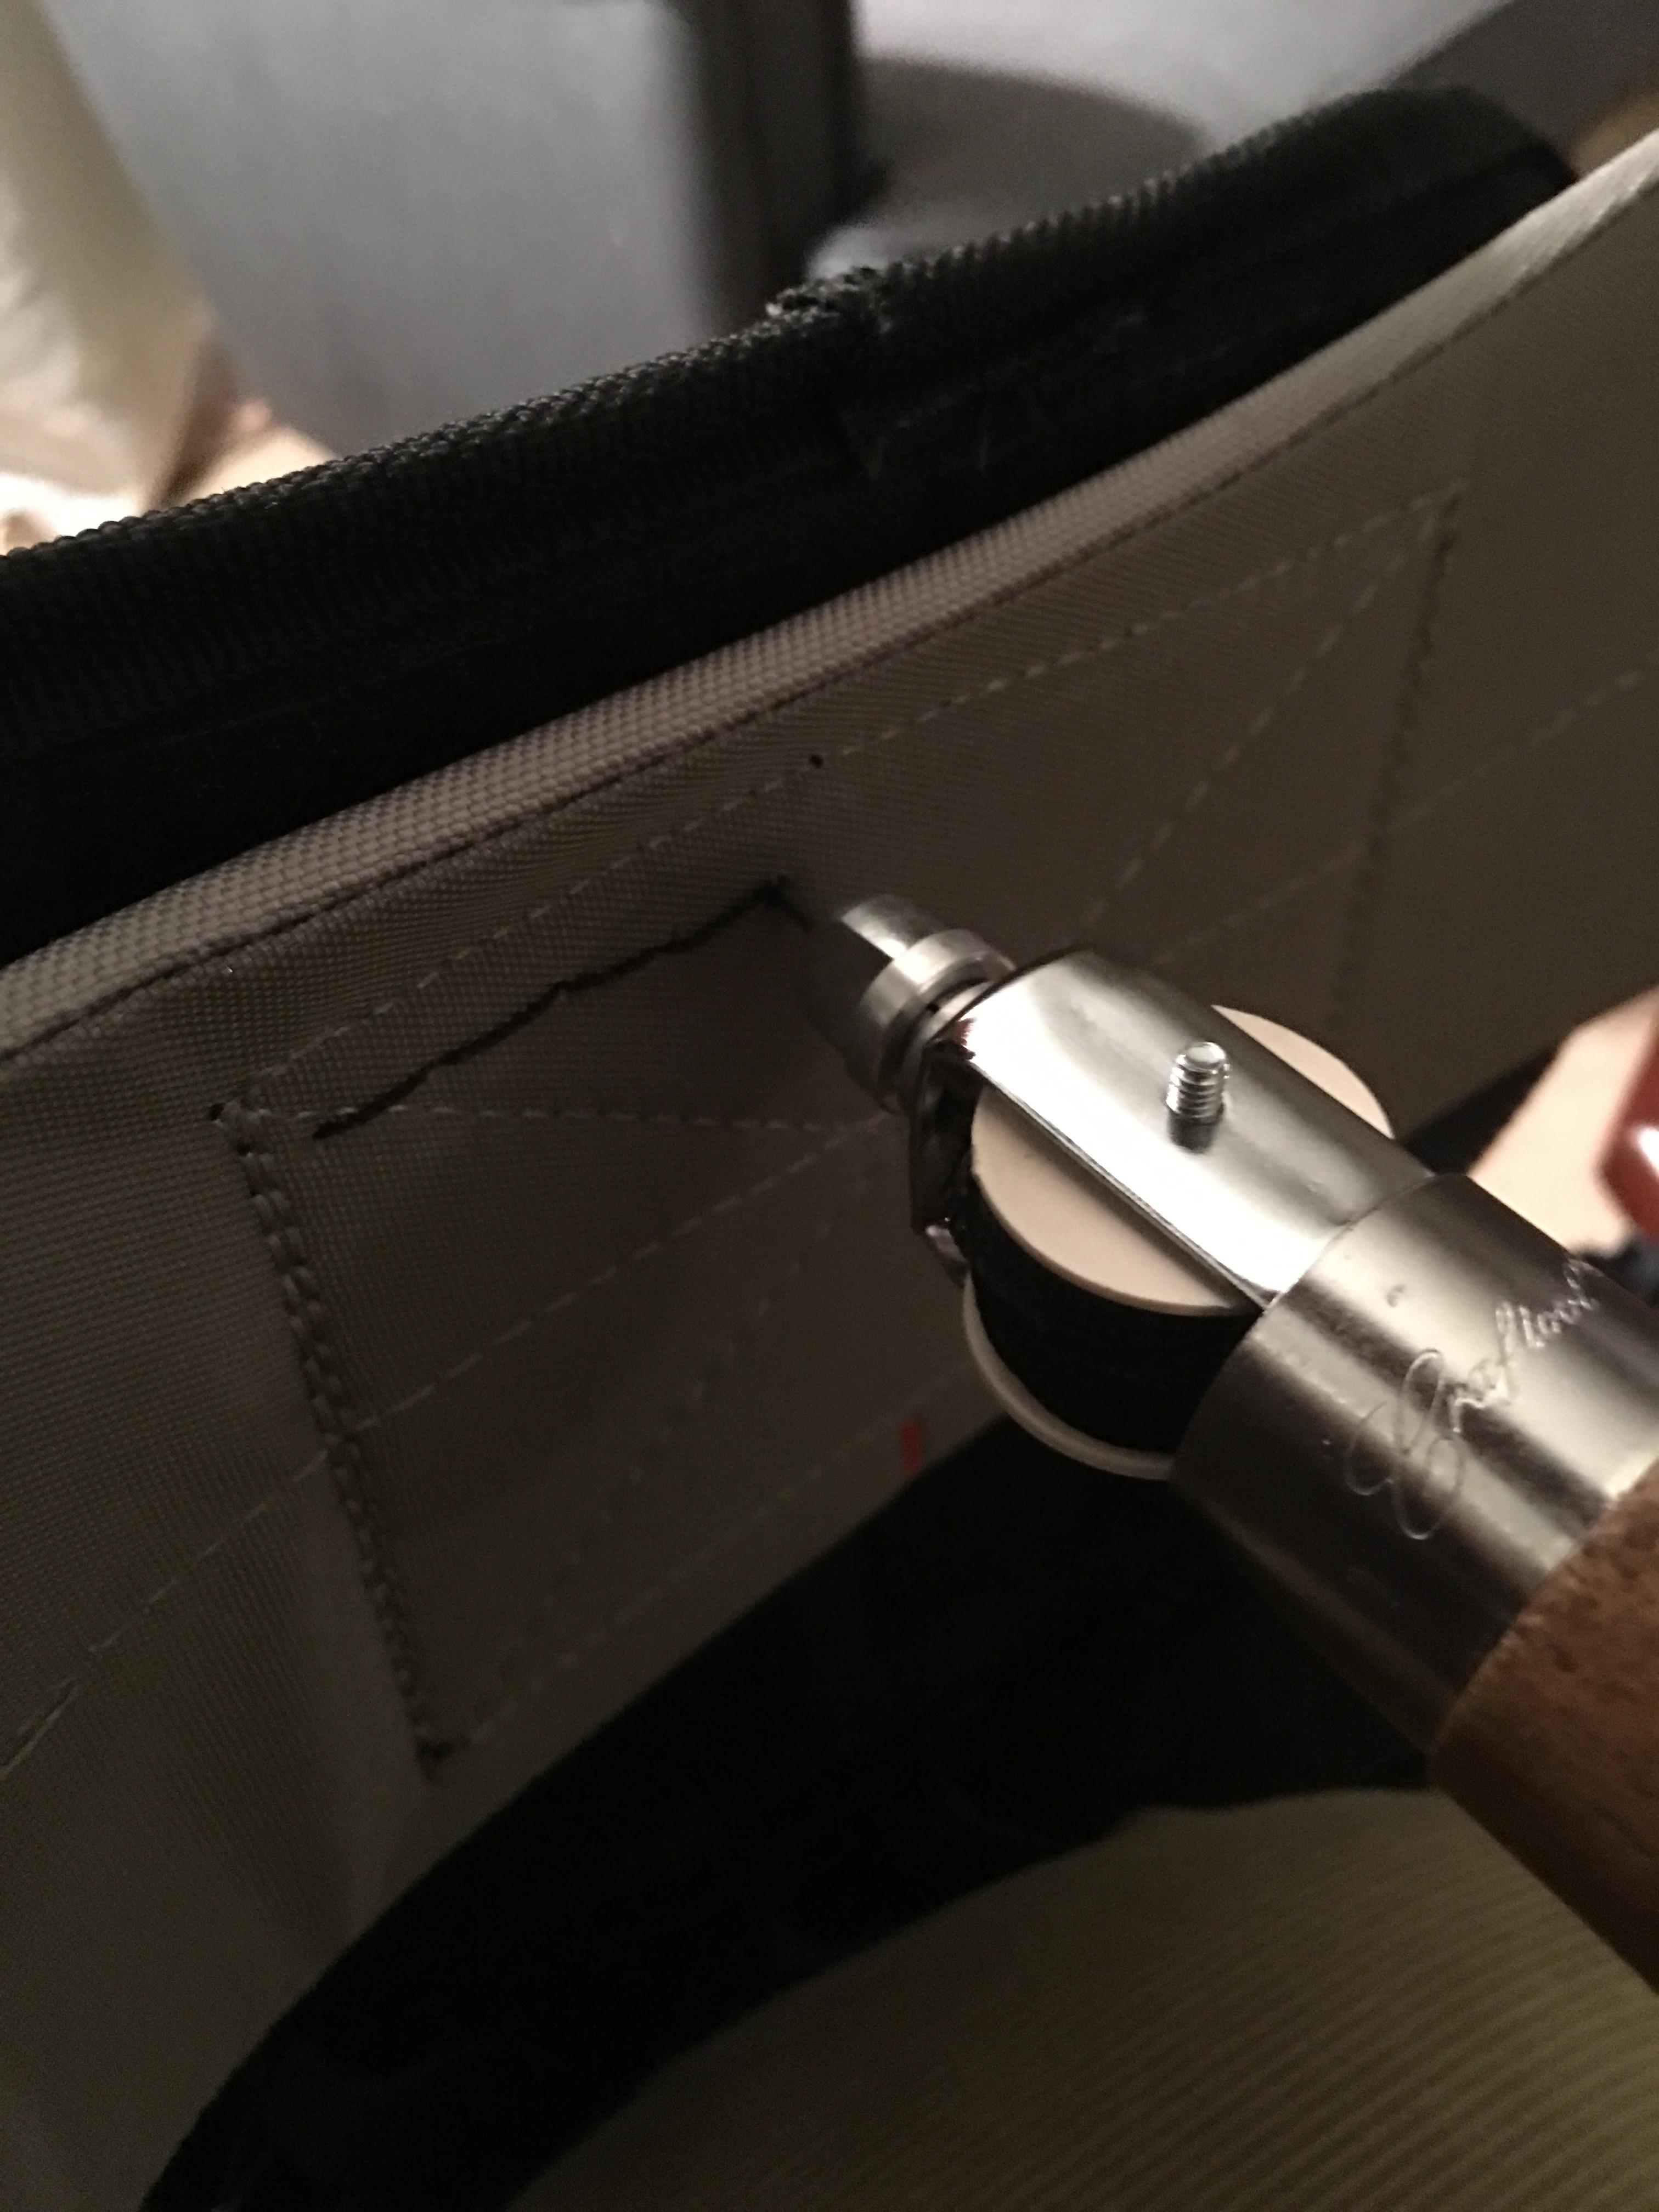
It became clear to me that I needed heavier and more robust attachment. I ordered a stitching awl from Amazon: http://amzn.to/1OyZLoj
There are cheaper versions that will probably work; but this thing worked perfectly. I used it to stitch on the hip-belt and the shoulder straps.
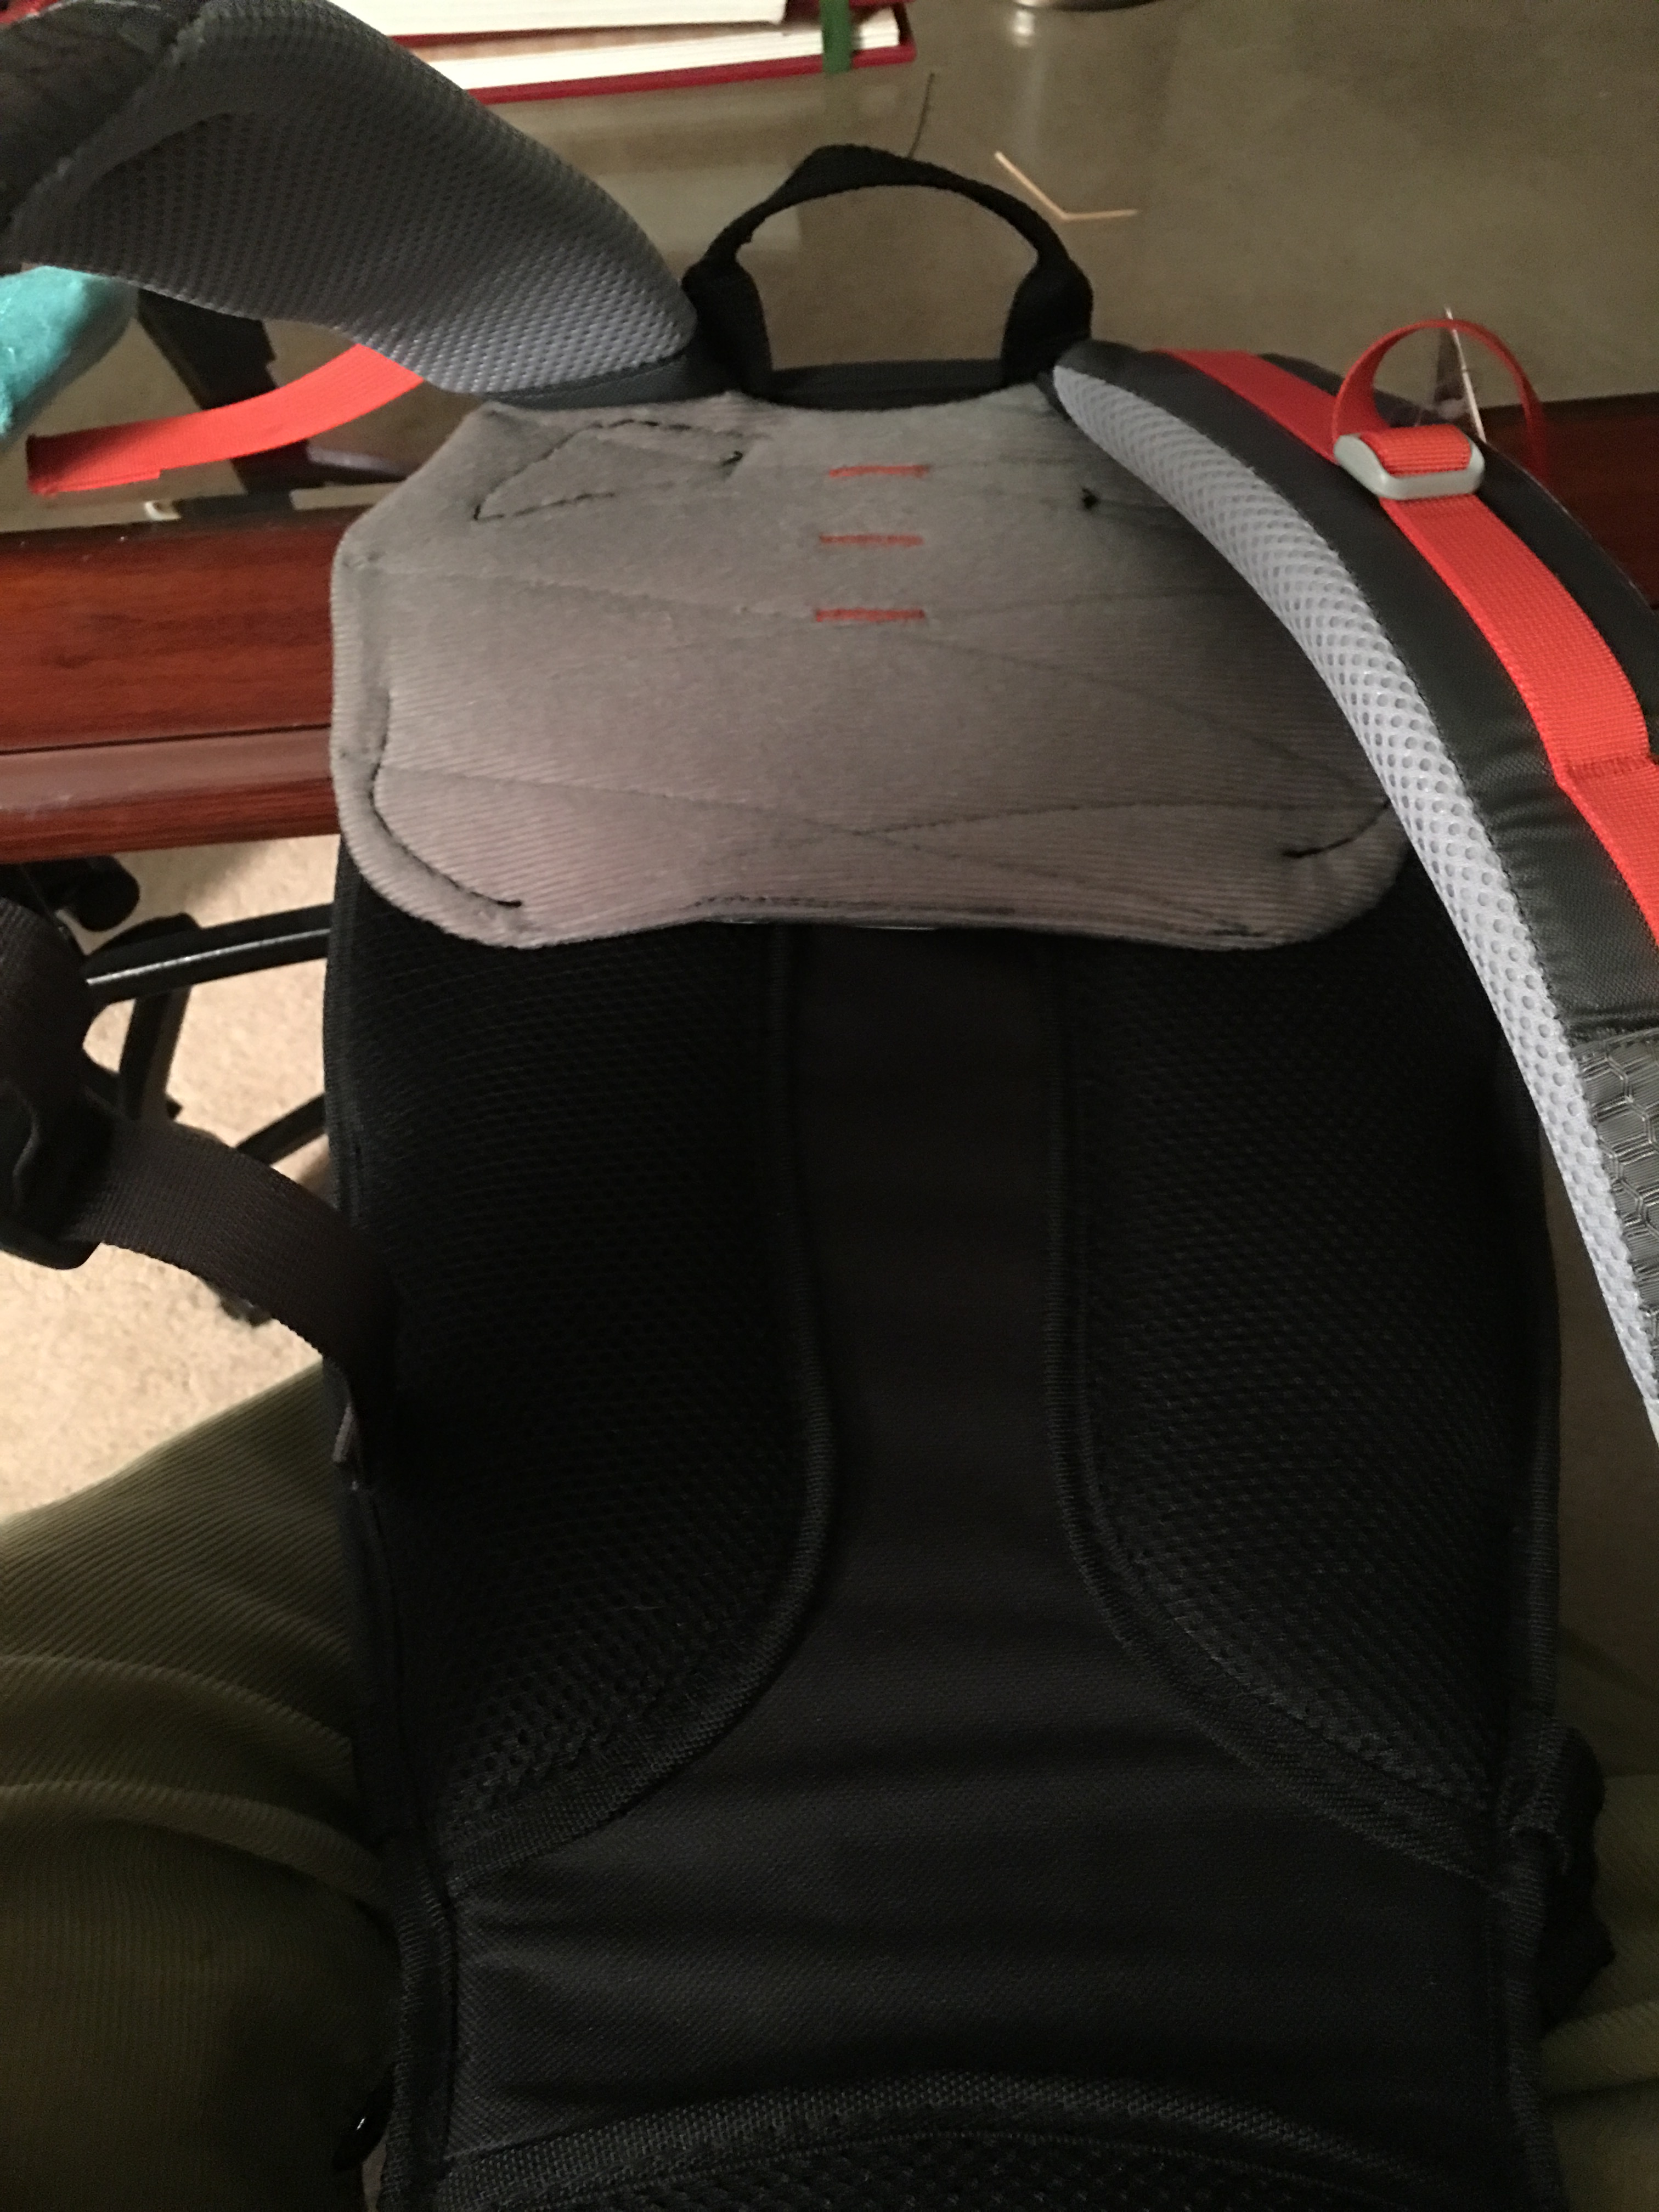
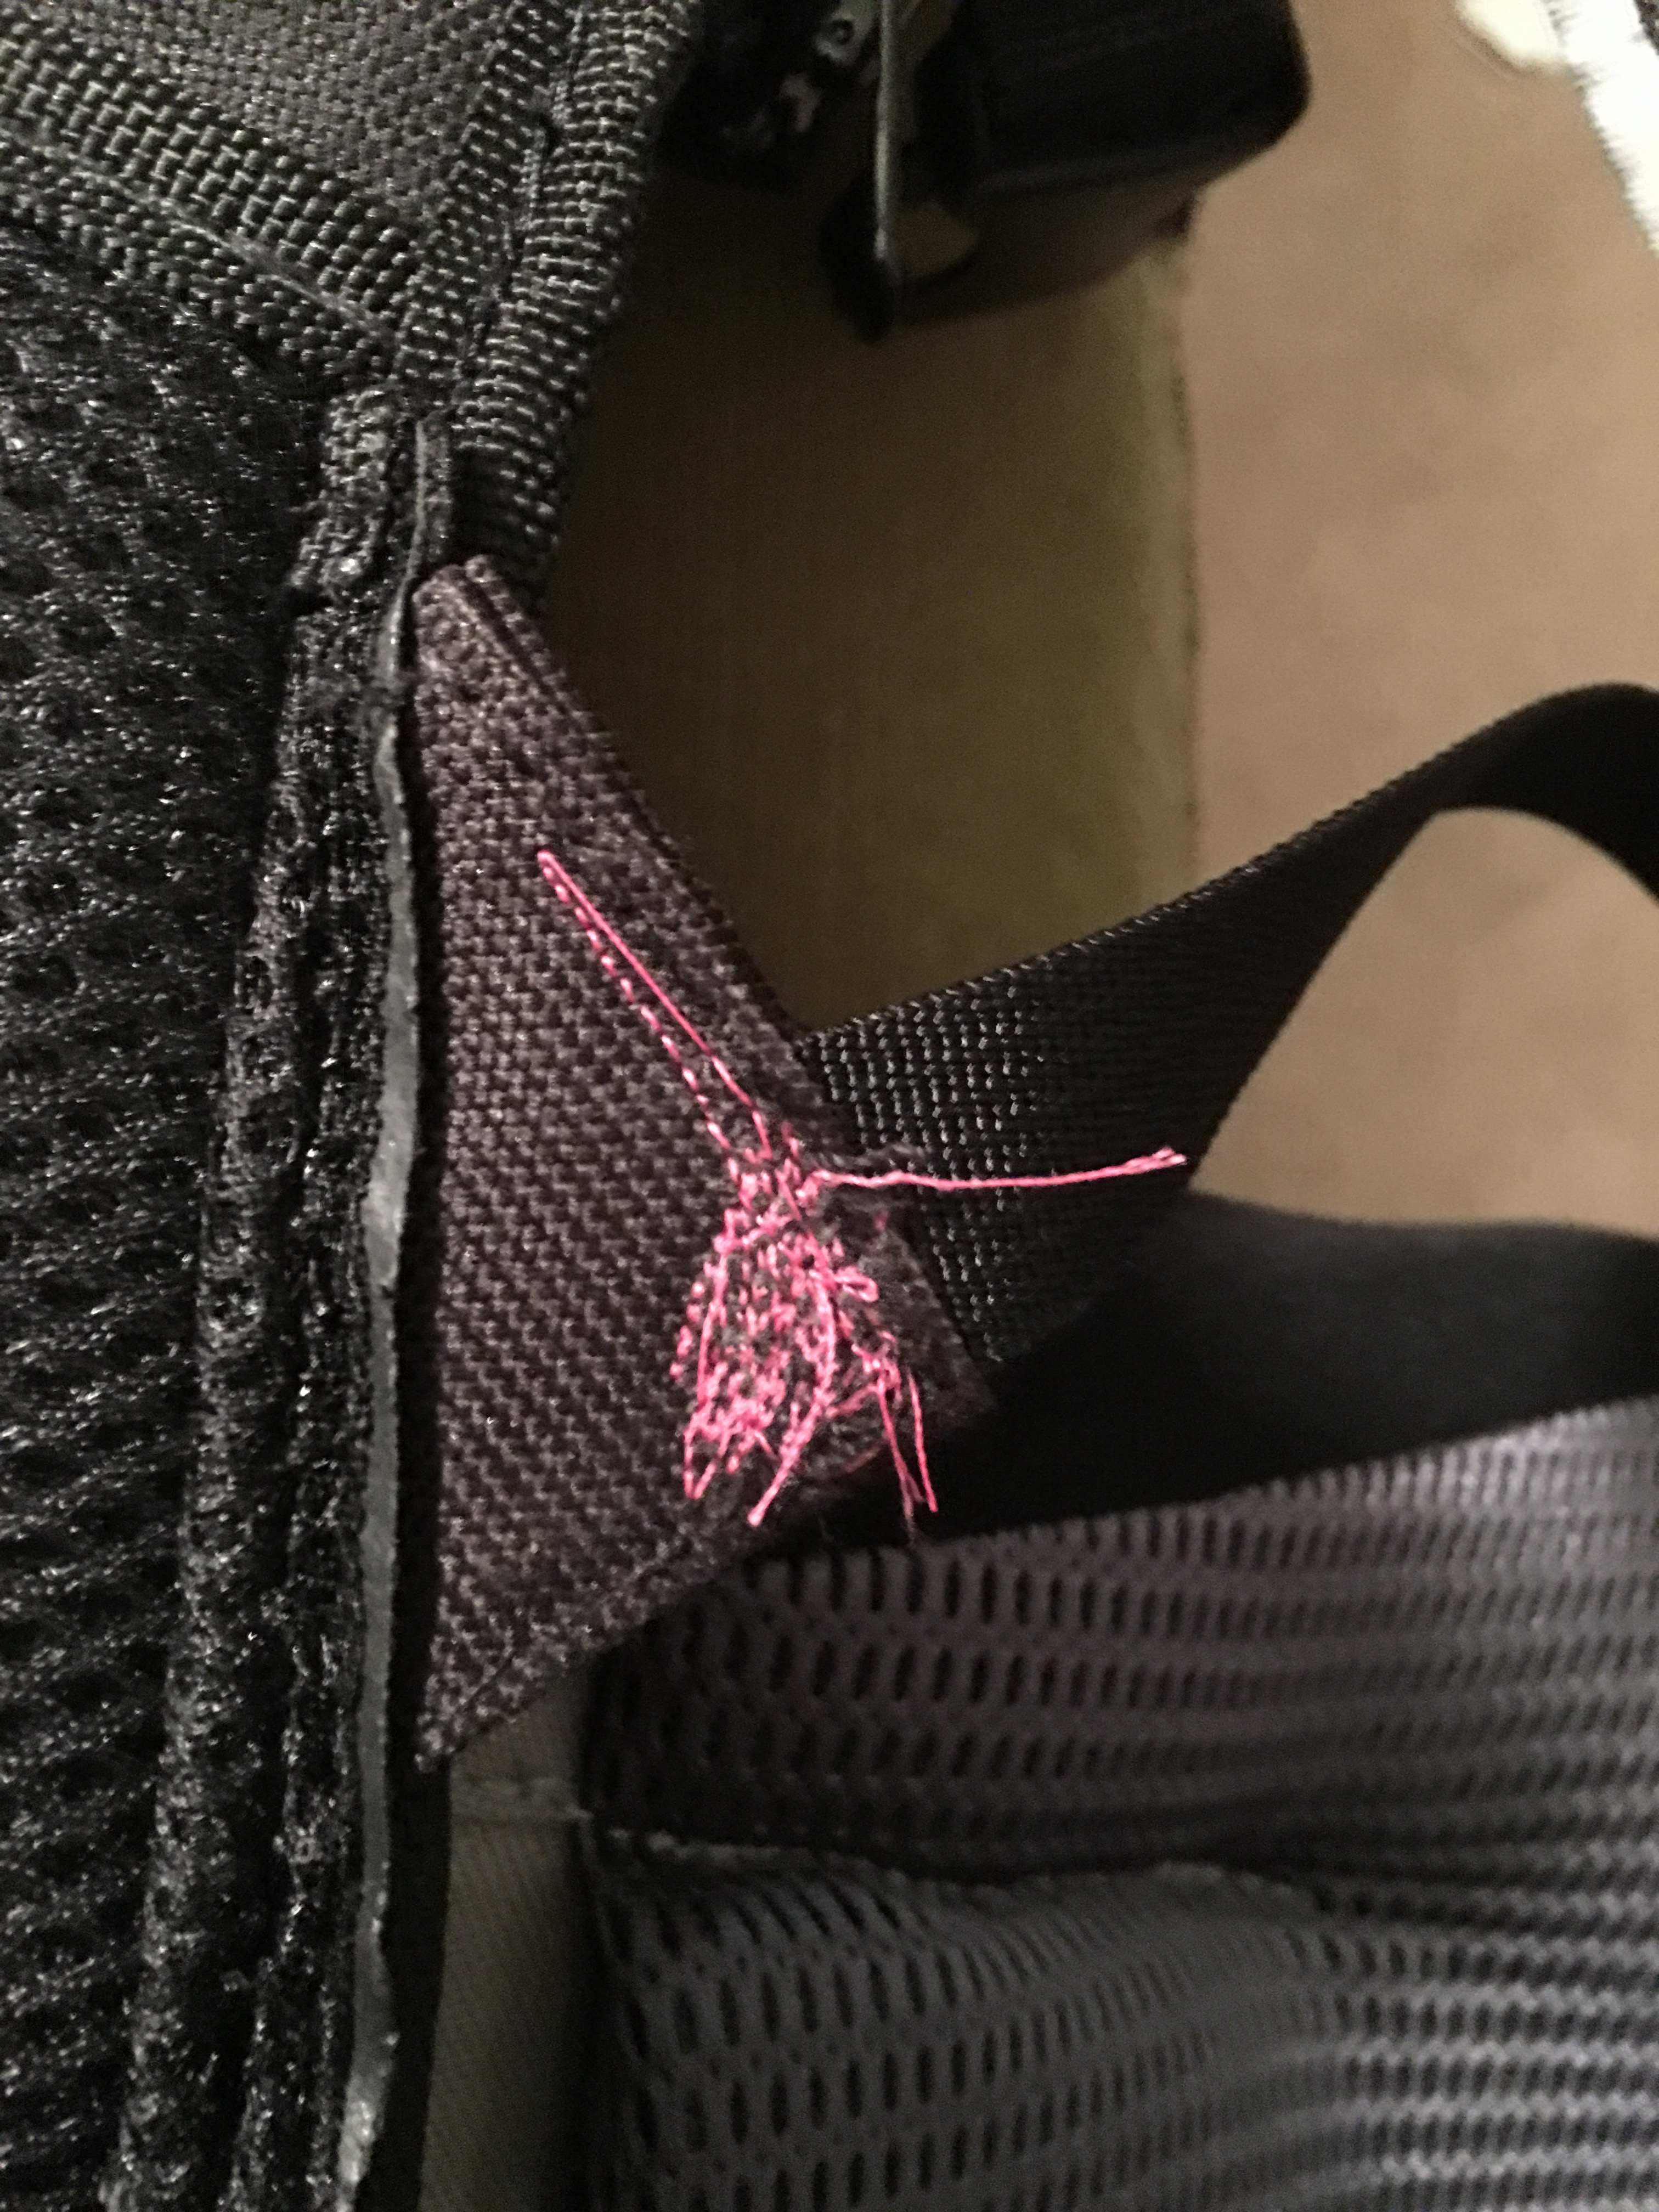

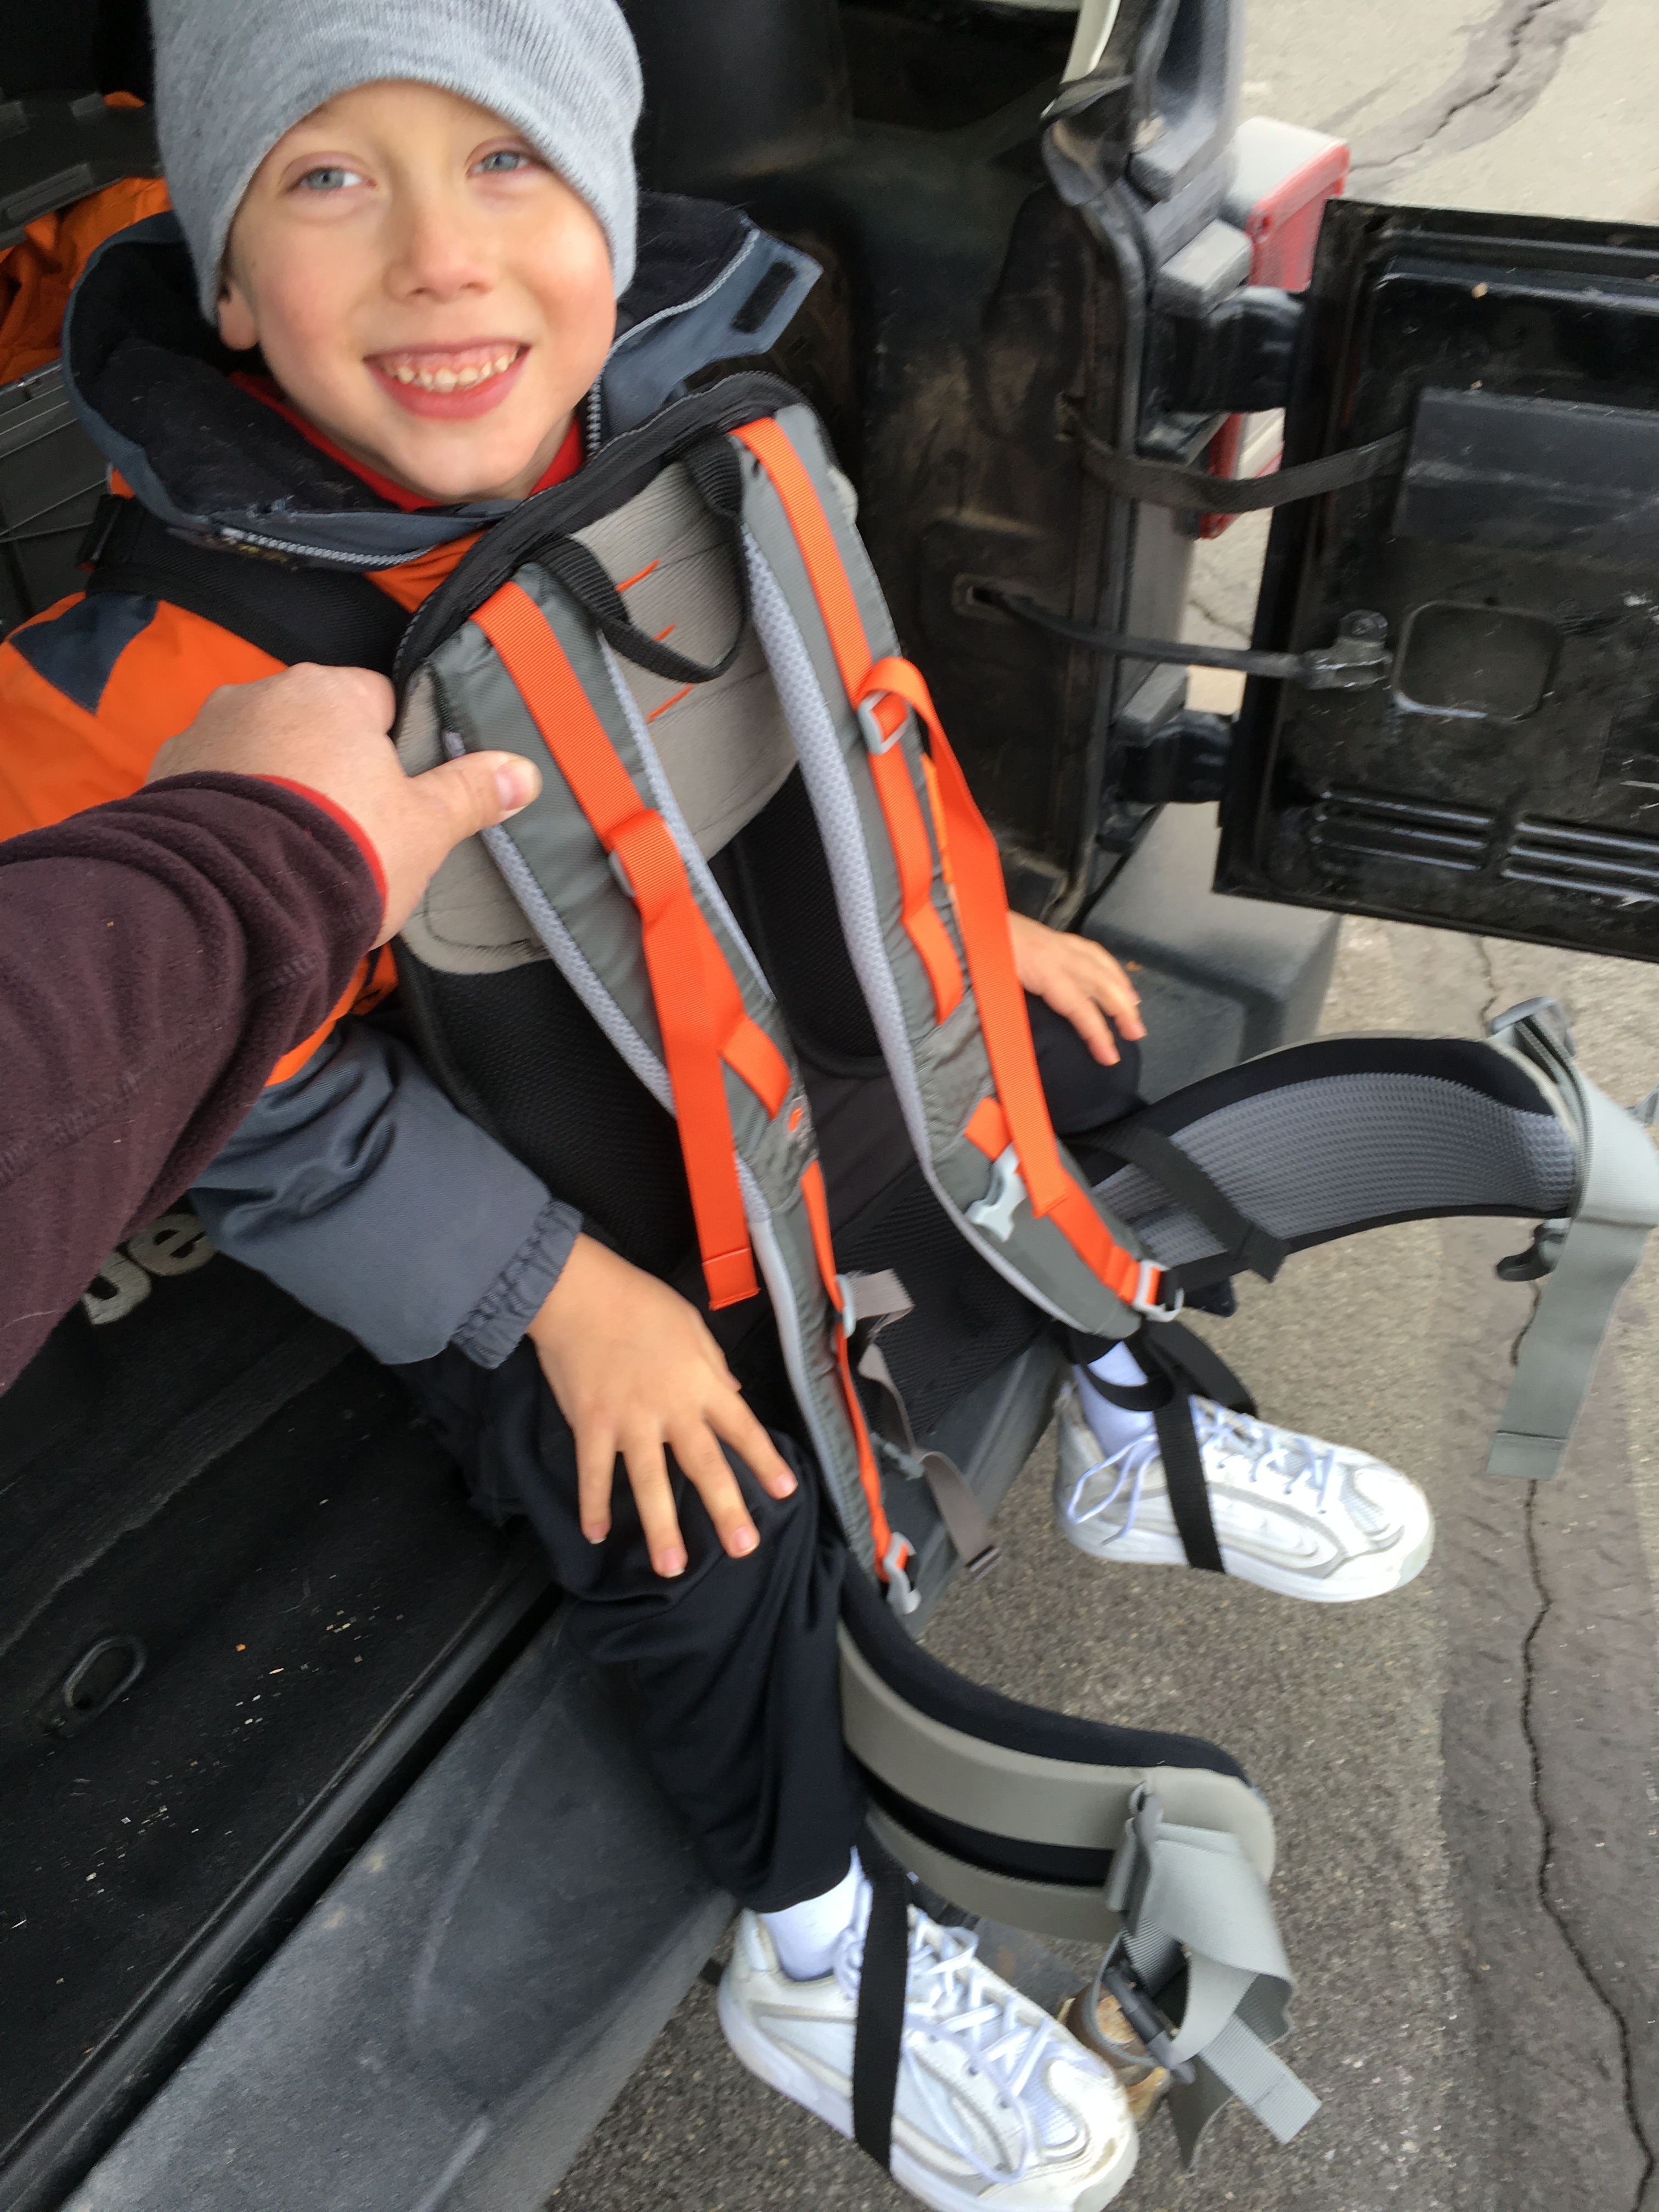
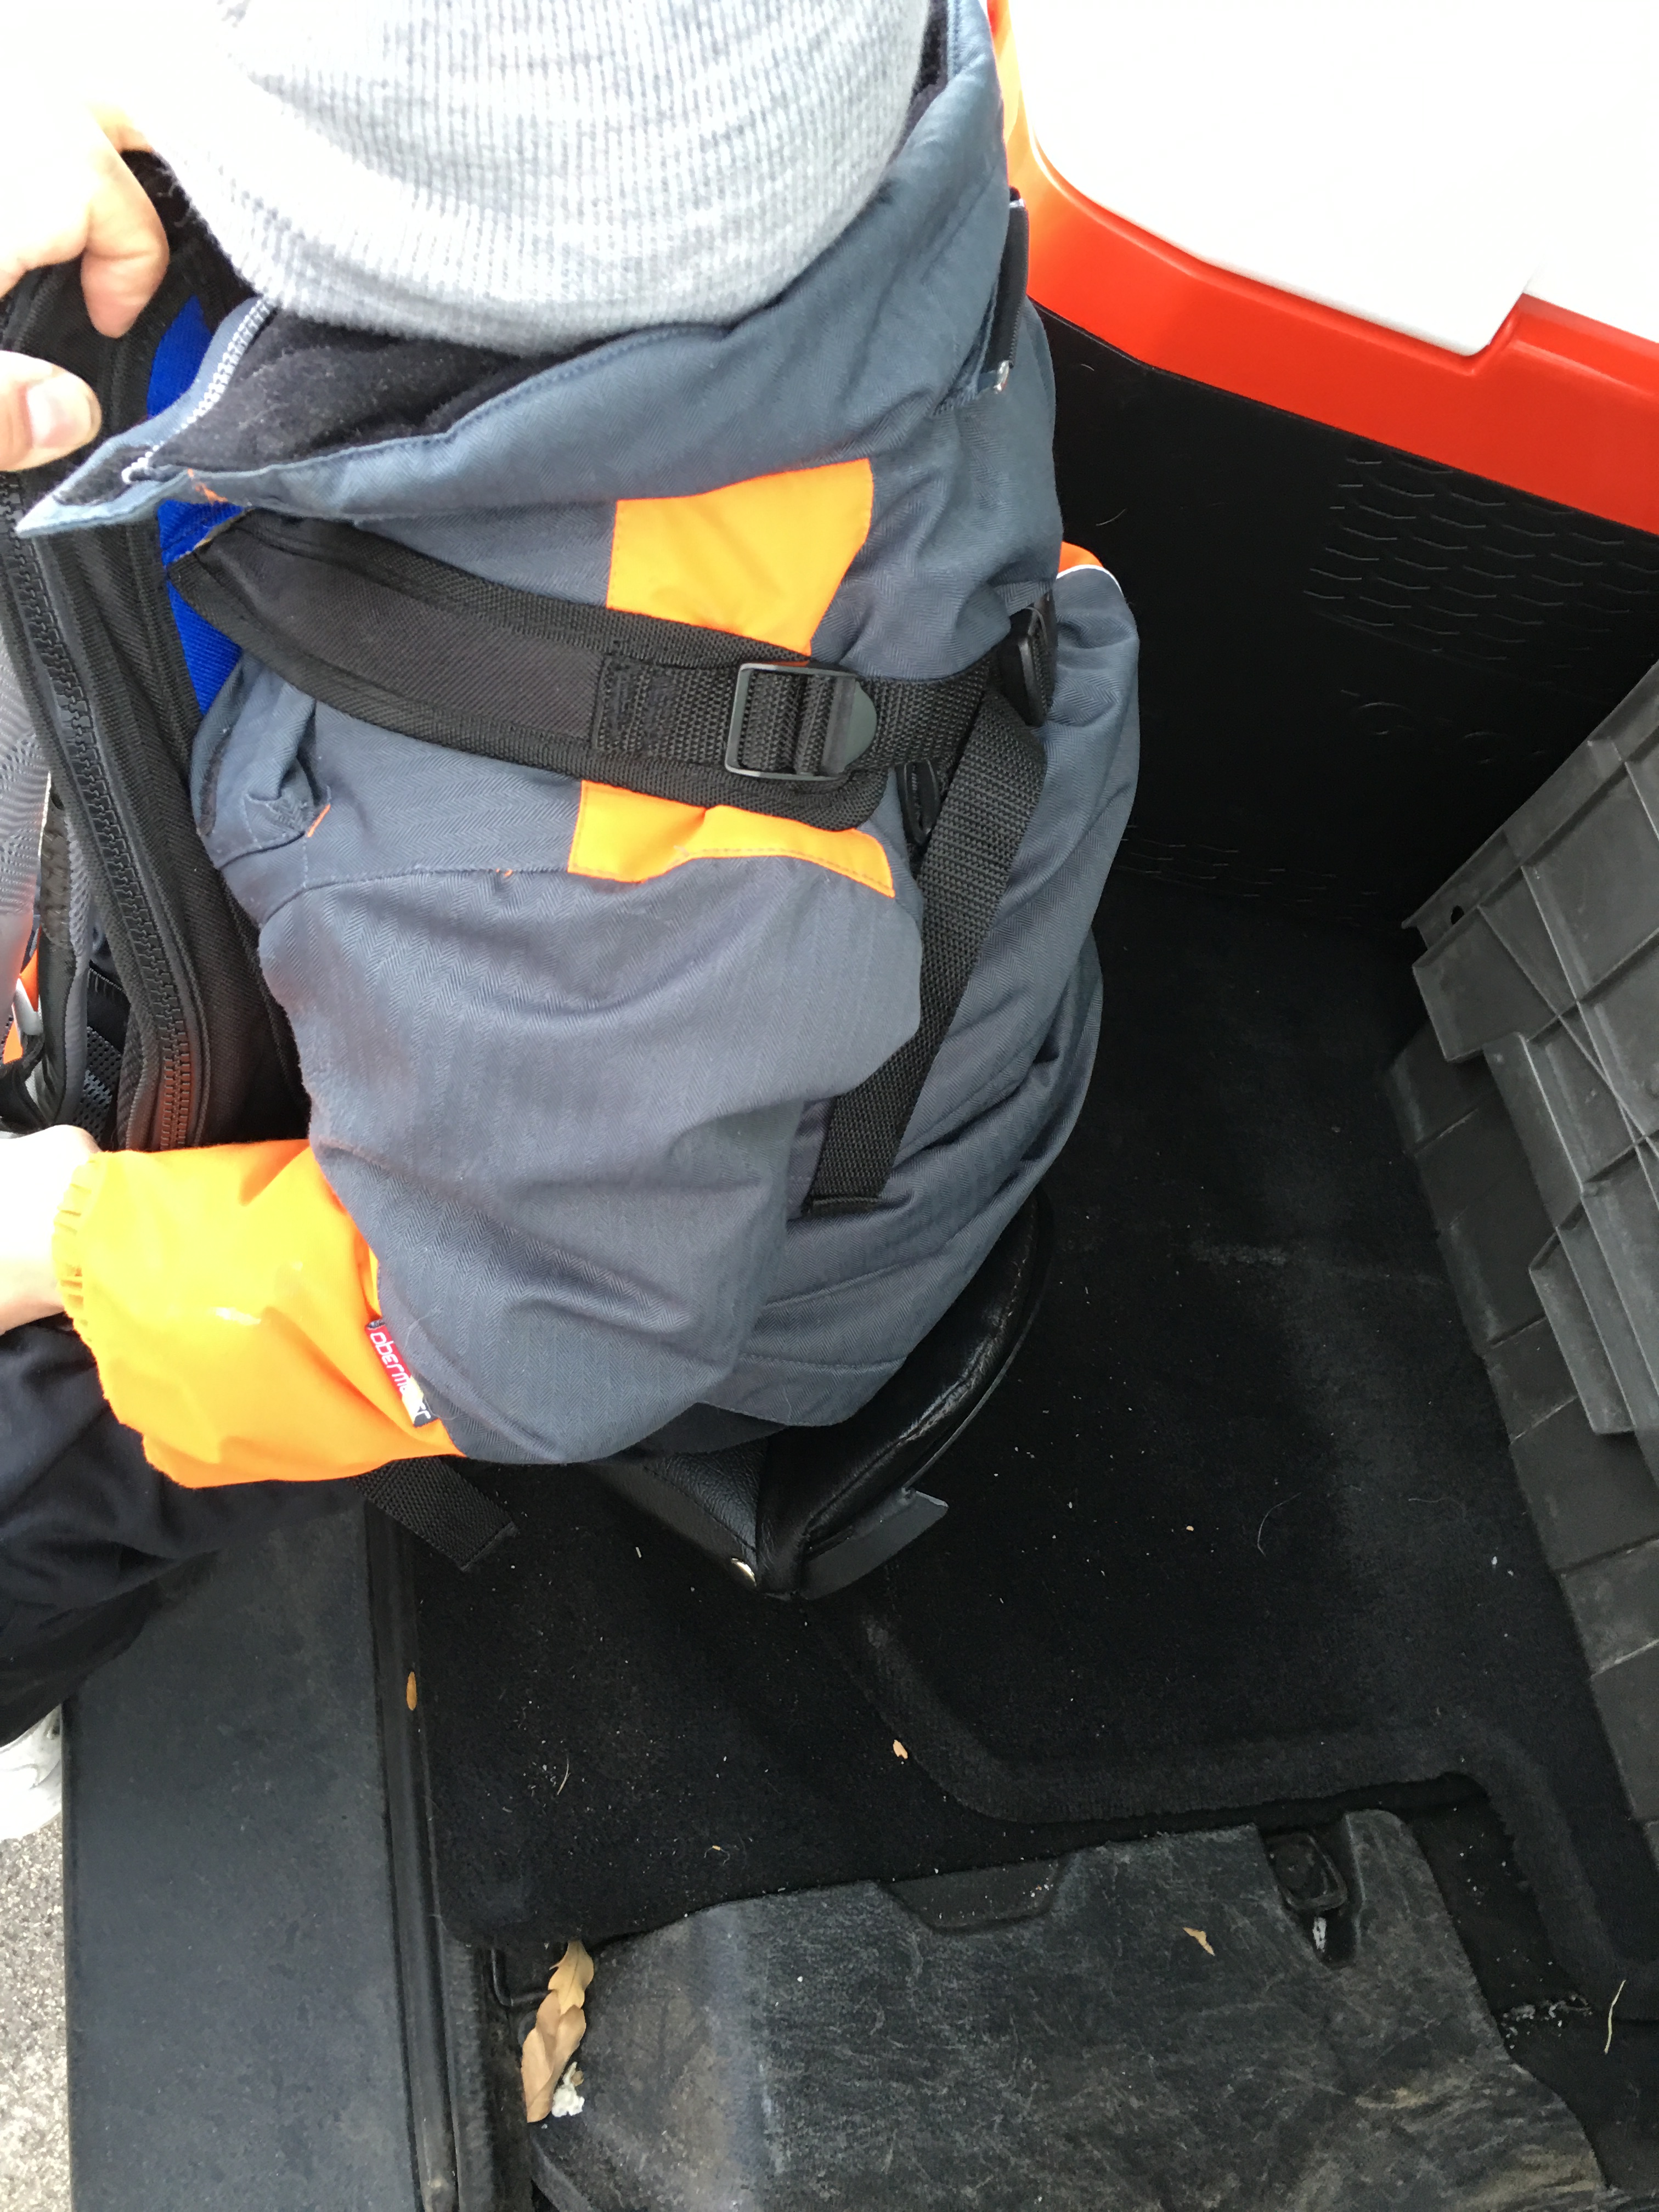
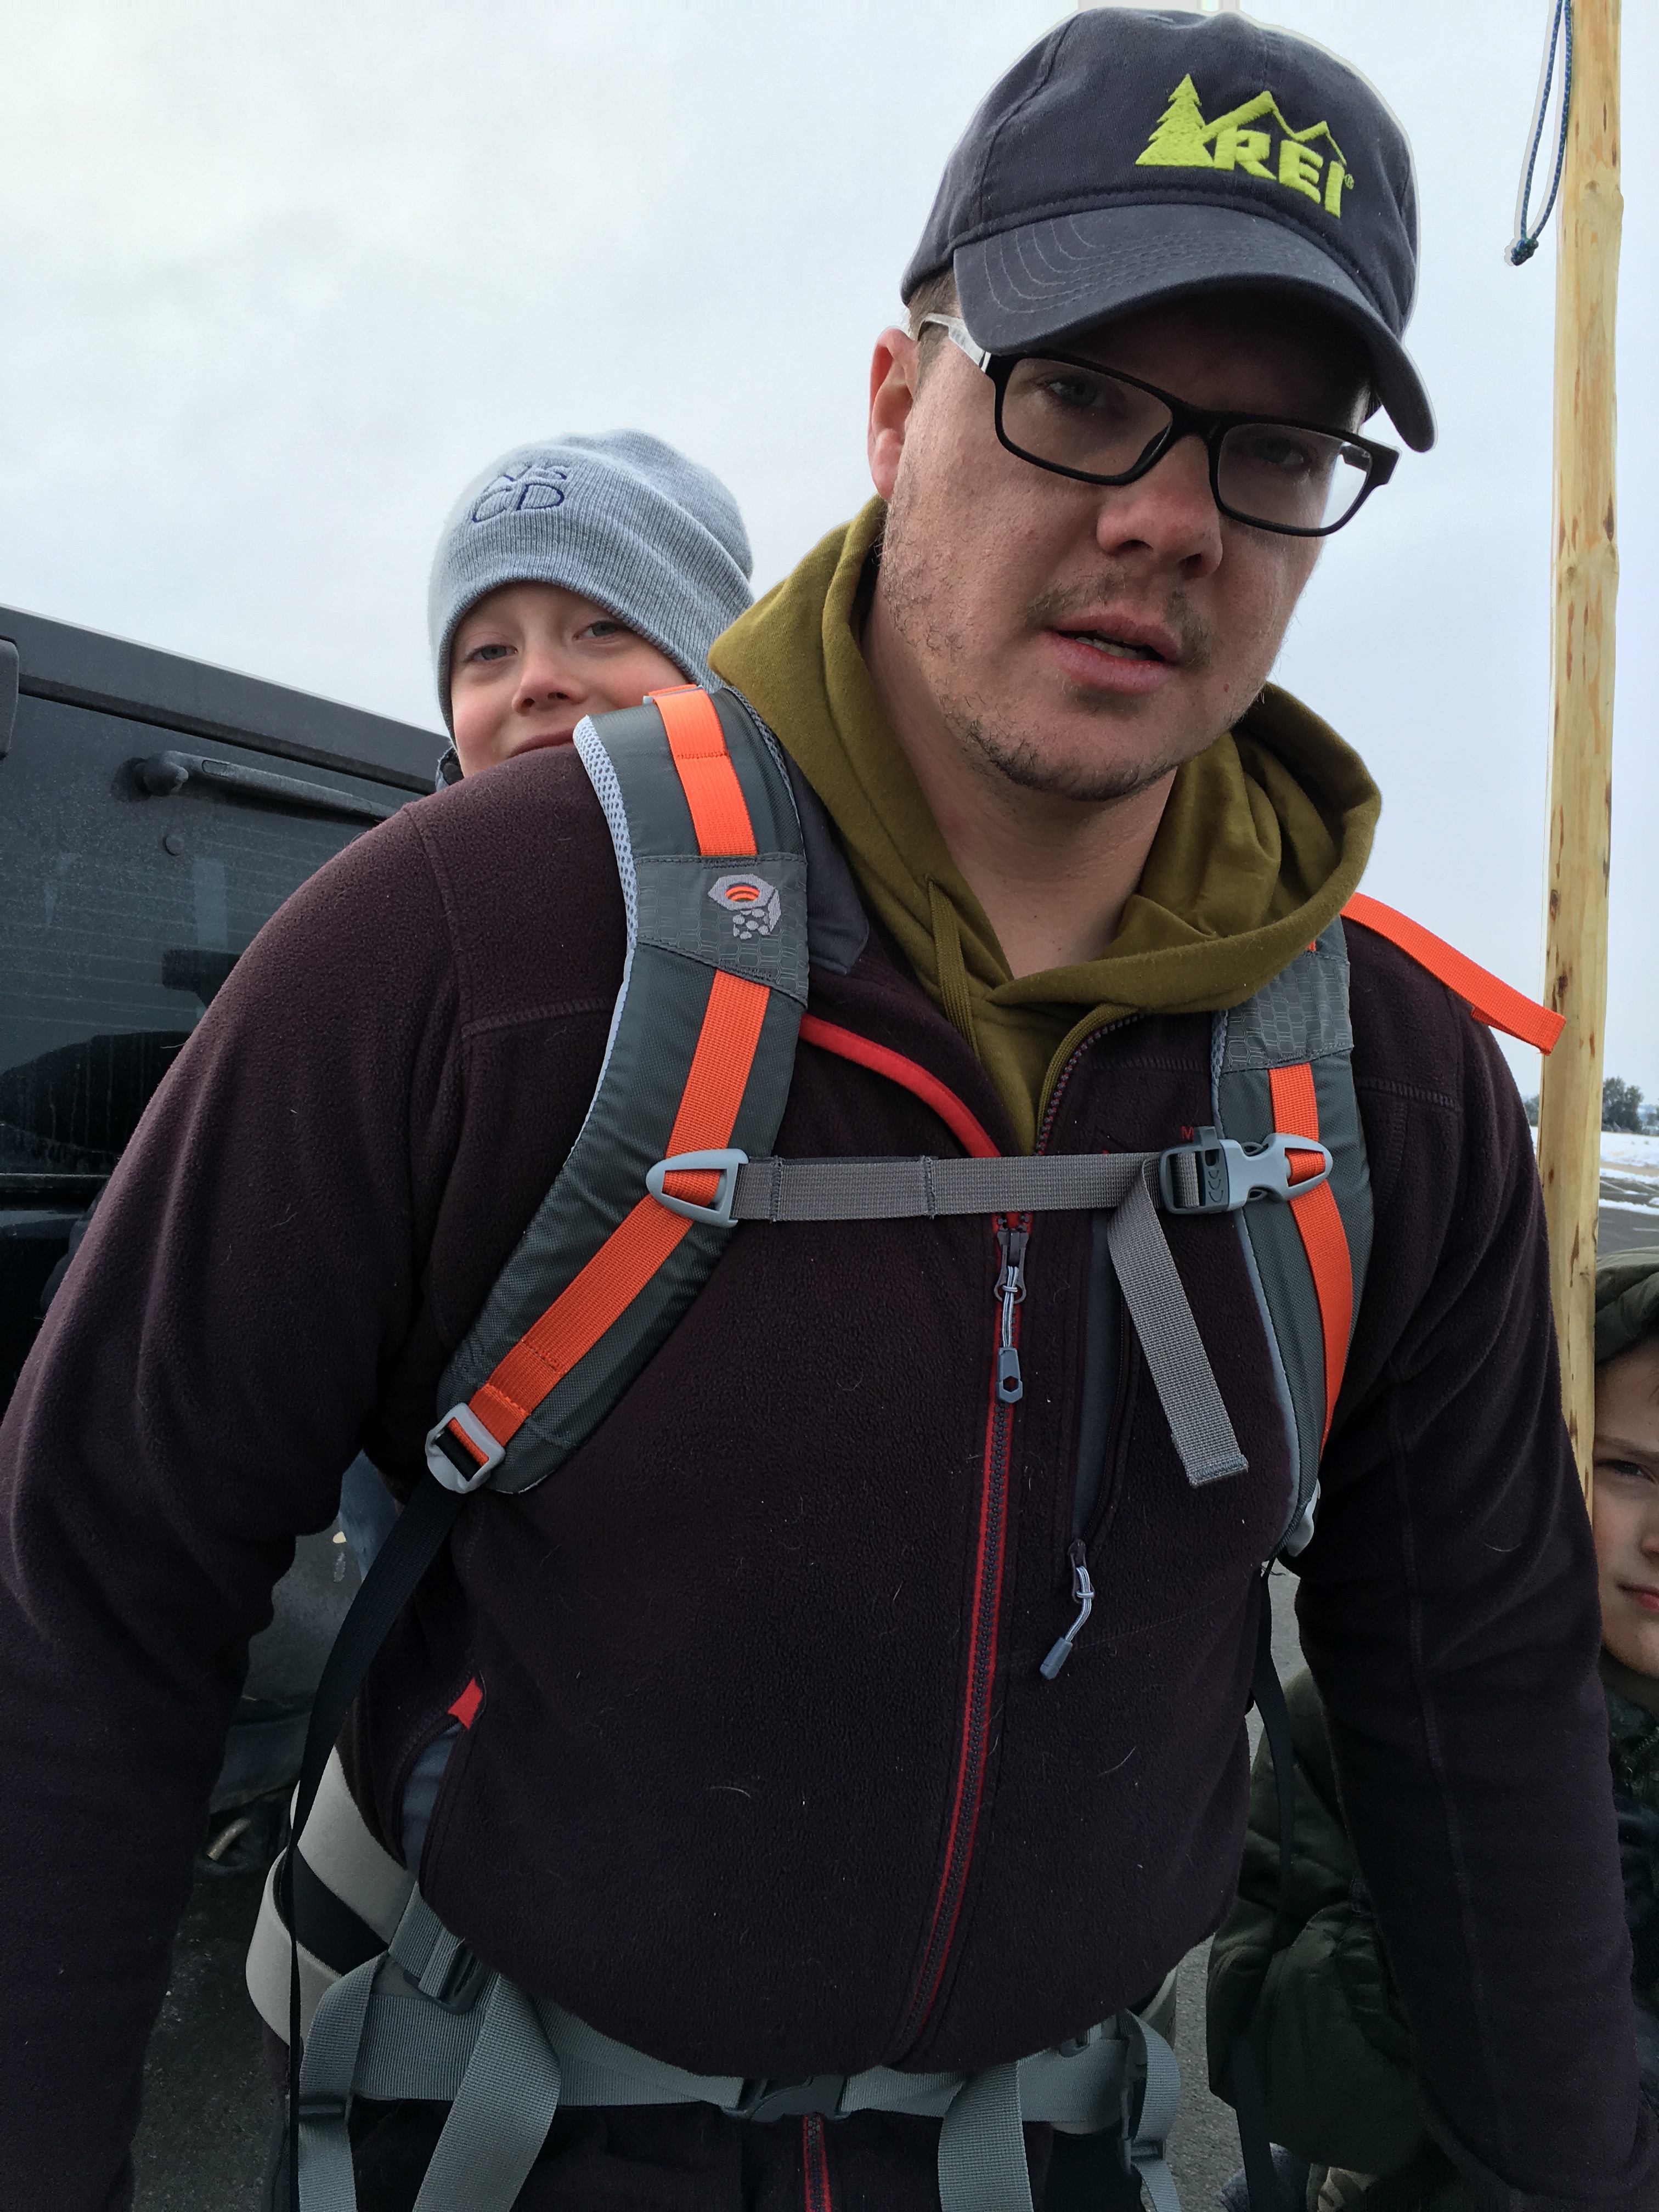

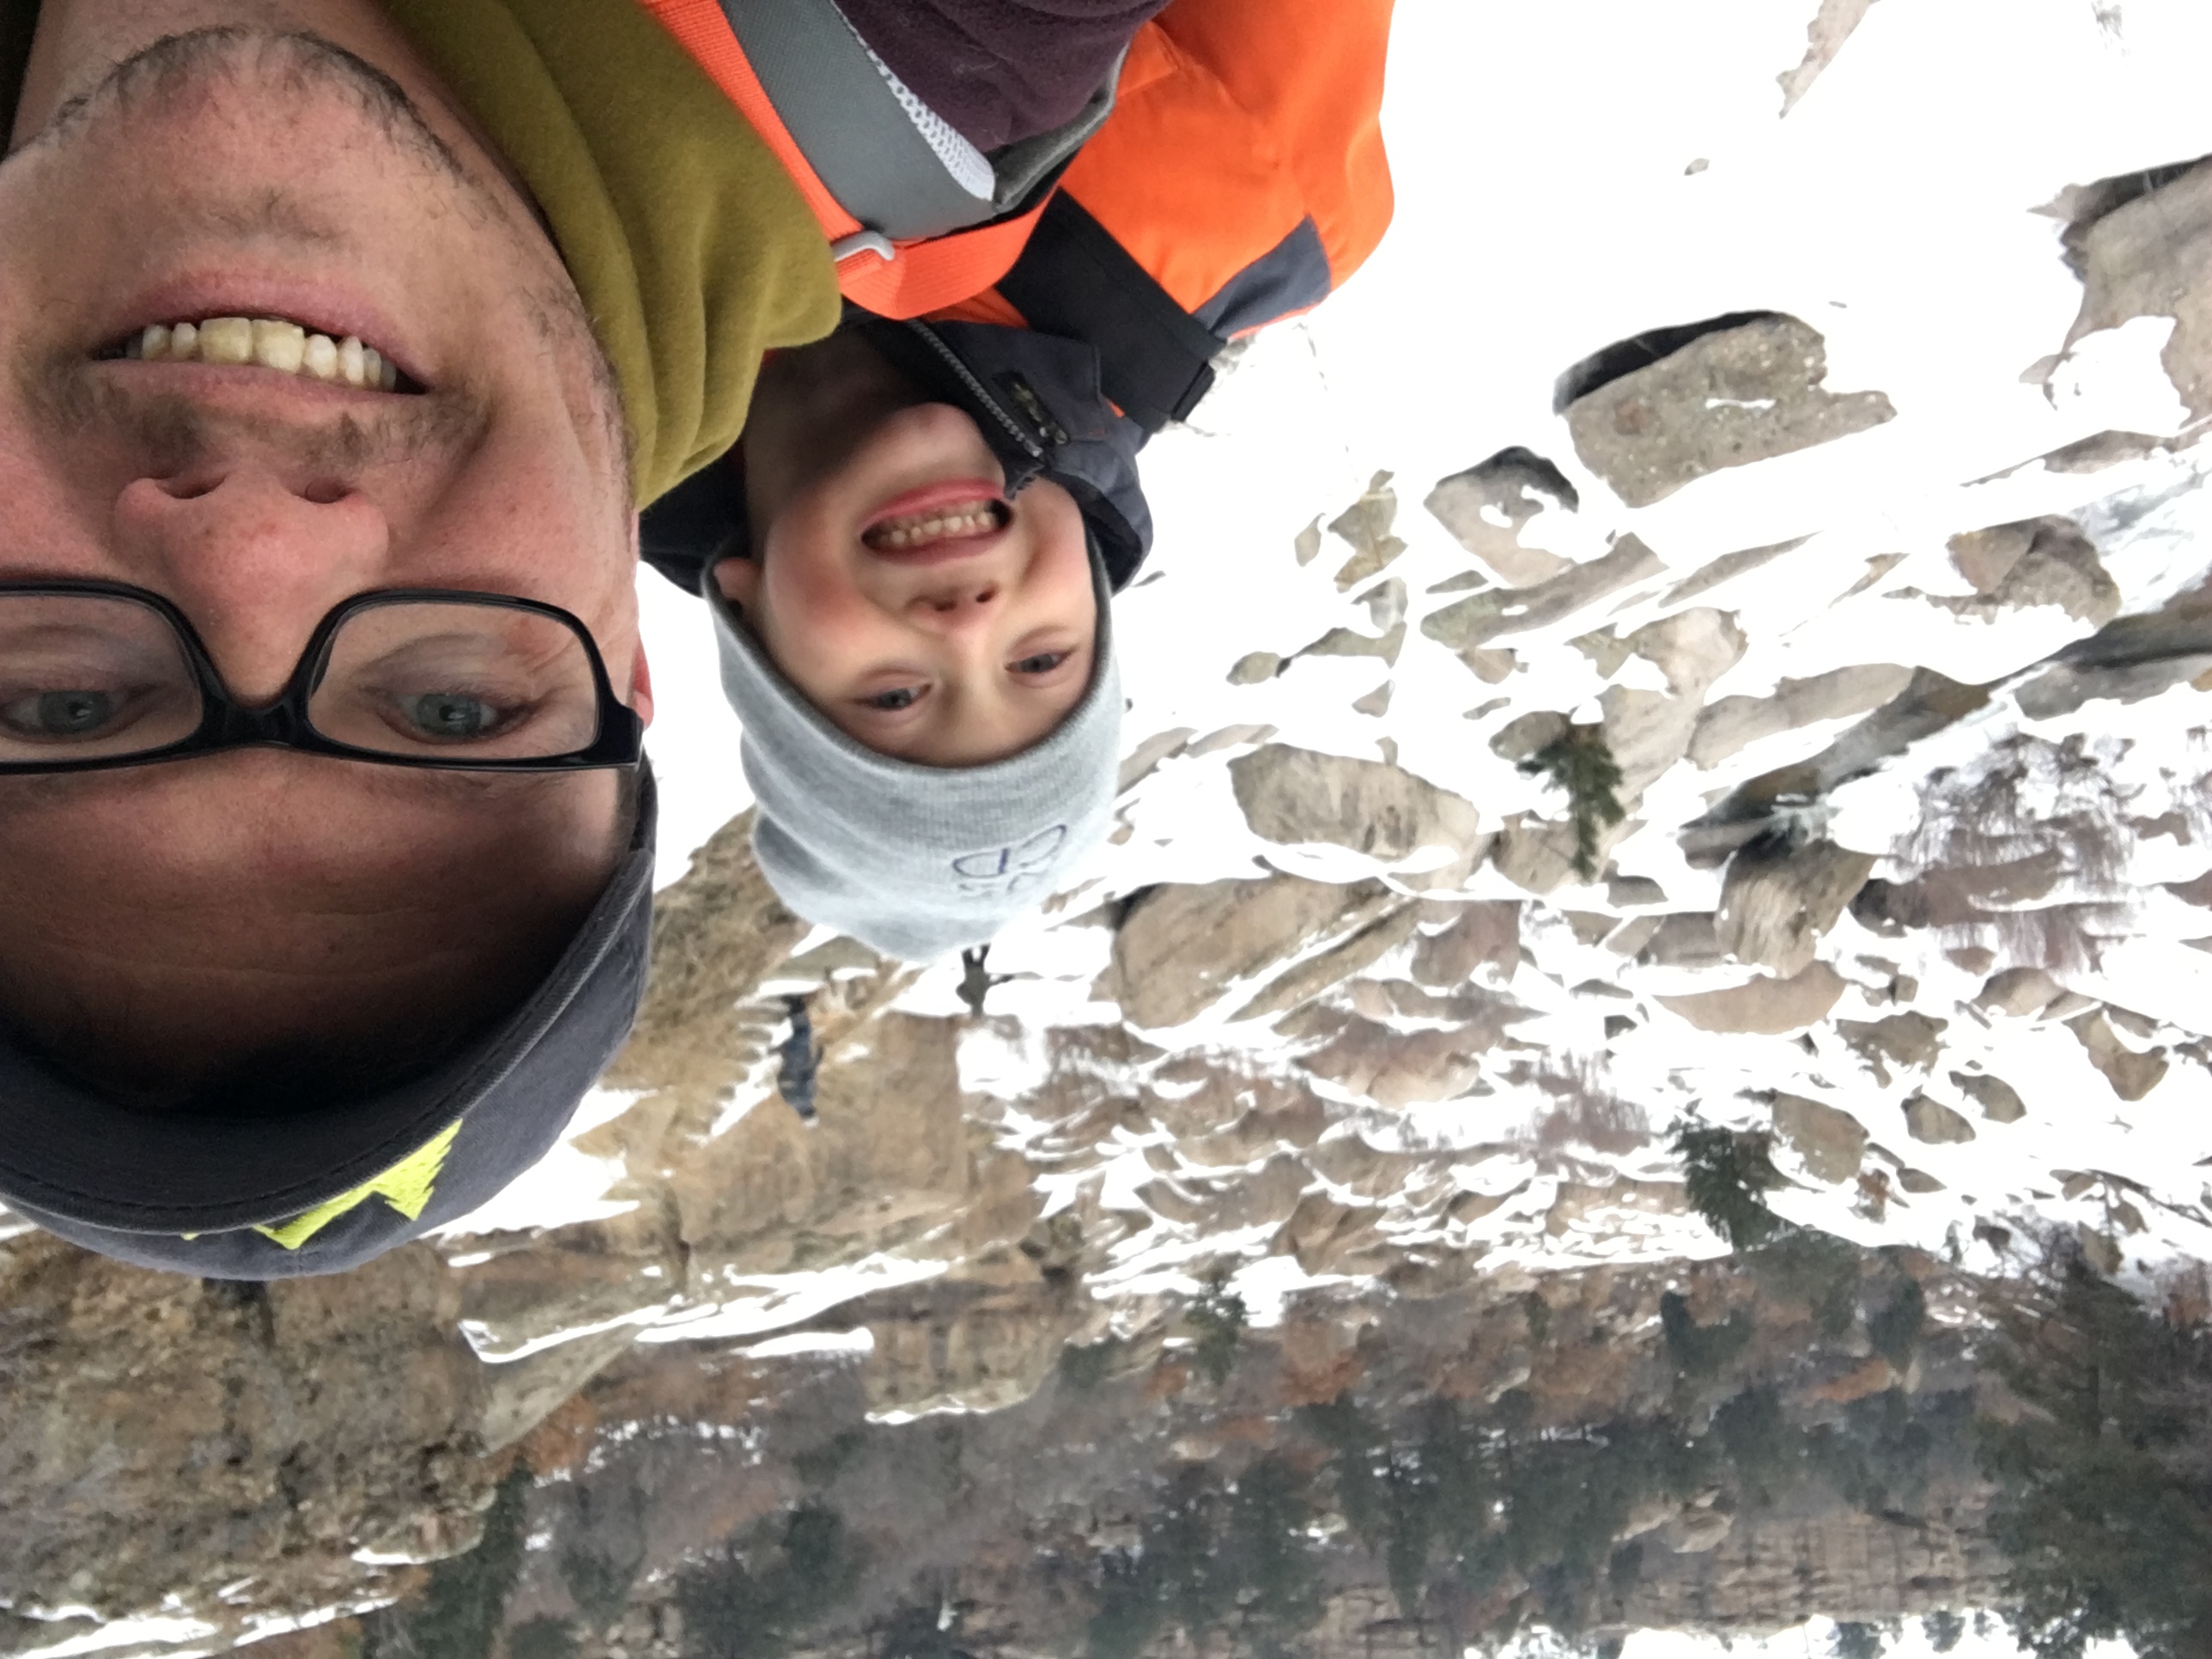
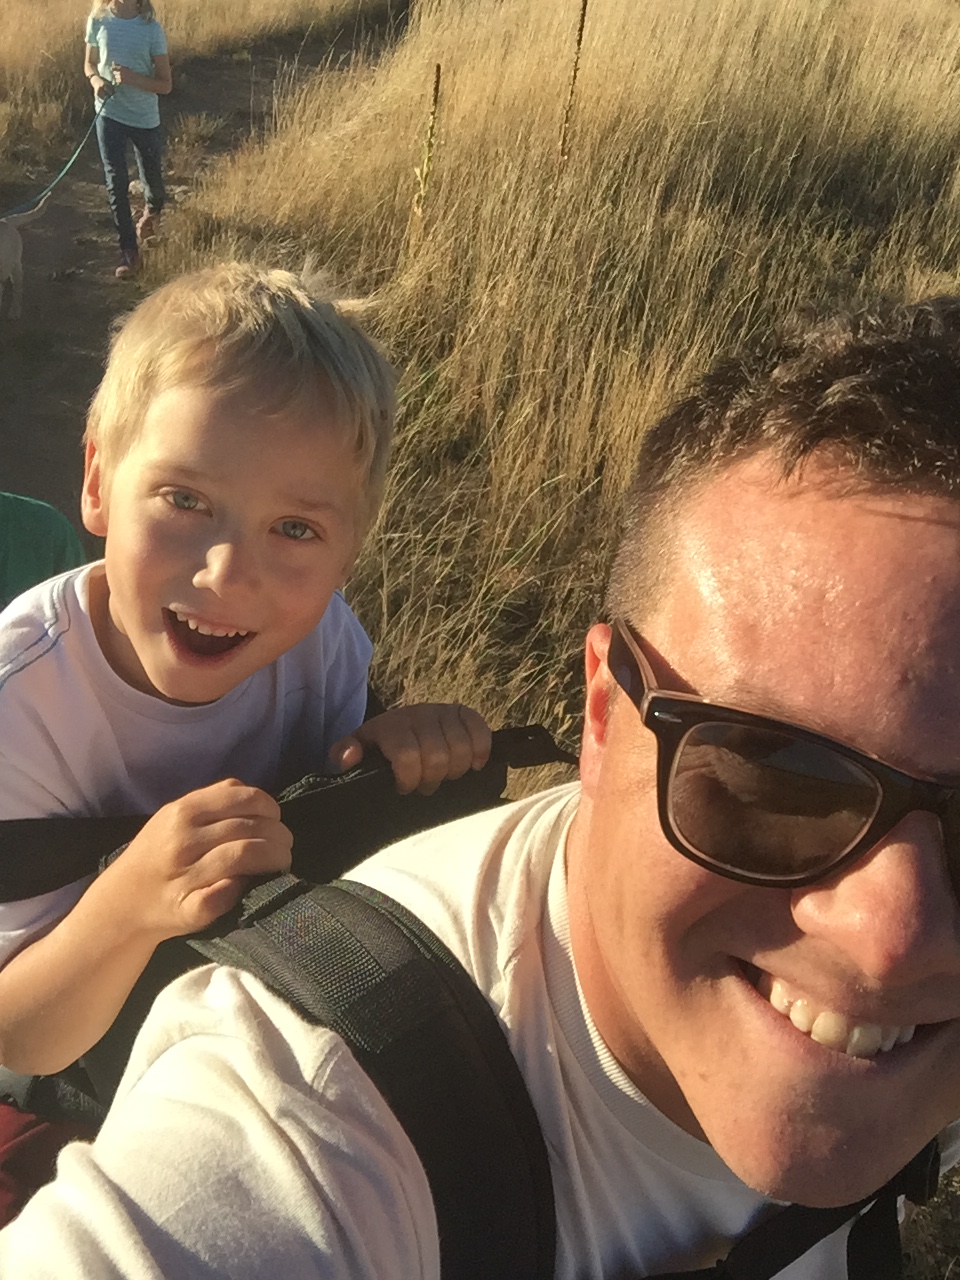
The improvement is incredible – its exactly what I had hoped the FreeLoader would be out of the box. I hiked Zeke several hours over the snow with zero stability issues, complete comfort and no strap slippage whatsoever. I’ll be checking my stitches and seams after each trip and reinforcing where needed – but this thing felt solid as a rock. It was more comfortable for me than I expected, and thanks to the fantastic seat and stirrup design from the guys at FreeLoader, the older boys wanted to come home long before Zeke and I were done.
If you’re looking for the same things I was – high quality backpack like comfort while carrying your larger heavier child around, this is the way to do it. I think I added another $50 or $60 in parts plus a couple of evening hours assembling, but the result is exactly what I wanted. Take FreeLoader’s skeleton and design, and put some good straps and a solid hip-belt on it. I’m looking forward to using this for at last three or four years.
Recent Comments